阅读文章前需要了解的知识,纹理:https://learnopengl-cn.github.io/01%20Getting%20started/06%20Textures/
过程简述:利用 FreeImage 库加载图像数据,再创建 OpenGL 纹理,通过 Canvas2D 画布绘制,最后又 Renderer 渲染器渲染
本来想用 soil 库加载图像数据的,虽然方便,但是加载有些格式的图像文件时会出现一些问题。最后,改用 FreeImage 库来加载图像了。
添加 FreeImage 库到工程
解压 FreeImage.rar 文件后得到三个文件

将其分别拷贝到 debug文件夹、External 文件夹、Lib 文件夹中,再链接上 lib 库。
绘制图片
创建一个纹理结构,储存纹理索引、大小以及纹理坐标
    structDLL_export Texture
    {
        Rect size;
        Vec2 texcoords[4];

        GLuint texture;
    };
创建一个纹理管理器类 TextureManager,用于创建和管理纹理。
利用 FreeImage 库加载纹理
    Texture* TexrureManager::createTexture(const char*filename)
    {
        GLuint texture = -1;
        std::string fullName =PathHelper::fullPath(filename);

        unsigned char* image_data =nullptr;
        FIBITMAP* bmp =nullptr;

        /*初始化 FreeImage */FreeImage_Initialise(TRUE);

        /*获取图像文件类型 */FREE_IMAGE_FORMAT fif =FIF_UNKNOWN;
        fif =FreeImage_GetFileType(fullName.c_str());

        if ( fif ==FIF_UNKNOWN ) {
            fif =FreeImage_GetFIFFromFilename(fullName.c_str());
        }
        /*加载所支持图像类型的图像 */
        if ( (fif != FIF_UNKNOWN) &&FreeImage_FIFSupportsReading(fif) ) {
            bmp =FreeImage_Load(fif, fullName.c_str(), JPEG_DEFAULT);
        }
        if ( !bmp ) returnnullptr;

        int w =FreeImage_GetWidth(bmp);
        int h =FreeImage_GetHeight(bmp);
        int pixel_count = w *h;

        int byte_per_pixel = FreeImage_GetLine(bmp) /w;
        image_data = ( unsigned char* ) malloc(sizeof( unsigned char ) * pixel_count * 4);

        unsigned char* bits =FreeImage_GetBits(bmp);

        int current_pixel = 0;
        if ( byte_per_pixel == 4) {
            for ( int i = 0; i < pixel_count; i++) {
                image_data[i * 4 + 2] = bits[current_pixel++];
                image_data[i * 4 + 1] = bits[current_pixel++];
                image_data[i * 4 + 0] = bits[current_pixel++];
                image_data[i * 4 + 3] = bits[current_pixel++];
            }
        }
        else{
            for ( int i = 0; i < pixel_count; i++) {
                image_data[i * 4 + 2] = bits[current_pixel++];
                image_data[i * 4 + 1] = bits[current_pixel++];
                image_data[i * 4 + 0] = bits[current_pixel++];
                image_data[i * 4 + 3] = 255;
            }
        }

        if( bmp ) FreeImage_Unload(bmp);
        FreeImage_DeInitialise();

        glGenTextures(1, &texture);
        glBindTexture(GL_TEXTURE_2D, texture);

        /*设置纹理选项 */glTexParameteri(GL_TEXTURE_2D, GL_TEXTURE_WRAP_S, GL_CLAMP_TO_EDGE);
        glTexParameteri(GL_TEXTURE_2D, GL_TEXTURE_WRAP_T, GL_CLAMP_TO_EDGE);
        glTexParameteri(GL_TEXTURE_2D, GL_TEXTURE_MIN_FILTER, GL_LINEAR);
        glTexParameteri(GL_TEXTURE_2D, GL_TEXTURE_MAG_FILTER, GL_LINEAR);

        glTexImage2D(GL_TEXTURE_2D, 0, GL_RGBA, w, h, 0, GL_RGBA, GL_UNSIGNED_BYTE, image_data);
        glBindTexture(GL_TEXTURE_2D, 0);

        free(image_data);

        Texture* tex = newTexture();
        tex->texture =texture;
        tex->size.set(0, 0, w, h);
        tex->texcoords[0].set(0, 0);
        tex->texcoords[1].set(0, 1);
        tex->texcoords[2].set(1, 1);
        tex->texcoords[3].set(1, 0);

        returntex;
    }
在函数中,使用 FreeImage 库加载纹理数据,然后创建 OpenGL 2D纹理,将创建的纹理保存到 Texture 结构中,并设置了纹理坐标。
在 Canvas2D 中绘制纹理
    void Canvas2D::drawTexture(int x, int y, Texture* texture, Color&color)
    {
        int w = texture->size.w;
        int h = texture->size.h;

        this->resizeVector(4, 6);
        vPositions[0].set(x + 0, y + 0, 0);
        vPositions[1].set(x + 0, y + h, 0);
        vPositions[2].set(x + w, y + h, 0);
        vPositions[3].set(x + w, y + 0, 0);

        vIndices[0] = 0;
        vIndices[1] = 2;
        vIndices[2] = 1;
        vIndices[3] = 0;
        vIndices[4] = 3;
        vIndices[5] = 2;

        staticRenderUnit unit;
        unit.pPositions = &vPositions[0];
        unit.nPositionCount = 4;
        unit.pTexcoords = texture->texcoords;
        unit.pIndices = &vIndices[0];
        unit.nIndexCount = 6;
        unit.color =color;
        unit.texture =texture;
        unit.renderType =RENDER_TYPE_TEXTURE;

        pRenderer->pushRenderUnit(unit);
    }
函数很简单,设置了顶点数据并填充了 RenderUnit,再传到 渲染器中渲染。与绘制几何图形相比,多了纹理坐标,并把渲染类型设置为 渲染纹理。
渲染器 Renderer 渲染纹理
添加成员
std::map<Texture*, VertexData*> textureDatas;
每张纹理都有其相应的顶点数据,这样可以把多张相同纹理的顶点数据放到一个缓冲区中渲染,保证了渲染多张相同纹理时只使用使用一个 DrawCall(调用 函数 glDrawElements 进行绘制的次数),提高渲染效率。
在pushRenderUnit 函数中
        else if ( unit.renderType ==RENDER_TYPE_TEXTURE ) {
            auto it =textureDatas.find(unit.texture);
            if ( it ==textureDatas.end() ) {
                vertexData = newVertexData();
                vertexData->bHasTexcoord = true;
                vertexData->renderType =RENDER_TYPE_TEXTURE;
                textureDatas.insert(std::make_pair(unit.texture, vertexData));
            }
            else{
                vertexData = it->second;
            }
        }
索引出纹理对应的 VertexData,然后填充数据。最后的渲染函数中添加填充纹理坐标代码
        /*设置纹理 */
        if ( vertexData->bHasTexcoord ) {
            glBindBuffer(GL_ARRAY_BUFFER, texcoordBuffer);
            glBufferData(GL_ARRAY_BUFFER, sizeof( Vec2 ) * vertexData->nPositionCount, &vertexData->texcoords[0], GL_DYNAMIC_DRAW);

            glActiveTexture(GL_TEXTURE0);
            glBindTexture(GL_TEXTURE_2D, texrure);
            glUniform1i(glGetUniformLocation(shaderProgram, "defaulteTexture"), 0);
        }
为了能够渲染纹理需要更改着色程序
顶点着色器
#version 330core

layout(location = 0) invec3 Position;
layout(location = 1) invec2 Texcoord;
layout(location = 2) invec4 Color;

outvec2 texcoord;
outvec4 color;

uniform intbRenderTexture;

voidmain()
{
    gl_Position = vec4(Position, 1.0f);
    color =Color;

    if( bRenderTexture != 0){
        texcoord =Texcoord;
    }
}
片段着色器
#version 330core

outvec4 Color;

invec2 texcoord;
invec4 color;

uniform sampler2D defaultTexture;
uniform intbRenderTexture;

voidmain()
{
    if( bRenderTexture != 0){
        Color = texture(defaultTexture, texcoord) * color *color.w;
    }
    else{
        Color =color;
    }
}
为了开启 Alpha 效果,设置OpenGL 的混合状态
glEnable(GL_BLEND);
        glBlendFunc(GL_SRC_ALPHA, GL_ONE_MINUS_SRC_ALPHA);
在主函数中添加绘制图像的代码
    Texture* texture = TexrureManager::instance()->getTexture("image.png");
    Texture* texture1 = TexrureManager::instance()->getTexture("image.jpg");
            canvas.drawTexture(180, 0, texture1, Color(1, 1, 1, 1));
            canvas.drawTexture(120, 100, texture, Color(1, 1, 1, 0.8));
程序的运行结果
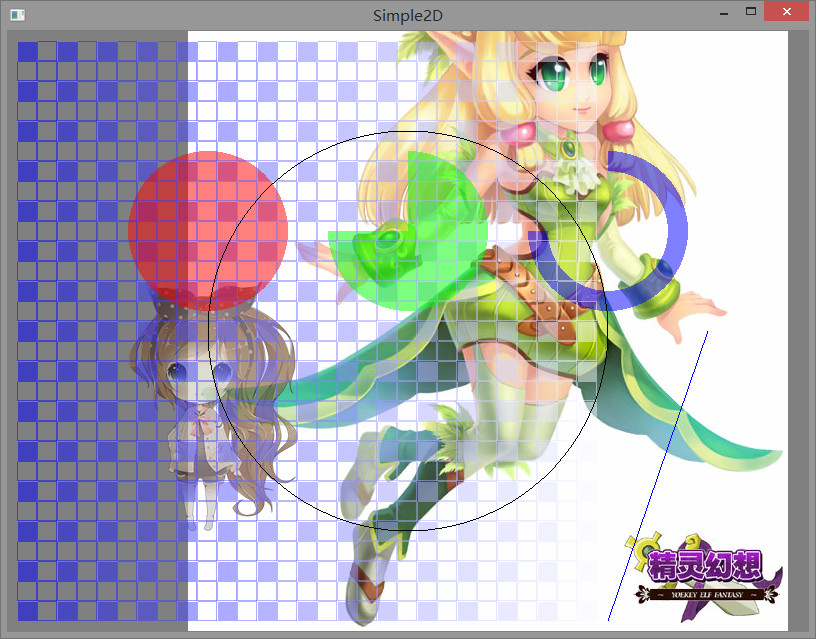
这里绘制了 png 和 jpg 格式的图像