由于工作需要必须将word文档内容粘贴到编辑器中使用
但发现word中的图片粘贴后变成了file:///xxxx.jpg这种内容,如果上传到服务器后其他人也访问不了,网上找了很多编辑器发现没有一个能直接解决这个问题
考虑到自己除了工作其他时间基本上不使用windows,因此打算使用nodejs来解决这一问题
发现不管什么编辑器只要将图片转换成base64后就可以直接使用(IE8及一下可能不支持),由于编辑器中添加word文档功能也只是自己用,因此可以忽略这种浏览器了
找了很久,试用了很多编辑器,发现只有ckeditor的功能还算符合我的需求(支持自定义HTML属性)
然后我写了一个监听粘贴事件的操作,用来获取粘贴之后的file:///xxxx.jpg这种路径
<script>
var service = {
http : require('http'),
url : require('url'),
querystring : require('querystring'),
fs : require('fs'),
config : {
timeout : 60000,
charset : 'utf8',
port : 10101,
host : '127.0.0.1'
},
router : {
index : function(res, query){
res.end('Server is running!');
},
check : function(res, query){
var result = {status: 1, info: 'success'};
result = JSON.stringify(result);
if(typeof query.callback == 'string'){
result = query.callback + '(' + result + ')';
}
res.end(result);
},
word : function(res, query){
var _this = service;
var result = {status: 0, info: 'error'};
if(typeof query.file == 'string'){
var img = query.file.match(/file://+(localhost)?(S+.(png|jpg|jpeg|gif|bmp))/i);
console.log(img);
if(img){
var base64 = _this.base64_encode(img[2]);
result.status = 1;
result.info = 'data:image/' + img[3] + ';base64,' + base64;
}
}
result = JSON.stringify(result);
if(typeof query.callback == 'string'){
result = query.callback + '(' + result + ')';
}
res.end(result);
}
},
start : function(){
var _this = this;
var Server = _this.http.createServer(function (req, res) {
var URL = _this.url.parse(req.url);
var receive = [];
var router = null;
switch(URL.pathname){
case '/word':
router = _this.router.word;
break;
case '/check':
router = _this.router.check;
break;
default:
router = _this.router.index;
}
req.setEncoding(_this.config.charset);
req.addListener('data', function(data) {
receive.push(data);
});
res.writeHead(200, {'Content-Type': 'text/plain'});
res.on("close",function(){
console.log("res closed");
});
req.on("close",function(){
console.log("req closed");
});
req.addListener('end', function() {
router(res, _this.querystring.parse(URL.query));
});
});
Server.listen(_this.config.port, _this.config.host, 1024);
Server.setTimeout(_this.config.timeout, function(cli){
cli.end('timeout ');
});
console.log('Server running at http://' + _this.config.host + ':' + _this.config.port);
},
//base64
base64_encode : function(file){
var bitmap = this.fs.readFileSync(file);
return new Buffer(bitmap).toString('base64');
}
};
service.start();
</script>
将以上代码保存为一个word.js文件
然后执行 node word.js就会自动创建一个http服务了
这个时候我们在编辑器中使用jsonp获取到处理完的图片数据替换原来的file:///xxxxxx.jpg路径就搞定了
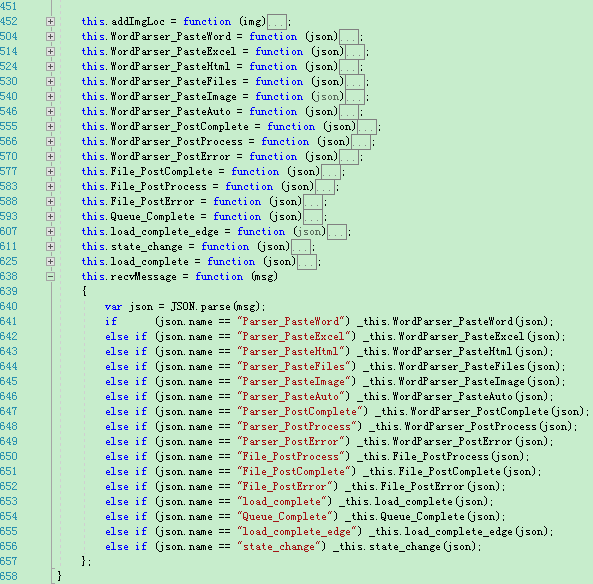
处理word图片批量上传的代码
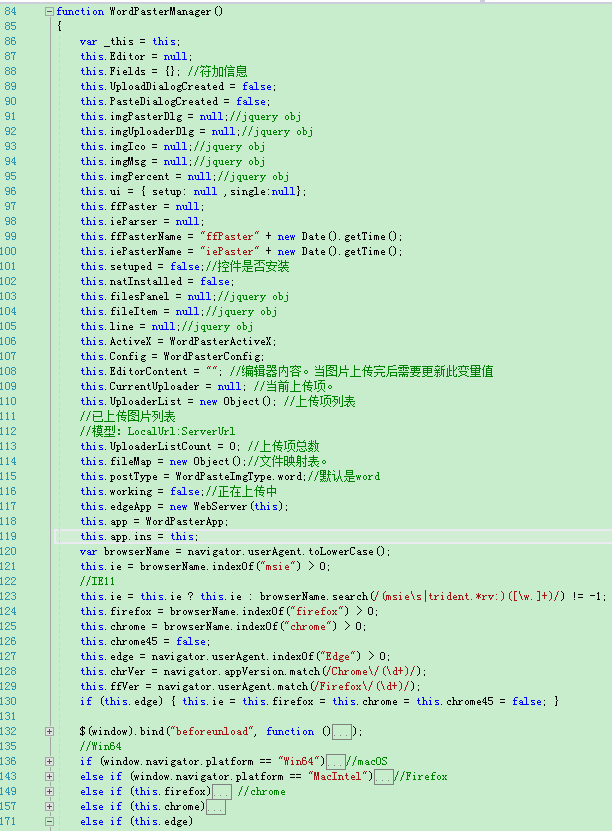
其它的业务逻辑参数代码
当然也可以将以上代码打包成一个本地执行文件去给不懂电脑的人使用就行了(具体方法我这里就不说了)
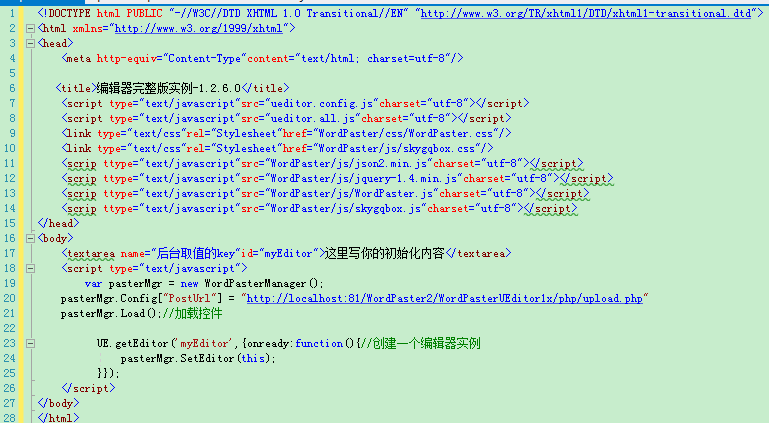
前台引用的代码
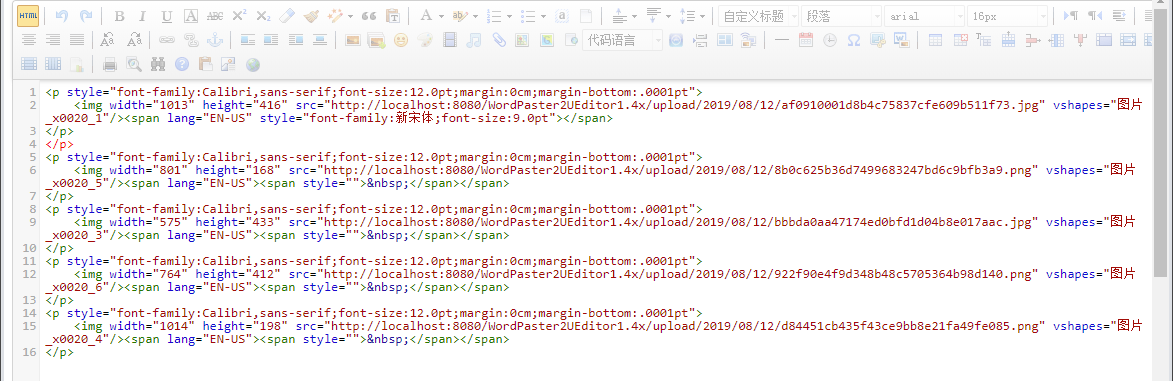
下面是实现后的效果,能够自动上传Word中的所有图片,并且有进度条显示
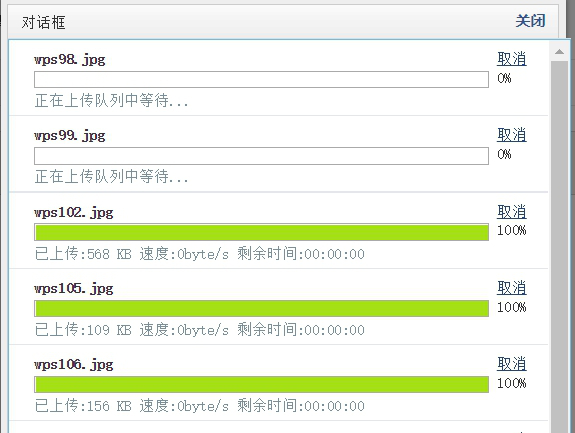
所有图片都能够保存在服务器中,而且支持分布式图片存储

编辑器中的图片地址已经全部替换成了服务器的图片地址,其它的用户也能够正常访问
详细内容可以参考这篇文章:http://blog.ncmem.com/wordpress/2019/07/30/ckeditor%e7%b2%98%e8%b4%b4word/
讨论群:223813913