摘要:
在上一篇文章中,我们使用SlidingMenu构造方法直接在活动中设置侧滑菜单。这里,我们使用活动继承SlidingActivity来实现侧滑。另一种方法是将SlidingMenu用作常规控件,并直接在XML布局中使用它LinearLayoutxmlns:android=“http://schemas.android.com/apk/res/android“android:layout_width=”match_parent“android:layout_height=”match _parent”android:orientation=“vertical”˃需要其他布局文件:pic.xml:˂?
在上一篇博文中已经简单的实现了侧滑菜单,代码也很简单,就几行代码。
这篇文章依然讲侧滑菜单,与前一篇文章不同的是,这篇文章用不同的代码方式来实现侧滑菜单。
在前面的文章中已经用了在Activity中通过SlidingMenu构造方法直接设置侧滑菜单,这里换成通过Activity继承SlidingActivity来实现侧滑。
代码如下:
public class MainActivity extends SlidingActivity
重写onCreate()方法:
  @Override
    public void onCreate(Bundle savedInstanceState) {
        super.onCreate(savedInstanceState);
        setContentView(R.layout.activity_main);
        setBehindContentView(R.layout.slidingmenu);// 设置侧滑布局
        SlidingMenu menu = getSlidingMenu();// 获取SlidingMenu
        menu.setMode(SlidingMenu.LEFT);
        // 设置触摸屏幕的模式
        menu.setTouchModeAbove(SlidingMenu.TOUCHMODE_FULLSCREEN);

        // 设置滑动菜单视图的宽度
        menu.setBehindOffsetRes(R.dimen.slidingmenu_offset);
        // 设置渐入渐出效果的值
        menu.setFadeDegree(0.35f);
    }
其余的跟上一篇博文的一样。
运行结果如下:
跟上一篇博文的效果完全一样。
另外还有一种方式,就是把SlidingMenu当作一般的控件使用,在XML布局中直接使用即可。
方式如下:
activity_main.xml:
<?xml version="1.0" encoding="utf-8"?>
<LinearLayout xmlns:android="http://schemas.android.com/apk/res/android"
    android:layout_width="match_parent"
    android:layout_height="match_parent"
    android:orientation="vertical" >

    <com.jeremyfeinstein.slidingmenu.lib.SlidingMenu
       xmlns:sliding="http://schemas.android.com/apk/res-auto"
            android:id="@+id/slidingmenulayout"
            android:layout_width="120dp"
            android:layout_height="170dp"
            android:background="#ffffffff"
            sliding:behindOffset="0dp"
            sliding:behindScrollScale="1"
            sliding:fadeDegree="0.3"
            sliding:fadeEnabled="true"
            sliding:touchModeAbove="fullscreen"
            sliding:viewAbove="@layout/pic" >
    </com.jeremyfeinstein.slidingmenu.lib.SlidingMenu>

</LinearLayout>
还需要其它的布局文件:
pic.xml:(其实就是放一张图片)
<?xml version="1.0" encoding="utf-8"?>
<ImageView xmlns:android="http://schemas.android.com/apk/res/android"
    android:layout_width="200dp"
    android:layout_height="200dp"
    android:src="@drawable/ic_launcher" />
slidingmenu.xml:(侧滑菜单的布局文件)
<?xml version="1.0" encoding="utf-8"?>
<LinearLayout xmlns:android="http://schemas.android.com/apk/res/android"
    android:layout_width="match_parent"
    android:layout_height="match_parent"
    android:background="#ff999999"
    android:orientation="vertical" >

    <Button
        android:layout_width="wrap_content"
        android:layout_height="wrap_content"
        android:text="00000" />

</LinearLayout>
接下来是在Activity中的代码了:
  @Override
    protected void onCreate(Bundle savedInstanceState) {
        // TODO Auto-generated method stub
        super.onCreate(savedInstanceState);
        setContentView(R.layout.activity_main);
        slidingmenu = (SlidingMenu) findViewById(R.id.slidingmenulayout);
        slidingmenu.setMode(SlidingMenu.LEFT);
        // 设置侧滑布局
        slidingmenu.setMenu(R.layout.slidingmenu);

        slidingmenu.setOnClickListener(new OnClickListener() {
            @Override
            public void onClick(View v) {
                if (slidingmenu.isMenuShowing())
                    slidingmenu.toggle();
            }
        });

    }
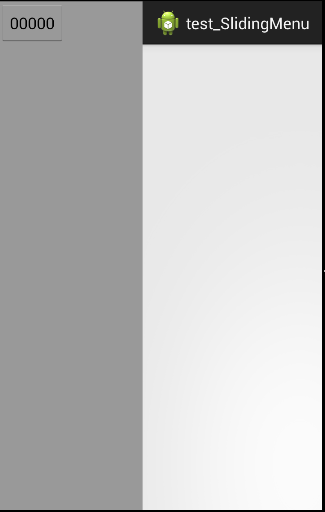
运行结果如下:
下面是SlidingMenu的常用属性:
viewAbove- a reference to the layout that you want to use as the above view of the SlidingMenuviewBehind- a reference to the layout that you want to use as the behind view of the SlidingMenutouchModeAbove- an enum that designates what part of the screen is touchable when the above view is showing. Margin means only the left margin. Fullscreen means the entire screen. Default is margin.behindOffset- a dimension representing the number of pixels that you want the above view to show when the behind view is showing. Default is 0.behindWidth- a dimension representing the width of the behind view. Default is the width of the screen (equivalent to behindOffset = 0).behindScrollScale- a float representing the relationship between the above view scrolling and the behind behind view scrolling. If set to 0.5f, the behind view will scroll 1px for every 2px that the above view scrolls. If set to 1.0f, the behind view will scroll 1px for every 1px that the above view scrolls. And if set to 0.0f, the behind view will never scroll; it will be static. This one is fun to play around with. Default is 0.25f.shadowDrawable- a reference to a drawable to be used as a drop shadow from the above view onto the below view. Default is no shadow for now.shadowWidth- a dimension representing the width of the shadow drawable. Default is 0.fadeEnabled- a boolean representing whether or not the behind view should fade when the SlidingMenu is closing and "un-fade" when openingfadeDegree- a float representing the "amount" of fade.1.0fwould mean fade all the way to black when the SlidingMenu is closed.0.0fwould mean do not fade at all.selectorEnabled- a boolean representing whether or not a selector should be drawn on the left side of the above view showing a selected view on the behind view.selectorDrawable- a reference to a drawable to be used as the selector NOTE : in order to have the selector drawn, you must call SlidingMenu.setSelectedView(View v) with the selected view. Note that this will most likely not work with items in a ListView because of the way that Android recycles item views.
还有一些到时候再查吧。