摘要:
注意:1.xaml编辑器和单独的编辑器都在VS的子窗口中,所以背景仍然是黑色的。然后你会看到角落里的背景图片3.修改肤色匹配1.关闭实验VS,转到官方网站下载并安装Visual Studio 2013ColorThemeEditorhttps://visualstudiogallery.msdn.microsoft.com/9e08e5d3-6eb4-4e73-a045-6ea2a5cbdabe2.安装成功后,重新启动VS,调试并启动实验VS3。此时,在实验VS中搜索并根据ColorTheme4重新启动。重新启动后,输入“工具-˃自定义颜色”。单击“CustomizeColors”中的“ImportTheme”。4.编辑器是透明的。1.到目前为止,打开文件后,编辑器的背景仍然是黑色的。
Note:
1.xaml编辑器和个别的编辑器(如HTML的)因为是承载在VS的一个子窗口上,所以背景依然是黑色的。
2.该背景必须在VS实验环境下使用。
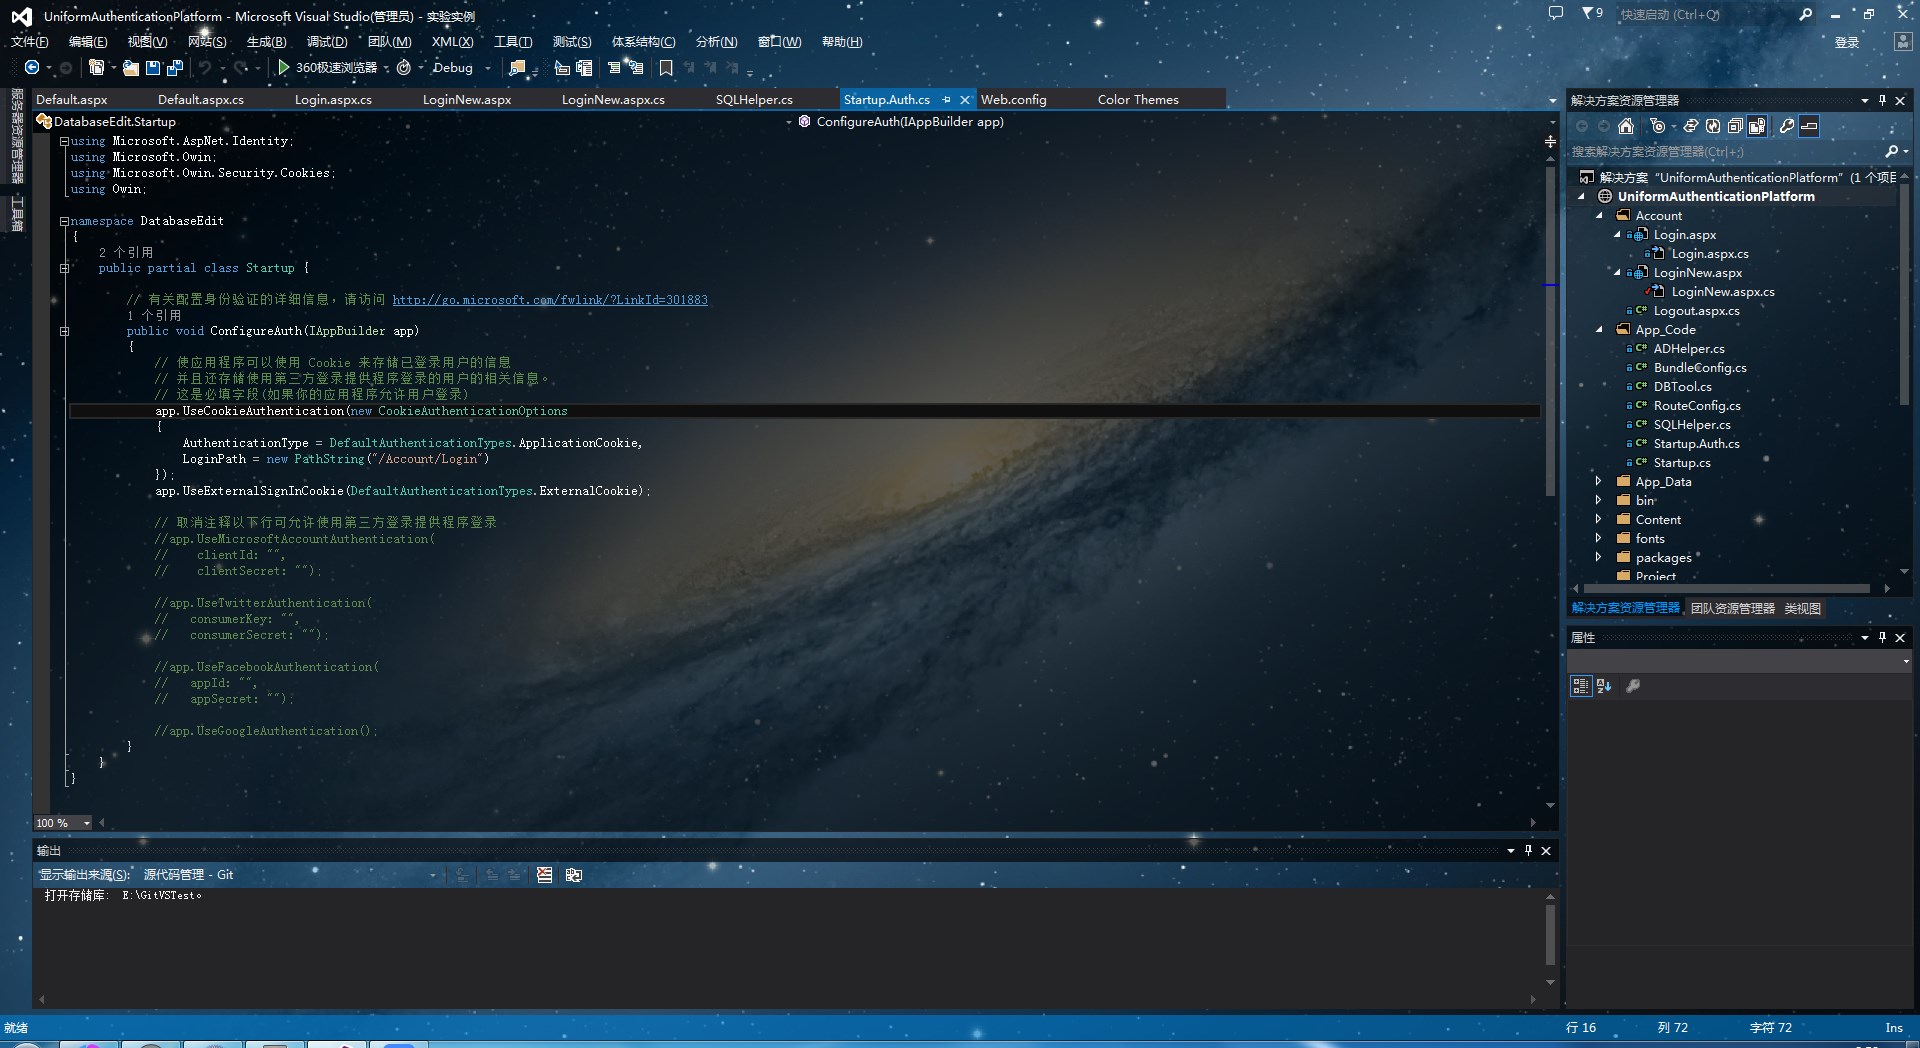
效果图:
1.先准备Visual Studio 2013 SDK
http://download.microsoft.com/download/9/1/0/910EE61D-A231-4DAB-BD56-DCE7092687D5/vssdk_full.exe
http://download.microsoft.com/download/9/1/0/910EE61D-A231-4DAB-BD56-DCE7092687D5/vssdk_full.exe
2.新建Package项目
1.安装好SDK后,进入VS。先新建一个Project,在“其它项目类型”那里找到“Visual Studio Package”
2.接下来的对话框里,选“C#”,然后基本是下一步。在最后一步把那两个复选框取消,因为那个在这里没什么用处。最后就成功新建了个VS扩展的Project
3.对Project添加WPF的程序集为引用,有四个,分别为“PresentationCore”、“PresentationFramework”、“System.Xaml”、“WindowsBase”。
4.然后打开“XXXPackage.cs”(XXX一般为这个Project的名字)文件,
代码如下:
using Microsoft.VisualStudio.Shell;

using Microsoft.VisualStudio.Shell.Interop;

using System;

using System.Runtime.InteropServices;

using System.Windows;

using System.Windows.Controls;

using System.Windows.Media;

using System.Windows.Media.Imaging;


namespace Microsoft.SoheeBackground//命名空间自己修改回自己用的

{

   [PackageRegistration(UseManagedResourcesOnly = true)]

   [InstalledProductRegistration("#110", "#112","1.0", IconResourceID = 400)]


//此处删除了一条代码段,原因不明,对后续影响不明


   [ProvideAutoLoad(UIContextGuids.NoSolution)]

   [ProvideAutoLoad(UIContextGuids.SolutionExists)]

   public sealed class IDEBackgroundPackage : Package

   {

       protected override void Initialize()

       {

            base.Initialize();


           Application.Current.MainWindow.Loaded += MainWindow_Loaded;

       }


       void MainWindow_Loaded(object sender, RoutedEventArgs e)

       {

            var rWindow = (Window)sender;


            //加载图片  E:FileDownloadExplorere30870a304e251ff3c5926fa786c9177f3e537f.jpg

            var rImageSource = BitmapFrame.Create(new Uri(@"E:FileDownloadExplorer241f95cad1c8a786d814d6eb6709c93d70cf501c.jpg"/*图片路径*/), BitmapCreateOptions.None, BitmapCacheOption.OnLoad);

            rImageSource.Freeze();


            var rImageControl = new Image()

                {

                    Source = rImageSource,

                    Stretch =Stretch.UniformToFill, //按比例填充

                    HorizontalAlignment =HorizontalAlignment.Center, //水平方向中心对齐

                    VerticalAlignment =VerticalAlignment.Center, //垂直方向中心对齐

                };


            Grid.SetRowSpan(rImageControl, 4);

            var rRootGrid =(Grid)rWindow.Template.FindName("RootGrid", rWindow);

            rRootGrid.Children.Insert(0, rImageControl);

        }

    }

}
5.代码修改后,调试,这时就会编译扩展,然后启动实验用VS。(如果这是第一次启动实验用VS,可能要像刚安装完VS那样设置一下)接着你会看到角落处显现出那张背景图
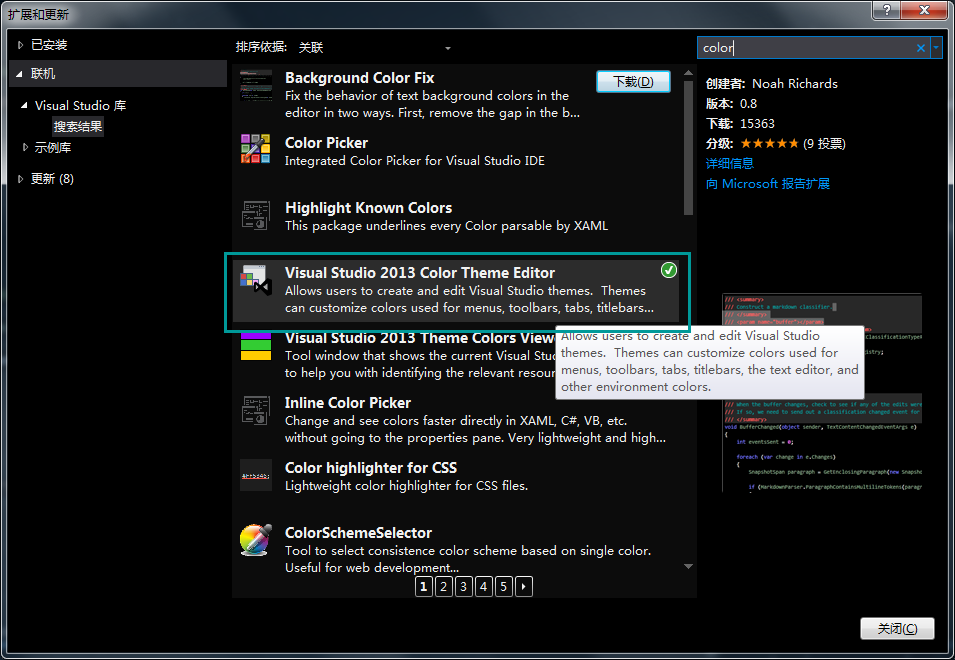
3.修改皮肤配色1.关闭实验用VS,前往官网下载并安装Visual Studio 2013 Color Theme Editor
https://visualstudiogallery.msdn.microsoft.com/9e08e5d3-6eb4-4e73-a045-6ea2a5cbdabe
https://visualstudiogallery.msdn.microsoft.com/9e08e5d3-6eb4-4e73-a045-6ea2a5cbdabe
3.此时在实验用VS中搜索并按照Color Theme
4.重启,重启后,进入“工具->CustomizeColors”。在“Customize Colors”那里点“Import Theme”即可(文件在一开始百度云下载的打包文件中)
4.编辑器透明化
1.到目前为止,打开文件后,编辑器的背景还是黑的。接下来就是把这层黑的去掉。先打开“source.extension.vsixmanifest”文件,进入“Assets”选项卡,单击“New”按钮。在弹出的对话框里,“Type”选“Microsoft.VisualStudio.MefComponent”,“Source”选“Aproject in current solution”,“Project”选当前的Project,目前应该就一个选项的。最后OK
2.添加引用 System.ComponentModel.Composition、Microsoft.VisualStudio.CoreUtility、Microsoft.VisualStudio.Text.UI、Microsoft.VisualStudio.Text.UI.Wpf
3.新建一个文件,这里就叫“EditorBackground.cs”
代码如下:
using Microsoft.VisualStudio.Text.Classification;

using Microsoft.VisualStudio.Text.Editor;

using Microsoft.VisualStudio.Utilities;

using System;

using System.ComponentModel.Composition;

using System.Windows;

using System.Windows.Controls;

using System.Windows.Media;

using System.Windows.Threading;


namespace Microsoft.SoheeBackground
{

   [Export(typeof(IWpfTextViewCreationListener))]

    [ContentType("Text")]

    [ContentType("BuildOutput")]

   [TextViewRole(PredefinedTextViewRoles.Document)]

    class Listener :IWpfTextViewCreationListener

    {

        [Import]

        IEditorFormatMapService EditorFormatMapService = null;


        public void TextViewCreated(IWpfTextView rpTextView)

        {

            new EditorBackground(rpTextView);


            //去掉断点边栏的背景

            var rProperties = EditorFormatMapService.GetEditorFormatMap(rpTextView).GetProperties("IndicatorMargin");

            rProperties["BackgroundColor"] = Colors.Transparent;

            rProperties["Background"]= Brushes.Transparent;

        }

    }


    class EditorBackground

    {

        IWpfTextView r_TextView;

        ContentControl r_Control;

        Grid r_ParentGrid;

        Canvas r_ViewStack;


        public EditorBackground(IWpfTextView rpTextView)

        {

            r_TextView = rpTextView;

            r_Control =(ContentControl)r_TextView;

            r_TextView.Background =Brushes.Transparent;

            r_TextView.BackgroundBrushChanged+= TextView_BackgroundBrushChanged;

            r_TextView.Closed +=TextView_Closed;

            r_Control.Loaded += TextView_Loaded;

        }

        void MakeBackgroundTransparent()

        {

            r_TextView.Background =Brushes.Transparent;

            r_ViewStack.Background =Brushes.Transparent;

           r_ParentGrid.ClearValue(Grid.BackgroundProperty);

        }

        void TextView_Loaded(object sender,RoutedEventArgs e)

        {

            if (r_ParentGrid == null)

                r_ParentGrid =(Grid)r_Control.Parent;

            if (r_ViewStack == null)

                r_ViewStack = (Canvas)r_Control.Content;

            MakeBackgroundTransparent();

        }

        void TextView_BackgroundBrushChanged(object sender, BackgroundBrushChangedEventArgs e)

        {

           r_Control.Dispatcher.BeginInvoke(new Action(() =>

            {

                while (r_ParentGrid.Background != null)

                   MakeBackgroundTransparent();

            }), DispatcherPriority.Render);

        }

        void TextView_Closed(object sender,EventArgs e)

        {

            //清除委托,以防内存泄露

            r_TextView.Closed -=TextView_Closed;

            r_TextView.BackgroundBrushChanged-= TextView_BackgroundBrushChanged;

        }

    }

}
4.再启动调试用VS,选择之前Import 的 Theme即可。
5.以后可以直接在 开始-VisualStudio2013-Microsoft VisualStudio SDK-Tools-Start Experimental Instance 开启调试用VS
PS:参考
1.http://startalkers.lofter.com/post/1cb119b5_5be5e5a
2.http://doc.okbase.net/u012915516/archive/124296.html