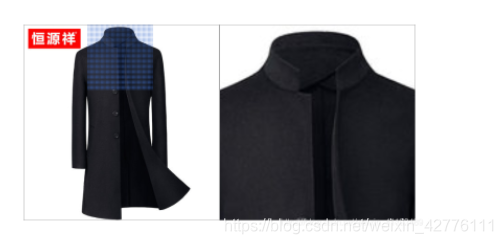
vue 实现像web淘宝一样区域放大功能

摘要:
vue的区域放大功能(如网上淘宝)的效果是直接定制组件代码:exportdefault{props:{minIMGsrc:String,maxIMGsrc:String,scale:{type:Number,default:2},{type:Number,default:420},height:{type:Number,default:420},},data(){return{show:false,finalMinIMGsrc='',finalMaxIMGsrr:''',imgBoxWidth:420,imgBoxHeight:420,areaWidth:210,areaMarkStyle:{},minImgBoxStyle:{cursor:'move'},min”ImgStyle:{},maxImgBoxStyle:},maxImgStyle:{position:‘absolute‘,},}},watch:{'minIMGsrc'(){this.init()},'maxIMGsrc‘(){this.init()}},mounted(){this.init()},方法:{init(){this.imgBoxWidth=this.widththis.imgBoxHeight=this.heightthis.$settithis.$setthis.$settithis.$settiths.$settithes.areaWidth=this.imgBoxWidth/this.scalthis.finalMinIMGsrc=this.minIMGsrcif(!
vue 实现像web淘宝一样区域放大功能

效果是这个样子的

在这里插入图片描述

直接上自定义组件代码:

<template>
    <div style="display: flex;position: relative">
        <div  
             : 
             @mouseleave="mouseLeave"
             @mouseenter="mouseEnter"
             @mousemove="mousemove($event)">
            <!--原始照片-小照片-->
            <img :  fit="contain" ref="minImg" :src="http://t.zoukankan.com/finalMinIMGsrc"/>
            <!--探测块-->
            <div v-show="show"   :style="areaMarkStyle"></div>
        </div>
        <div   :  v-show="show">
            <!--放大后的照片-->
            <img :  fit="contain" :src="http://t.zoukankan.com/finalMaxIMGsrc"/>
        </div>
    </div>
</template>
<script>
    export default {
        props: {
            minIMGsrc: String,
            maxIMGsrc: String,
            scale: {
                type: Number,
                default: 2
            },
             {
                type: Number,
                default: 420
            },
            height: {
                type: Number,
                default: 420
            },
        },
        data() {
            return {
                show: false,
                finalMinIMGsrc: '',
                finalMaxIMGsrc: '',
                imgBoxWidth: 420,
                imgBoxHeight: 420,
                areaWidth: 210,
                areaHeight: 210,
                areaMarkStyle: {},
                minImgBoxStyle: {
                    cursor: 'move'
                },
                minImgStyle: {},
                maxImgBoxStyle: {
 
 
                },
                maxImgStyle: {
                    position: 'absolute',
                },
            }
        },
        watch: {
            'minIMGsrc'() {
                this.init()
            },
            'maxIMGsrc'() {
                this.init()
            },
        },
        mounted() {
            this.init()
        },
        methods: {
            init() {
                this.imgBoxWidth = this.width
                this.imgBoxHeight = this.height
                this.$set(this.minImgStyle, 'width', this.imgBoxWidth + 'px')
                this.$set(this.minImgStyle, 'height', this.imgBoxHeight + 'px')
                this.$set(this.maxImgStyle, 'width', this.imgBoxWidth + 'px')
                this.$set(this.maxImgStyle, 'height', this.imgBoxHeight + 'px')
                this.$set(this.minImgBoxStyle, 'width', this.imgBoxWidth + 'px')
                this.$set(this.minImgBoxStyle, 'height', this.imgBoxHeight + 'px')
                this.$set(this.maxImgBoxStyle, 'width', this.imgBoxWidth + 'px')
                this.$set(this.maxImgBoxStyle, 'height', this.imgBoxHeight + 'px')
                this.$set(this.maxImgBoxStyle, 'left', this.imgBoxWidth + 'px')
                this.areaWidth = this.imgBoxWidth / this.scale
                this.areaHeight = this.imgBoxHeight / this.scale
                this.finalMinIMGsrc = this.minIMGsrc
                if (!this.maxIMGsrc) {
                    this.finalMaxIMGsrc = this.minIMGsrc
                }
                this.$set(this.areaMarkStyle, 'width', this.areaWidth + 'px')
                this.$set(this.areaMarkStyle, 'height', this.areaHeight + 'px')
                this.$set(this.maxImgStyle, 'transform', 'scale(' + this.scale + ')')
            },
            mouseEnter() {
                this.show = true
            },
            mouseLeave() {
                this.show = false
            },
            mousemove(e) {
                // 获取文档顶端与屏幕顶部之间的距离
                // scrollTop指的是“元素中的内容”超出“元素上边界”的那部分的高度
                let documentScrollTop = document.documentElement.scrollTop || document.body.scrollTop;
                // 获取鼠标相对于屏幕的坐标
                let mouseClientX = e.clientX
                let mouseClientY = e.clientY
                // 获取小照片相对于屏幕位置信息
                // getBoundingClientRect()用于获得页面中某个元素的左,上,右和下分别相对浏览器视窗的位置。
                let minImgPosition = this.$refs.minImg.getBoundingClientRect();
                let minImgX = minImgPosition.left;
                let minImgY = minImgPosition.top;
                // 计算出探测块相对于小图片的坐标
                let areaLeft = mouseClientX - minImgX - this.areaWidth / 2
                let areaTop = mouseClientY - minImgY - this.areaHeight / 2
                if (documentScrollTop > 0) {
                    areaTop = documentScrollTop + areaTop
                }
                let minLeft = 0
                let maxLeft = this.imgBoxWidth - this.areaWidth
                let minTop = 0
                let maxTop = this.imgBoxHeight - this.areaHeight
                // 禁止探测块移出小图片
                if (areaLeft < minLeft) {
                    areaLeft = minLeft
                }
                if (areaLeft > maxLeft) {
                    areaLeft = maxLeft
                }
                if (areaTop < minTop) {
                    areaTop = minTop
                }
                if (areaTop > maxTop) {
                    areaTop = maxTop
                }
                // 更新探测块的坐标
                this.$set(this.areaMarkStyle, 'left', areaLeft + 'px')
                this.$set(this.areaMarkStyle, 'top', areaTop + 'px')
                // 更新放大后照片的坐标
                this.$set(this.maxImgStyle, 'left', (this.scale - 1) * this.imgBoxWidth / 2 - areaLeft * this.scale + 'px')
                this.$set(this.maxImgStyle, 'top', (this.scale - 1) * this.imgBoxHeight / 2 - areaTop * this.scale + 'px')
            }
        }
    }
</script>
<style scoped>
    .box {
        border: 1px solid darkgray;
        position: relative;
        overflow: hidden;
        box-sizing: border-box;
    }
 
    .areaMark {
        position: absolute;
        background: url(//img-tmdetail.alicdn.com/tps/i4/T12pdtXaldXXXXXXXX-2-2.png);
    }
    .maxImgBox{
        position: absolute;
    z-index:999
    }
</style>

使用

<s-imgZoom  :   :  minIMGsrc="https://img.alicdn.com/imgextra/i2/2183295419/O1CN01awKYlS1ptwv0tbmL5_!!0-item_pic.jpg_430x430q90.jpg" :scale="3" />

亲测可用

在这里插入图片描述

免责声明:文章转载自《vue 实现像web淘宝一样区域放大功能》仅用于学习参考。如对内容有疑问,请及时联系本站处理。

上篇Windows mkdirUnable to resolve service for type的问题下篇

宿迁高防,2C2G15M,22元/月;香港BGP,2C5G5M,25元/月 雨云优惠码:MjYwNzM=

相关文章

在Vue中使用了Swiper ,从后台获取动态数据后,swiper滑动失效

原因是因为Swiper提前初始化了,然而数据还没有加载完成。解决方法如下: 1、在Swiper初始化时 swiper0 = new Swiper('.w0', { initialSlide :0, observer:true,//修改swiper自己或子元素时,自动初始化swiper observeParents:true,//修改...

Vue.js 源码分析(二十八) 高级应用 transition组件 详解

transition组件可以给任何元素和组件添加进入/离开过渡,但只能给单个组件实行过渡效果(多个元素可以用transition-group组件,下一节再讲),调用该内置组件时,可以传入如下特性:     name         用于自动生成CSS过渡类名        例如:name:'fade'将自动拓展为.fade-enter,.fade-ente...

vue对vue-giant-tree进行节点操作

vue 项目中使用到了vue-giant-tree这个使用ztree封装的树形插件,在对其节点进行操作时遇到了无法向传统的jquery那样获取到ztreeObj;而导致了无法控制节点dom;浪费了许多时间,so特此记录一哈 Vue-Giant-Tree Vue-Giant-Tree是最ztree的一个封装;用于vue 项目中,该ztree的好处就是不需要...

Vue template 报错 Type expected.Vetur(1110)

解决方案: 1. 文件名称中不要含Test 2.可以复制正常文件,再改名字 排查步骤如下: 1. 按其他博客写的去设置了vetur.validation.template false,切换到问题vue文件,还是报错; 2. 尝试将没报错的文件内容复制过来,依然报错; 3.内容后,输入<template,选择default.vue 模板,依然报错;...

Vue指令和事件

/** * 语法糖的概念: * 语法糖是指在不影响功能的情况下,添加某种方法实现同样的; * 使用语法糖,可以简化代码的书写 * 比如 v-on:click='func' @click='func' * v-bind:src :src */ <!-- v-on 可以监听原生DOM事件click,dbclick,keyup,mousemove...

Vue项目的全局环境设置

webpack自动有三种模式可以在package.json文件中看到 第一种方法 通过.env文件设置 1 .env.development文件,这是开发环境下的配置文件。 2 .env.production 文件,这是生产环境下的配置文件。 3 .env 文件,这是一些全局的属性。 直接新建文件名为以上的文件,在输入npm run dev时会自动执行de...