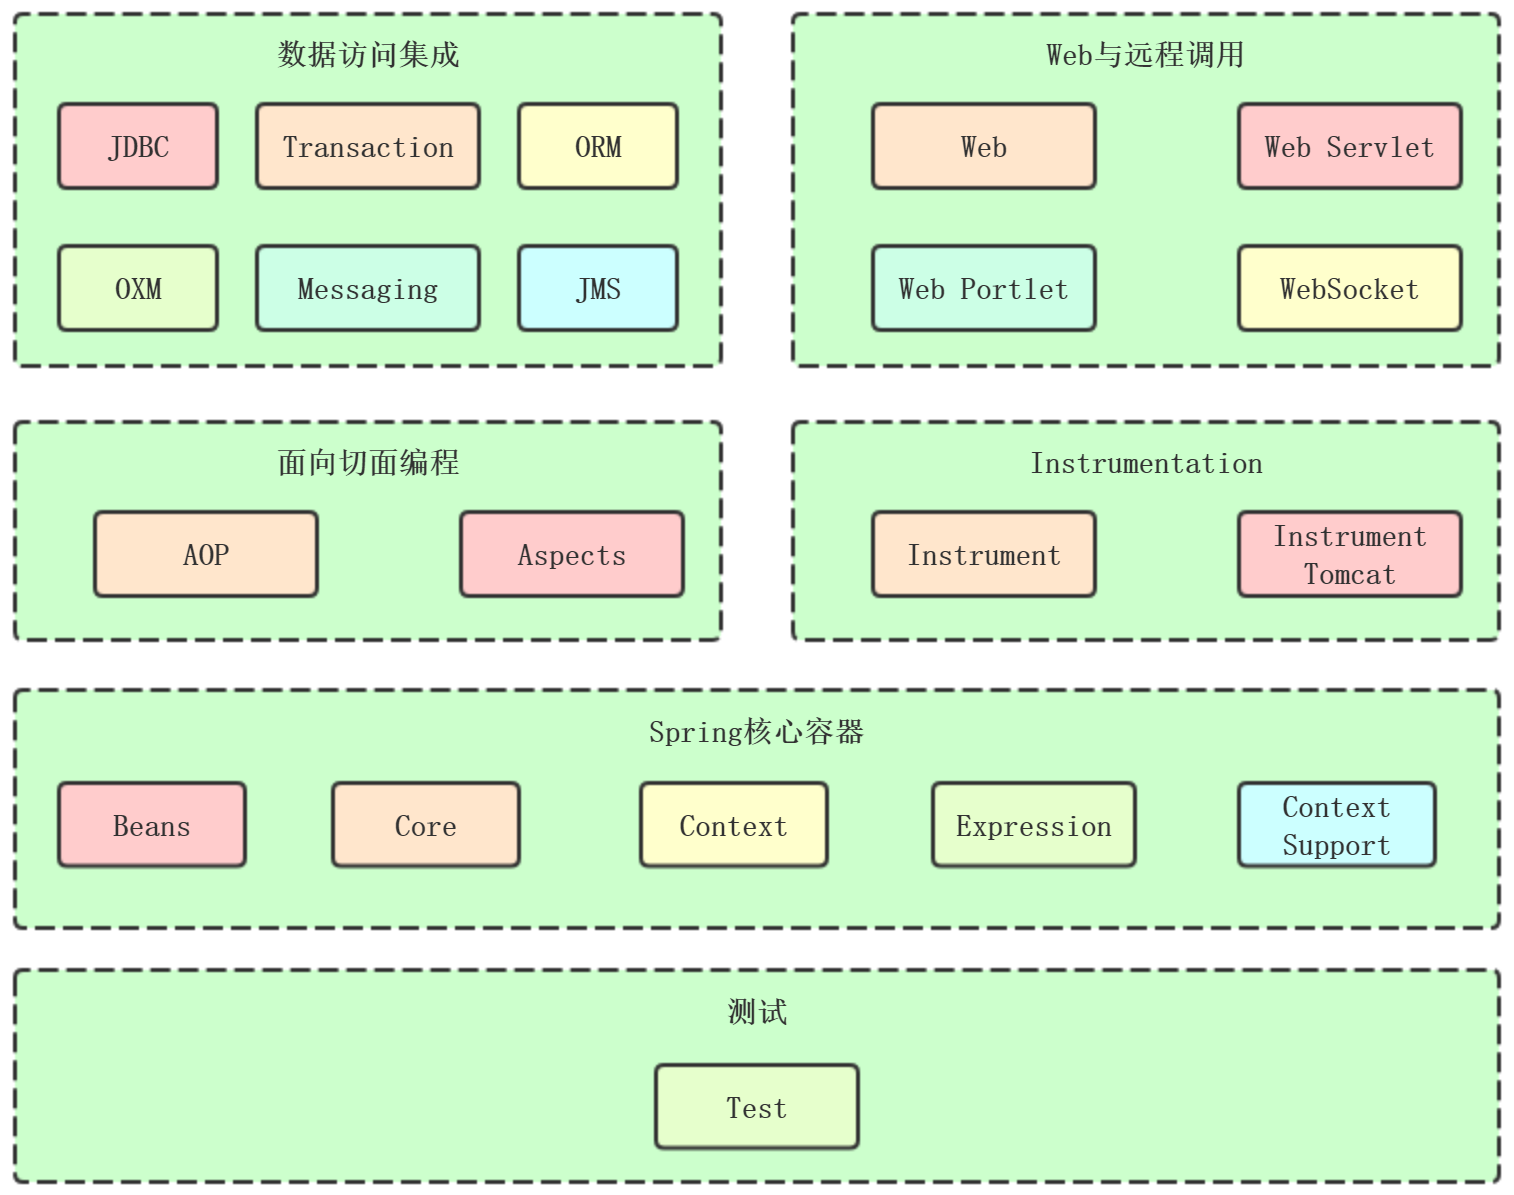
企业日常开发中,几乎都是Spring系的框架,无论是SSM、还是现在大火的SpringBoot,使用最大的目的就是简化开发
基本模块:

核心容器:Beans、Core、Context、SpEL
1. core和beans模块提供了整个框架最基础的部分,包括了IoC(控制反转)和Dependency Injection(依赖注入)。
2. Context建立在Core和Beans模块提供的基础之上:他提供了框架式访问对象的方式
3. core、beans、context构成了Spring的骨架
4. SpEL:提供了一种强大的用于在运行时操作对象的表达式语言
优点:
1、对象之间的依赖关系通过IOC容器进行管理,降低组件之间的耦合,不需要总是new一个对象
2、提供面向切面编程
3、功能丰富,Transaction、JDBC、WebSocket等
4、轻量级:大小和开销方面都是轻量级的
5、开放性很高,可以选择自己想要使用的功能
装配Bean
pojo的使用体现了非侵入式编程,通过DI进行装配
装配方式:
1、xml显式配置
2、java中显式配置
3、隐式的bean发现机制和自动装配
StudentDaoImpl.java
public class StudentDaoImpl implements StudentDao {
    @Override
    public void add() {
        System.out.println("add");
    }

    @Override
    public void del() {
        System.out.println("del");
    }
}
StudentServiceImpl.java
@Data
@AllArgsConstructor
public class StudentServiceImpl implements StudentService {

    private StudentRepository studentResponstory;

    @Override
    public void add() {
        System.out.println("add");
    }

    @Override
    public void del() {
        System.out.println("del");
    }
}
1、xml显式配置
Spring最开始的配置方式,相比注解装配和java配置比较麻烦
<?xml version="1.0" encoding="UTF-8"?>
<beans
    xmlns="http://www.springframework.org/schema/beans"
    xmlns:xsi="http://www.w3.org/2001/XMLSchema-instance"
    xmlns:context="http://www.springframework.org/schema/context"
    xsi:schemaLocation="http://www.springframework.org/schema/beans http://www.springframework.org/schema/beans/spring-beans.xsd
    http://www.springframework.org/schema/context http://www.springframework.org/schema/context/spring-context.xsd">

    <beans>
        <bean id="studentDao" class="com.it.dao.impl.StudentDaoImpl"/>
        <bean id="studentService" class="com.it.service.impl.StudentServiceImpl" >
            <constructor-arg ref="studentDao" />
        </bean>
    </beans>

</beans>
xml文件中首先要声明多个xml模式文件,这些xsd文件了配置spring xml元素
通过<bean>去配置,id如果省略的话,自动生成名称:"class内容"#0,可读性较差,一般主动声明,首字母要小写
2、自动化装配Bean
实现:
1、自动扫描@ComponentScan,自动发现应用上下文中所创建的 bean
2、自动装配@Autowired,自动满足 bean 之间的依赖
例如上面例子service和dao之间关系,dao上面都要通过@Component("StudentDao")声明是个组件,通过config的@ComponentScan去扫描(也可以
在xml配置扫描),通过@Autowired去自动注入
@Service
public class StudentServiceImpl implements StudentService {

    private StudentDao studentDao;

    @Override
    public void add() {
        studentDao.add();
    }

    @Override
    public void del() {
        studentDao.del();
    }
}
注入的方式一般有两种:
1、@Autowired,按类型注入,只能是当有且仅有一个匹配的Bean才可以,如果有多个,就需要和@Qualifier联合使用,确定唯一的实现类,相
比@Resource多一个required属性,如果等于false,即使没有发现这个bean,也不会抛出异常
2、@Resource,按名称注入,建议指明name值,@Resource(name="xxx"),这个注解是javax带有的,而不是Spring的注解
3、@RequiredArgsConstructor(onConstructor = @__(@Autowired)):基于lombok的注入,实际上通过构造器注入的方式,不需要为每个注入
的Bean书写@Autowired,只需要写在class的上面。而且对于某些IDE不识别的Bean,会爆红,例如MyBatis的Mapper注入,这种方式不会爆红。
@Autowired
public AddressServiceImpl(ModelMapper modelMapper, SupportAddressRepository supportAddressRepository) {
    this.modelMapper = modelMapper;
    this.supportAddressRepository = supportAddressRepository;
}
Bean注入/创建方式
1、XML配置
Student.java
@Data
@NoArgsConstructor
@AllArgsConstructor
public class Student {

    private int id;
    private String name;
    private int age;
}
1.1)属性注入,也就是setter注入
需要生成属性的set方法
<?xml version="1.0" encoding="UTF-8"?>
<beans
    xmlns="http://www.springframework.org/schema/beans"
    xmlns:xsi="http://www.w3.org/2001/XMLSchema-instance"
    xmlns:context="http://www.springframework.org/schema/context"
    xsi:schemaLocation="http://www.springframework.org/schema/beans http://www.springframework.org/schema/beans/spring-beans.xsd
    http://www.springframework.org/schema/context http://www.springframework.org/schema/context/spring-context.xsd">

    <beans>
        <bean id="student" class="com.it.entity.Student">
            <property name="id" value="1001" />
            <property name="name" value="sam" />
            <property name="age" value="25" />
        </bean>

    </beans>

</beans>
1.2)构造器注入
School.java
@Data
@AllArgsConstructor
public class School {
    private Student student;
}
<?xml version="1.0" encoding="UTF-8"?>
<beans
    xmlns="http://www.springframework.org/schema/beans"
    xmlns:xsi="http://www.w3.org/2001/XMLSchema-instance"
    xmlns:context="http://www.springframework.org/schema/context"
    xsi:schemaLocation="http://www.springframework.org/schema/beans http://www.springframework.org/schema/beans/spring-beans.xsd
    http://www.springframework.org/schema/context http://www.springframework.org/schema/context/spring-context.xsd">

    <beans>
        <bean id="student" class="com.it.entity.Student" />
        <bean id="school" class="com.it.entity.School" >
            <constructor-arg name="student" ref="student" />
        </bean>
    </beans>

</beans>
1.3)工厂方法注入:静态工厂和实例工厂
School.java
public class School {

    public Teacher createTeacher() {
        Teacher teacher = new Teacher();
        teacher.setId(1001);
        teacher.setName("sam");
        return teacher;
    }

    public static Teacher createTeacher1() {
        Teacher teacher = new Teacher();
        return teacher;
    }
}
<?xml version="1.0" encoding="UTF-8"?>
<beans
    xmlns="http://www.springframework.org/schema/beans"
    xmlns:xsi="http://www.w3.org/2001/XMLSchema-instance"
    xmlns:context="http://www.springframework.org/schema/context"
    xsi:schemaLocation="http://www.springframework.org/schema/beans http://www.springframework.org/schema/beans/spring-beans.xsd
    http://www.springframework.org/schema/context http://www.springframework.org/schema/context/spring-context.xsd">

    <beans>

        <bean id="school" class="com.it.entity.School" />
        <bean factory-bean="school" factory-method="createTeacher" />

        <bean id="school1" class="com.it.entity.School" factory-method="createTeacher1"/>
    </beans>

</beans>
2、基于Java类的bean定义
在任何一个配置类中通过@Bean实现创建Bean,适用于外部引用jar包
@Bean
public Gson gson() {
    return new Gson();
}
此时就可以通过@Autowired装配
3、基于注解
@Component:当对组件的层次难以定位的时候使用这个注解
@Controller:表示控制层的组件
@Service:表示业务逻辑层的组件
@Repository:表示数据访问层的组件
基于注解也是项目中使用最多的,只有在引用外部jar包才会采用第二种方式,尽量避免XML配置