什么是Let's Encrypt?
目前世界上就只有为数不多的几家域名证书签发机构得到浏览器的认可,而Let‘s Encrypt
就是其中一家,并且你可以申请到免费的证书,当然你如果想要付费也行,很多机构证书动辄几千几万一年。如果我们只想搭建个测试环境有需要https,我们肯定不会去花这个冤枉钱,当然免费的午餐并没有那么好吃,Let's Encrypt申请的证书只有90天有效期,所以到期你得进行续期操作。并且还有各种各样得条件限制,比如一周你只能申请多少次,同一个ip一天只能操作多少次之类,详见
https://letsencrypt.org/docs/rate-limits/
假如你使用jdk生成的自签证书能不能用呢?当然是可以用的,只不过浏览器会告诉你这个证书我不承认。也就是左上角会给你挂个不安全的警告。
什么是泛域名证书?
例如:*.xxx.cn也就是这个证书可以给某个域名的所有二级域名使用,就叫做泛域名证书(也称作通配符证书)。
Let's Encrypt官方推荐我们使用certbot脚本申请证书(当然也可以使用acme.sh等方式),以下是申请步骤基于Debian10python3.7.3如果你在操作过程中遇到什么报错,请多考虑python工具包的版本问题之类的。
Let's Encrypt自2018年开始支持申请泛域名证书,相比于单域名证书,泛域名证书更利于日常的维护。
准备工作
下载 certbot,这个很多发行版的源中都已经自带了。比如Debian的:
sudo apt install certbot
需要有域名的管理权限,因为申请泛解析证书需要使用 DNS 验证,这就需要你能够根据要求操作 DNS 解析记录,以此证明你对域名的权限。
开始申请泛域名证书
certbot certonly --preferred-challenges dns --manual -d *.xx.cn --server https://acme-v02.api.letsencrypt.org/directory
Saving debug log to /var/log/letsencrypt/letsencrypt.log
Plugins selected: Authenticator manual, Installer None
Obtaining a new certificate
Performing the following challenges:
dns-01 challenge for xx.cn
- - - - - - - - - - - - - - - - - - - - - - - - - - - - - - - - - - - - - - - -
NOTE: The IP of this machine will be publicly logged as having requested this
certificate. If you're running certbot in manual mode on a machine that is not
your server, please ensure you're okay with that.
Are you OK with your IP being logged?
- - - - - - - - - - - - - - - - - - - - - - - - - - - - - - - - - - - - - - - -
(Y)es/(N)o: y
- - - - - - - - - - - - - - - - - - - - - - - - - - - - - - - - - - - - - - - -
Please deploy a DNS TXT record under the name
_acme-challenge.xx.cn with the following value:
nI0DhzH-vn0W7STVuLi2O-oIKuFNlqQx5EnjB-zewvs
Before continuing, verify the record is deployed.
- - - - - - - - - - - - - - - - - - - - - - - - - - - - - - - - - - - - - - - -
Press Enter to Continue #让你的二级域名_acme-challenge.xx.cn用TXT方式解析到nI0DhzH-vn0W7STVuLi2O-oIKuFNlqQx5EnjB-zewvs
#可用dig -t txt _acme-challenge.xx.cn验证解析是否生效,然后按下Enter通过验证。 debian可用apt install dnsutils来安装dig命令。
#也可以用nslookup命令来验证。
Waiting for verification...
Cleaning up challenges
IMPORTANT NOTES:
- Congratulations! Your certificate and chain have been saved at:
/etc/letsencrypt/live/xx.cn/fullchain.pem
Your key file has been saved at:
/etc/letsencrypt/live/xx.cn/privkey.pem
Your cert will expire on 2021-04-26. To obtain a new or tweaked
version of this certificate in the future, simply run certbot
again. To non-interactively renew *all* of your certificates, run
"certbot renew"
- If you like Certbot, please consider supporting our work by:
Donating to ISRG / Let's Encrypt: https://letsencrypt.org/donate
Donating to EFF: https://eff.org/donate-le
#至此证书申请成功
参数说明:
certonly 表示只申请证书。
--no-bootstrap 需要用户同意的系统级操作直接选N。
--manual 表示交互式申请。
-d 为那些主机申请证书如 *.xxx.cn(此处为泛域名)
--preferred-challenges dns,使用 DNS 方式校验域名所有权,可以配置多个
--server Let's Encrypt ACME v2 版本使用的服务器不同于 v1 版本(V2版本才支持泛域名解析),需要显示指定。
证书签发成功后去Nginx或Apache配置新生成的证书文件即可。
撤销证书
倘若有不需要的证书了,可撤销删除。
sudo certbot revoke --cert-path /etc/letsencrypt/archive/xx.cn/cert1.pemSaving debug log to /var/log/letsencrypt/letsencrypt.log
- - - - - - - - - - - - - - - - - - - - - - - - - - - - - - - - - - - - - - - -
Would you like to delete the cert(s) you just revoked, along with all earlier
and later versions of the cert?
- - - - - - - - - - - - - - - - - - - - - - - - - - - - - - - - - - - - - - - -
(Y)es (recommended)/(N)o: y #是否删除证书
自动验证的方式申请证书
上面的方式需要手动去到DNS解析服务商更改解析通过验证,其实通过Certbot官方的插件可以实现自动更新DNS通过验证。https://certbot.eff.org/docs/using.html#manual

支持上面这些服务商。
准备
安装对应的DNS插件
sudo apt install python3-certbot-dns-cloudflare
#sudo apt install python2-certbot-dns-cloudflare
#我用到的服务商是Cloudflare
配置 DNS 插件
在cloudflare获取KEY/TOKEN
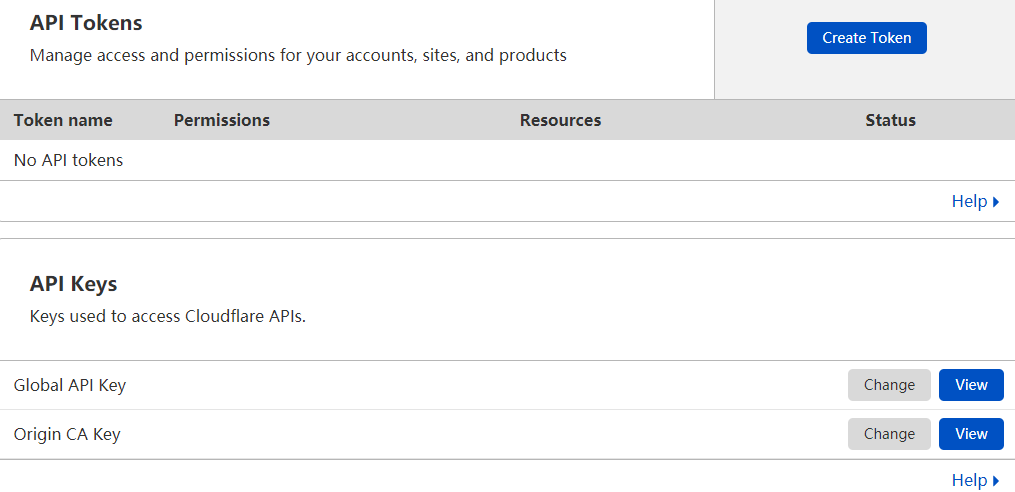
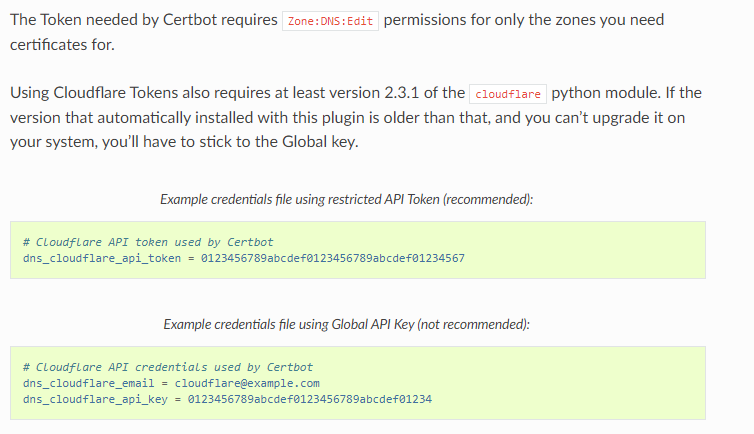
两种方式均可,只是token的方式需要2.3.1版本以上的python*-certbot-dns-cloudflare插件。出于安全因素,推荐前者的方式。
# Cloudflare API credentials used by Certbot
dns_cloudflare_email =cloudflare@example.com
dns_cloudflare_api_key = 0123456789abcdef0123456789abcdef01234567
将上面的配置信息写入~/cloudflare.ini。
申请
sudo certbot certonly --dns-cloudflare --dns-cloudflare-credentials ~/cloudflare.ini --dns-cloudflare-propagation-seconds 60 --preferred-challenges dns -d *.example.win --server https://acme-v02.api.letsencrypt.org/directory
#--dns-cloudflare-propagation-seconds 60 #等待60秒, 等DNS解析生效
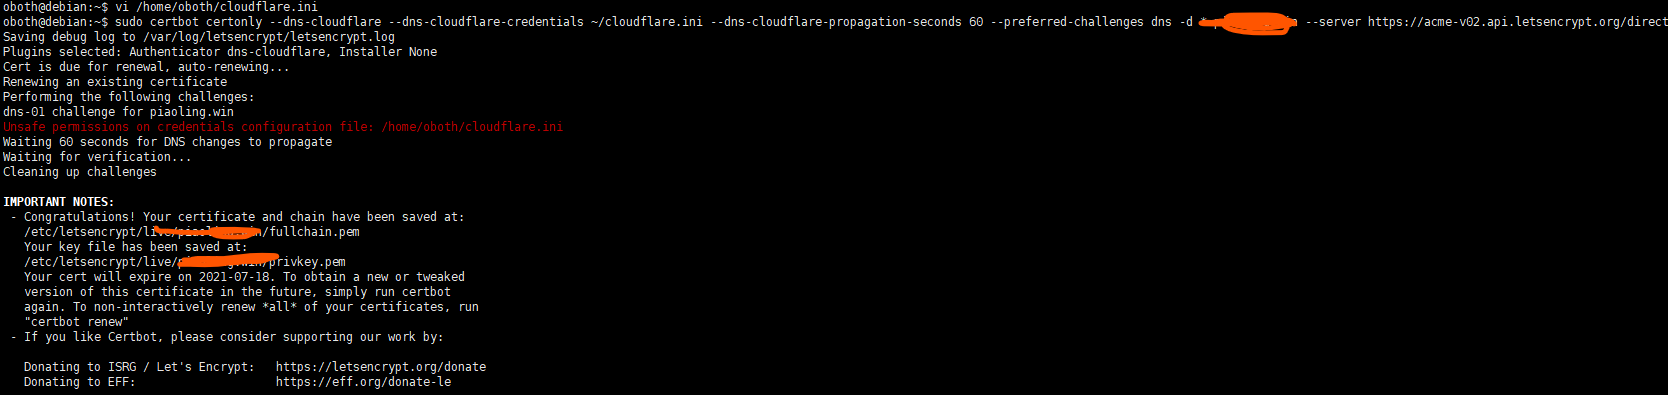
由于这里的泛域名证书之前已申请过,且存在于服务器,Certbot自动进行了续期操作。
至此,泛域名证书申请完成。
续期
若是通过手动更改DNS解析的方式申请的域名,我们执行certbot renew时会报错。

此时只有重新按照申请证书的步骤再来一遍。
certbot certonly --preferred-challenges dns --manual -d *.xx.cn --server https://acme-v02.api.letsencrypt.org/directory
若是通过API自动验证的方式申请的,则可以直接用cerbot renew的方式更新证书!