UEditor富文本编辑器,百度的良心产品之一。
记录下我是怎么用UEditor的
1、引入到项目中,添加对net/bin下Newtonsoft.json的引用
2、实例化,按照demo中的index.html的形式。把ueditor.config.js和ueditor.all.min.js引过来
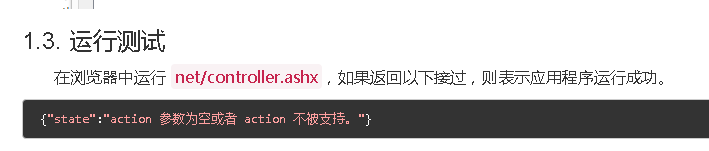
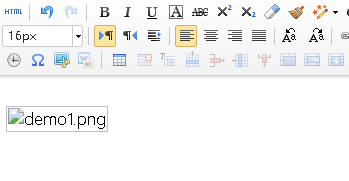
此时,应该可以加载出编辑器了
3、修改配置
按照文档中的说明,修改配置分为前台配置项和后台配置项
前台配置项:ueditor.config.js
后台配置项:config.json
成功配置后:
以上传图片为例,看图片上传是怎么实现的
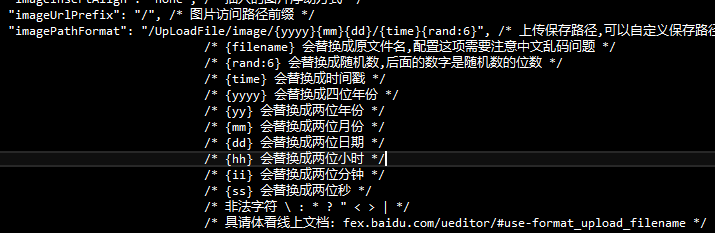
首先,我想把 图片上传到我网站的根目录下的 UpLoadFile文件夹下
在config.json中设置imagePathFormat 文件上传保存路径为 "/UpLoadFile/image/{yyyy}{mm}{dd}/{time}{rand:6}"
发现图片时不可以显示的,点击html源代码那个按钮,发现图片的src地址不对
在config.json中设置imageUrlPrefix 设置图片访问前缀
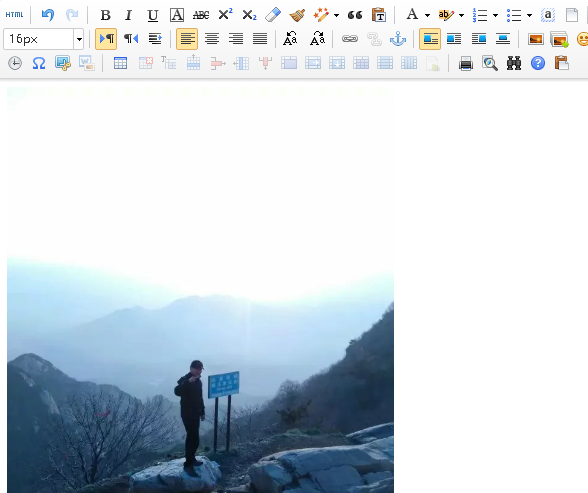
成功上传!

图片src路径
修改之后的
下面就仔细研究下上传是 怎么实现的,经过仔细研究,有了初步的了解
在点击多图上传的时候,加载了dialogs/image下的image.html
在image.js中找到了上传图片的方法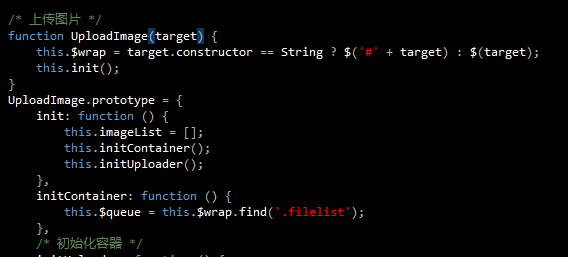
无奈对js研究过少,看到这里就是完全懵逼的状态,但是可以勉强猜出大概干了啥事:加载配置里的上传路径及其他的上传配置。通过Developer Tools发现,请求路径是这样的:://localhost:16857/Content/ueditorKK/net/controller.ashx?action=uploadimage&encode=utf-8
在controller.ashx中做了这样的事情:
 Handler action = null;
 action = new UploadHandler(context, new UploadConfig()
                {
                    上传文件配置
                });
     action.Process();
UploadHandler继承自抽象类Handler
这时候,UploadHandler中的Process()就要执行了
  byte[] uploadFileBytes = null;
        string uploadFileName = null;

        if (UploadConfig.Base64)
        {
            uploadFileName = UploadConfig.Base64Filename;
            uploadFileBytes = Convert.FromBase64String(Request[UploadConfig.UploadFieldName]);
        }
        else
        {
            var file = Request.Files[UploadConfig.UploadFieldName];
            uploadFileName = file.FileName;

            if (!CheckFileType(uploadFileName))
            {
                Result.State = UploadState.TypeNotAllow;
                WriteResult();
                return;
            }
            if (!CheckFileSize(file.ContentLength))
            {
                Result.State = UploadState.SizeLimitExceed;
                WriteResult();
                return;
            }

            uploadFileBytes = new byte[file.ContentLength];
            try
            {
                file.InputStream.Read(uploadFileBytes, 0, file.ContentLength);
            }
            catch (Exception)
            {
                Result.State = UploadState.NetworkError;
                WriteResult();
            }
        }
上面的代码将获取上传文件的二进制形式,文件名
接下来就是获取上传路径,上传
返回这些东西:
"state":"SUCCESS",
"url":"/UpLoadFile/image/20160814/6360679021994094052976991.jpg",
"title":"psbM9XZV19O.jpg",
"original":"psbM9XZV19O.jpg",
"error":null
然后,图片就直接展示出来了
这就是UEditor上传图片的过程
接下来就是如何把图片上传到第三方云存储上
上面的代码已经得到了文件的二进制形式和文件名
又拍云的用法
1、引入UpYun.cs文件
2、将原来上传的代码改为如下
 1    //上传到又拍云
 2         //年月日加上文件的MD5值作为文件名
 3     文件名        设置
 4         try
 5         {
 6
 7             // 域名http://amayergogh.b0.upaiyun.com/
 8             UpYun upyun = new UpYun("amayergogh", "admin1", "adminheheda");
 9
10             /// 设置待上传文件的 Content-MD5 值(如又拍云服务端收到的文件MD5值与用户设置的不一致,将回报 406 Not Acceptable 错误)
11             // upyun.setContentMD5(UpYun.md5_file(@"D:\"));
12             upyun.setContentMD5(CommonHelper.CalcMD5(uploadFileBytes));
13             bool uploadResult = upyun.writeFile(upYunFilePath, uploadFileBytes, true);
14             if (uploadResult == true)
15             {
16                 Result.Url = "又拍云地址    " + upYunFilePath;//返回给UEditor的插入编辑器的图片的src
17                 Result.State = UploadState.Success;
18             }
19             else
20             {
21                 Result.State = UploadState.FileAccessError;
22                 Result.ErrorMessage = "上传到又拍云失败";
23                 logger.Error("上传文件失败");
24             }
25         }
26         catch (Exception e)
27         {
28             Result.State = UploadState.FileAccessError;
29             Result.ErrorMessage = e.Message;
30             logger.Error("上传文件失败,发生异常:", e);
31         }
32         finally
33         {
34             WriteResult();
35         }
七牛云的用法:
还是比较麻烦的
1、引用SDK到项目中(好庞大) ,引用dll文件
2、获取 Access Key 和 Secret Key。
3、http://developer.qiniu.com/code/v6/sdk/csharp.html 官方文档上的文件上传方式是直接以文件的形式上传的
而我们这里想以流的方式上传
所以,改造PutFile
 1    public CallRet PutFile(string upToken, byte[] FileBytes, string key)
 2         {
 3
 4             PutAuthClient client = new PutAuthClient(upToken);
 5             CallRet ret;
 6             using (Stream fs=new MemoryStream(FileBytes))
 7             {
 8                 int block_cnt = block_count(fs.Length);
 9                 long fsize = fs.Length;
10                 extra.Progresses = new BlkputRet[block_cnt];
11                 byte[] byteBuf = new byte[BLOCKSIZE];
12                 int readLen = BLOCKSIZE;
13                 for (int i = 0; i < block_cnt; i++)
14                 {
15                     if (i == block_cnt - 1) {
16                         readLen = (int)(fsize - (long)i * BLOCKSIZE);
17                     }
18                     fs.Seek((long)i * BLOCKSIZE, SeekOrigin.Begin);
19                     fs.Read(byteBuf, 0, readLen);
20                     BlkputRet blkRet = ResumableBlockPut(client, byteBuf, i, readLen);
21                     if (blkRet == null)
22                     {
23                         extra.OnNotifyErr(new PutNotifyErrorEvent(i, readLen, "Make Block Error"));
24                     }
25                     else
26                     {
27                         extra.OnNotify(new PutNotifyEvent(i, readLen, extra.Progresses[i]));
28                     }
29                 }
30                 ret = Mkfile(client, key, fsize);
31             }
32             if (ret.OK)
33             {
34                 if (PutFinished != null)
35                 {
36                     PutFinished(this, ret);
37                 }
38             }
39             else
40             {
41                 if (PutFailure != null)
42                 {
43                     PutFailure(this, ret);
44                 }
45             }
46             return ret;
47         }
上传方法


 1       Qiniu.Conf.Config.ACCESS_KEY = "";
 2         Qiniu.Conf.Config.SECRET_KEY = "";
 3         string bucketName = ""; //空间名
 4         PutPolicy put = new PutPolicy(bucketName, 3600);
 5         string uptoken = put.Token();
 6         Settings setting = new Settings();
 7         ResumablePutExtra extra = new ResumablePutExtra();
 8         ResumablePut client = new ResumablePut(setting, extra);
 9
10         //设置上传的文件的key值  文件名
11         String key = 文件名
12         //调用PutFile()方法上传
13
14         try
15         {
16             CallRet callRet = client.PutFile(uptoken, uploadFileBytes, key);
17             if (callRet.OK == true)
18             {
19                 Result.Url = "http://o7clwdmua.bkt.clouddn.com/" + key;
20                 Result.State = UploadState.Success;
21             }
22             else
23             {
24                 Result.ErrorMessage = "失败了";
25             }
26         }
27         catch (Exception e)
28         {
29             Result.State = UploadState.FileAccessError;
30             Result.ErrorMessage = e.Message;
31             logger.Error("上传文件失败,发生异常:", e);
32         }
33         finally
34         {
35             WriteResult();
36         }
总结:UEditor很强大