摘要:
多线程 importorg.springframework.context.annotation.ComponentScan;importorg.springframework.context.annotation.Configuration;
Spring通过任务执行器(TaskExecutor)来实现多线程和并发编程。使用ThreadPoolTaskExecutor可实现一个基于线程池的TaskExecutor。而实际开发中任务一般是非阻碍的,即异步的,所以我们要在配置类中通过@EnableAsync开启对异步任务的支持,并通过在实际执行的Bean的方法中使用@Async注解声明其是一个异步任务。
此外,还提供一种Java的实现方式,多种方式去尝试如何去实现多线程。
实现一、基于Spring
1、配置类
import java.util.concurrent.Executor;

import org.springframework.aop.interceptor.AsyncUncaughtExceptionHandler;
import org.springframework.context.annotation.ComponentScan;
import org.springframework.context.annotation.Configuration;
import org.springframework.scheduling.annotation.AsyncConfigurer;
import org.springframework.scheduling.annotation.EnableAsync;
import org.springframework.scheduling.concurrent.ThreadPoolTaskExecutor;

/**
 * @Description: 配置类实现AsyncConfigurer接口,并重写getAsyncExecutor方法,并返回一个ThreadPoolTaskExecutor,
 * 这样我们就获得一个基于线程池TaskExecutor
 * @ClassName: CustomMultiThreadingConfig
 * @Author: OnlyMate
 * @Date: 2018年9月21日 下午2:50:14
 */
@Configuration
@ComponentScan("com.only.mate.springboot.multithreading")
@EnableAsync//利用@EnableAsync注解开启异步任务支持
public class CustomMultiThreadingConfig implements AsyncConfigurer{

    @Override
    public Executor getAsyncExecutor() {
        ThreadPoolTaskExecutor taskExecutor = new ThreadPoolTaskExecutor();
        taskExecutor.setCorePoolSize(5);
        taskExecutor.setMaxPoolSize(10);
        taskExecutor.setQueueCapacity(25);
        taskExecutor.initialize();
        return taskExecutor;
    }

    @Override
    public AsyncUncaughtExceptionHandler getAsyncUncaughtExceptionHandler() {
        return AsyncConfigurer.super.getAsyncUncaughtExceptionHandler();
    }

}
2、创建线程任务
import org.slf4j.Logger;
import org.slf4j.LoggerFactory;
import org.springframework.scheduling.annotation.Async;
import org.springframework.stereotype.Service;

/**
 * @Description: 创建线程任务服务
 * @ClassName: CustomMultiThreadingService
 * @Author: OnlyMate
 * @Date: 2018年9月21日 下午3:17:57
 */
@Service
public class CustomMultiThreadingService {
    private Logger logger = LoggerFactory.getLogger(CustomMultiThreadingService.class);
    /**
     * @Description:通过@Async注解表明该方法是一个异步方法,
     * 如果注解在类级别上,则表明该类所有的方法都是异步方法,而这里的方法自动被注入使用ThreadPoolTaskExecutor作为TaskExecutor
     * @Title: executeAysncTask1
     * @Date: 2018年9月21日 下午2:54:32
     * @Author: OnlyMate
     * @Throws
     * @param i
     */
    @Async
    public void executeAysncTask1(Integer i){
        logger.info("CustomMultiThreadingService ==> executeAysncTask1 method: 执行异步任务{} ", i);
    }

    /**
     * @Description:通过@Async注解表明该方法是一个异步方法,
     * 如果注解在类级别上,则表明该类所有的方法都是异步方法,而这里的方法自动被注入使用ThreadPoolTaskExecutor作为TaskExecutor
     * @Title: executeAsyncTask2
     * @Date: 2018年9月21日 下午2:55:04
     * @Author: OnlyMate
     * @Throws
     * @param i
     */
    @Async
    public void executeAsyncTask2(Integer i){
        logger.info("CustomMultiThreadingService ==> executeAsyncTask2 method: 执行异步任务{} ", i);
    }
}
3、触发线程任务
import org.springframework.beans.factory.annotation.Autowired;
import org.springframework.stereotype.Controller;
import org.springframework.web.bind.annotation.RequestMapping;
import org.springframework.web.bind.annotation.ResponseBody;

import com.only.mate.springboot.multithreading.CustomMultiThreadingService;

/**
 * @Description:自定义多线程Controller
 * @ClassName: CustomMultiThreadingController
 * @Author: OnlyMate
 * @Date: 2018年9月21日 下午3:02:49
 */
@Controller
@RequestMapping(value="/multithreading")
public class CustomMultiThreadingController {
    @Autowired
    private CustomMultiThreadingService customMultiThreadingService;

    @ResponseBody
    @RequestMapping(value="/dotask")
    public String doTask() {
        for (int i=0;i<10;i++){
            customMultiThreadingService.executeAysncTask1(i);
            customMultiThreadingService.executeAsyncTask2(i);
        }

        return "success";
    }
}
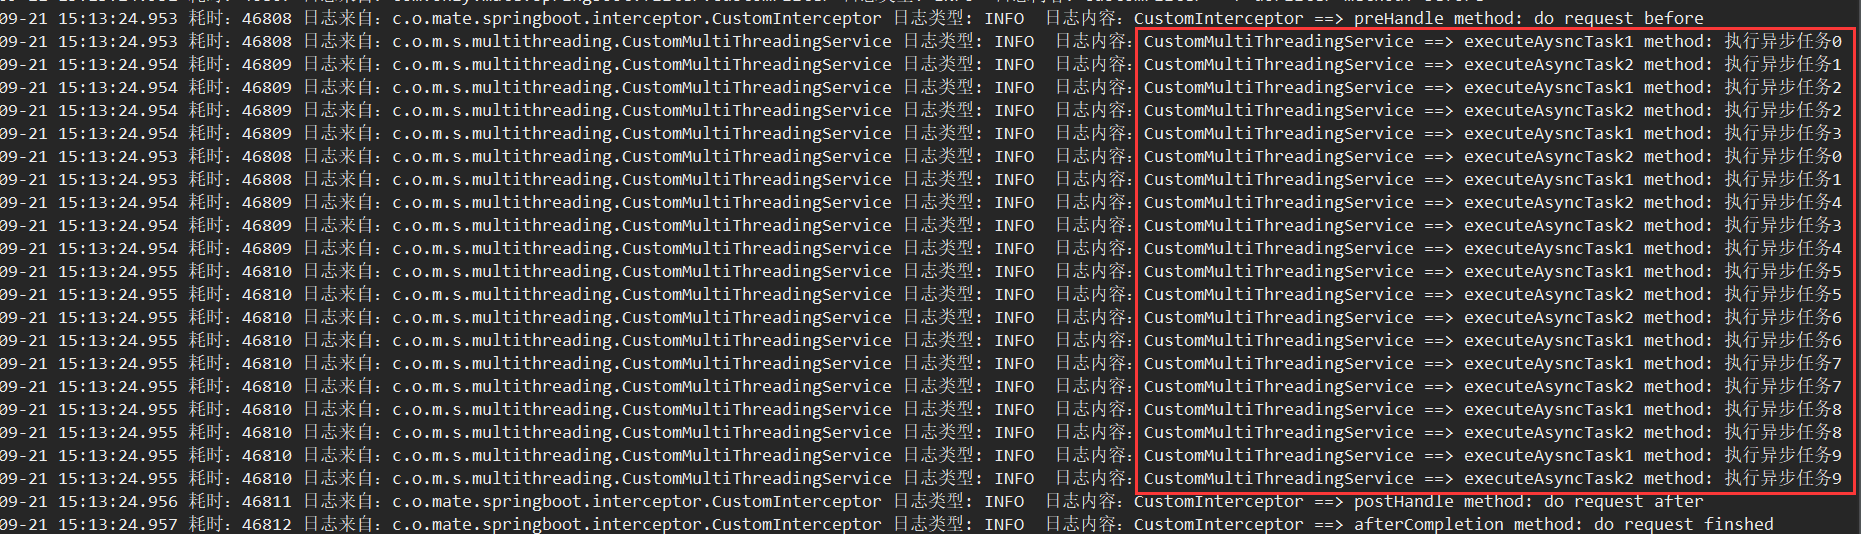
4、效果图
访问http://localhost:8088/springboot/multithreading/dotask
二、基于Java
1、异步线程调度管理器
import java.util.concurrent.BlockingQueue;
import java.util.concurrent.LinkedBlockingQueue;
import java.util.concurrent.ThreadPoolExecutor;
import java.util.concurrent.TimeUnit;

/**
 * @Description: 异步线程调度管理器
 * @ClassName: CustomAsyncScheduler
 * @Author: OnlyMate
 * @Date: 2018年9月21日 下午3:25:40
 */
public class CustomAsyncScheduler {
    private volatile static CustomAsyncScheduler instance;
    private static ThreadPoolExecutor chnlBackendQueryPool;

    private CustomAsyncScheduler() {
    }

    @SuppressWarnings({ "rawtypes", "static-access", "unchecked" })
    public static CustomAsyncScheduler getInstance() {
        if (instance == null) {
            synchronized (CustomAsyncScheduler.class) {
                if (instance == null) {
                    instance = new CustomAsyncScheduler();

                    BlockingQueue queue = new LinkedBlockingQueue();
                    chnlBackendQueryPool = new ThreadPoolExecutor(50, 100, 30, TimeUnit.SECONDS, queue);
                    chnlBackendQueryPool.allowCoreThreadTimeOut(true);
                    instance.setChnlBackendQueryPool(chnlBackendQueryPool);
                }
            }
        }
        return instance;
    }

    public ThreadPoolExecutor getChnlBackendQueryPool() {
        return chnlBackendQueryPool;
    }

    public static void setChnlBackendQueryPool(ThreadPoolExecutor chnlBackendQueryPool) {
        CustomAsyncScheduler.chnlBackendQueryPool = chnlBackendQueryPool;
    }

    public static void setInstance(CustomAsyncScheduler instance) {
        CustomAsyncScheduler.instance = instance;
    }

}
2、创建线程任务
import org.slf4j.Logger;
import org.slf4j.LoggerFactory;
import org.springframework.scheduling.annotation.Async;
import org.springframework.stereotype.Service;

/**
 * @Description: 创建线程任务服务
 * @ClassName: CustomMultiThreadingService
 * @Author: OnlyMate
 * @Date: 2018年9月21日 下午3:17:57
 */
@Service
public class CustomMultiThreadingService {
    private Logger logger = LoggerFactory.getLogger(CustomMultiThreadingService.class);
    /**
     * @Description:通过@Async注解表明该方法是一个异步方法,
     * 如果注解在类级别上,则表明该类所有的方法都是异步方法,而这里的方法自动被注入使用ThreadPoolTaskExecutor作为TaskExecutor
     * @Title: executeAysncTask1
     * @Date: 2018年9月21日 下午2:54:32
     * @Author: OnlyMate
     * @Throws
     * @param i
     */
    @Async
    public void executeAysncTask1(Integer i){
        logger.info("CustomMultiThreadingService ==> executeAysncTask1 method: 执行异步任务{} ", i);
    }

    /**
     * @Description:通过@Async注解表明该方法是一个异步方法,
     * 如果注解在类级别上,则表明该类所有的方法都是异步方法,而这里的方法自动被注入使用ThreadPoolTaskExecutor作为TaskExecutor
     * @Title: executeAsyncTask2
     * @Date: 2018年9月21日 下午2:55:04
     * @Author: OnlyMate
     * @Throws
     * @param i
     */
    @Async
    public void executeAsyncTask2(Integer i){
        logger.info("CustomMultiThreadingService ==> executeAsyncTask2 method: 执行异步任务{} ", i);
    }

    /**
     * @Description: 异步线程调度管理器创建线程任务
     * @Title: executeAsyncTask3
     * @Date: 2018年9月21日 下午3:32:28
     * @Author: OnlyMate
     * @Throws
     * @param i
     */
    public void executeAsyncTask3(Integer i){
        CustomAsyncScheduler.getInstance().getChnlBackendQueryPool().execute(new Runnable() {
            @Override
            public void run() {
                logger.info("CustomMultiThreadingService ==> executeAsyncTask3 method: 执行异步任务{} ", i);
            }
        });

    }
}
3、触发线程任务
import org.springframework.beans.factory.annotation.Autowired;
import org.springframework.stereotype.Controller;
import org.springframework.web.bind.annotation.RequestMapping;
import org.springframework.web.bind.annotation.ResponseBody;

import com.only.mate.springboot.multithreading.CustomMultiThreadingService;

/**
 * @Description:自定义多线程Controller
 * @ClassName: CustomMultiThreadingController
 * @Author: OnlyMate
 * @Date: 2018年9月21日 下午3:02:49
 */
@Controller
@RequestMapping(value="/multithreading")
public class CustomMultiThreadingController {
    @Autowired
    private CustomMultiThreadingService customMultiThreadingService;

    @ResponseBody
    @RequestMapping(value="/dotask")
    public String doTask() {
        for (int i=0;i<10;i++){
            customMultiThreadingService.executeAysncTask1(i);
            customMultiThreadingService.executeAsyncTask2(i);
        }

        return "success";
    }

    @ResponseBody
    @RequestMapping(value="/dojob")
    public String doJob() {
        for (int i=0;i<10;i++){
            customMultiThreadingService.executeAysncTask1(i);
            customMultiThreadingService.executeAsyncTask2(i);
            customMultiThreadingService.executeAsyncTask3(i);
        }
        return "success";
    }
}
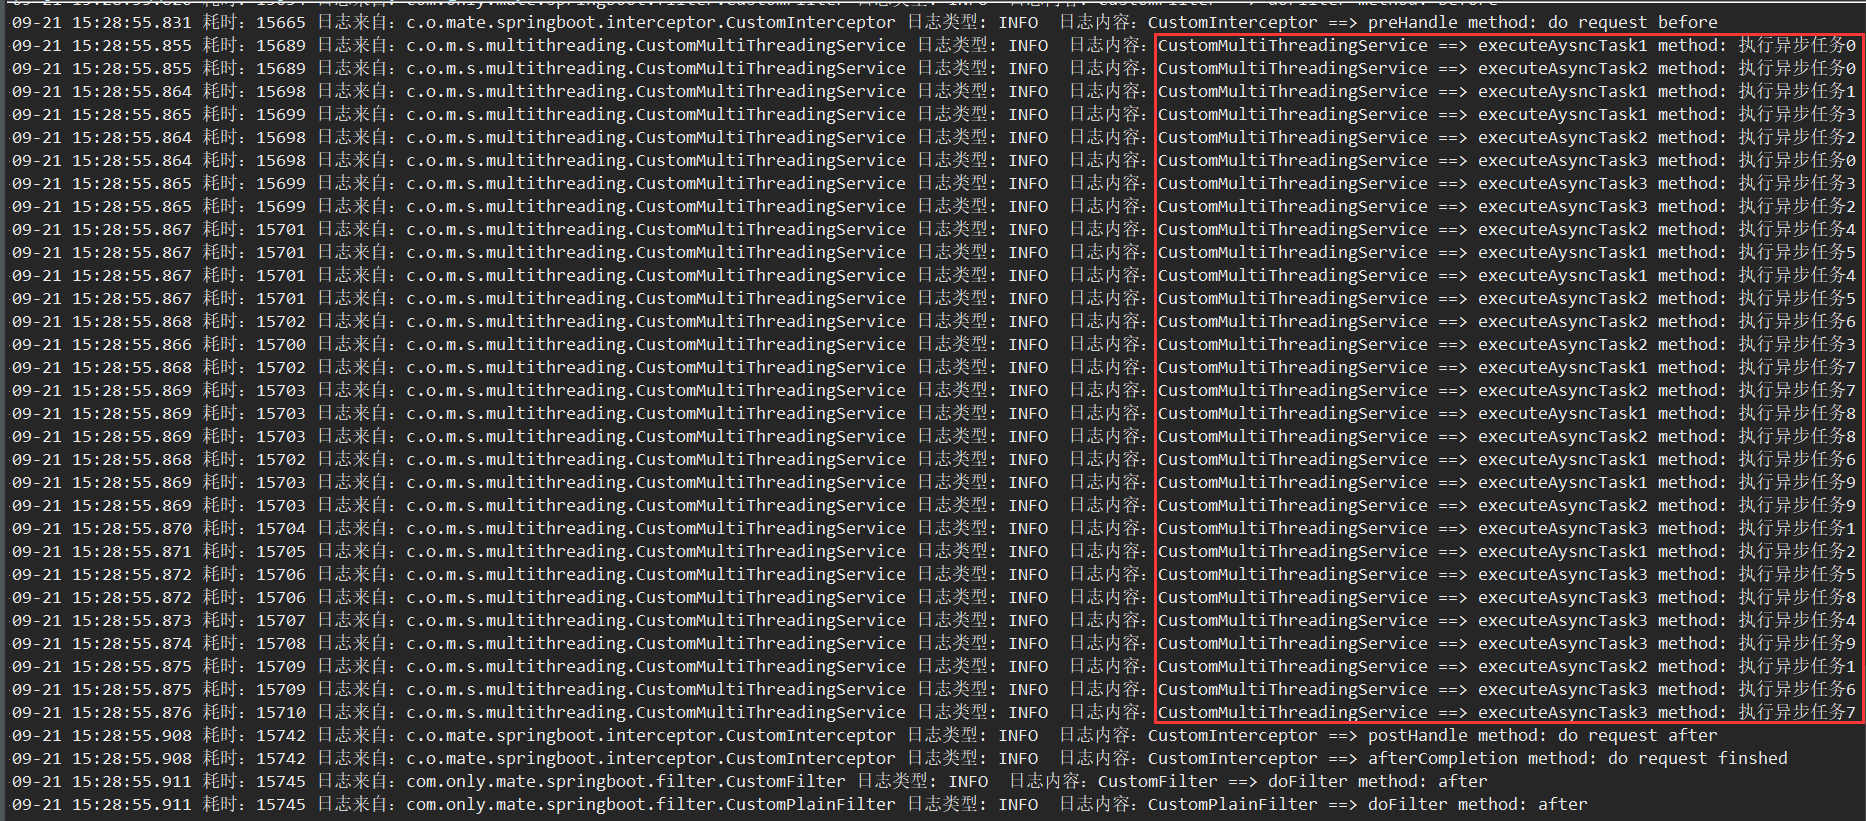
4、效果图
访问http://localhost:8088/springboot/multithreading/dojob