摘要:
spring boot管理服务版本>;/spring boot管理服务版本>;&书信电报;春季启动管理服务器<;${spring boot admin serve.version}<;1.5.7<;偏心<;版本>;/版本>;&书信电报;
spring-boot admin的github地址:https://github.com/codecentric/spring-boot-admin
本文基于SpringCloud的环境和配置上增加配置信息,而不是从0开始的配置。
一、搭建admin服务端
1、引入pom
<properties>
    <spring-boot-admin-starter-client.version>1.5.6</spring-boot-admin-starter-client.version>
    <spring-boot-admin-serve.version>1.5.7</spring-boot-admin-serve.version>
    <spring-boot-admin-serve-ui.version>1.5.7</spring-boot-admin-serve-ui.version>
</properties>

<dependencies>
    <!-- 增加admin server 和 ui支持 -->
    <dependency>
        <groupId>de.codecentric</groupId>
        <artifactId>spring-boot-admin-server</artifactId>
        <version>${spring-boot-admin-serve.version}</version>
    </dependency>
    <dependency>
        <groupId>de.codecentric</groupId>
        <artifactId>spring-boot-admin-server-ui</artifactId>
        <version>${spring-boot-admin-serve-ui.version}</version>
    </dependency>

    <!-- 增加对hystrix的UI支持,需要服务依赖了hystrix -->
    <dependency>
        <groupId>de.codecentric</groupId>
        <artifactId>spring-boot-admin-server-ui-hystrix</artifactId>
        <version>1.5.7</version>
    </dependency>
    <!-- 增加对turbine的集成支持,需要指定相关turbine参数信息 -->
    <dependency>
        <groupId>de.codecentric</groupId>
        <artifactId>spring-boot-admin-server-ui-turbine</artifactId>
        <version>1.5.4</version>
    </dependency>
</dependencies>
2、application.properties
# 应用名称
# 这个变量必须写在这里,因为项目启动的时候需要记录日志文件,如果写在git上讲导致生成bootstrap.log和springAppName_IS_UNDEFINED.log
spring.application.name=crm-admin-server
# 服务端口
server.port=21500

spring.profiles.active=local
# 非本地的启动,注册中心采用启动参数传入,本地测试也在启动参数中注入
eureka.client.serviceUrl.defaultZone=http://127.0.0.1:20000/eureka/

eureka.instance.lease-renewal-interval-in-seconds=2
eureka.instance.lease-expiration-duration-in-seconds=6
eureka.instance.preferIpAddress=true
eureka.client.registryFetchIntervalSeconds=2

#禁用管理的鉴权
management.security.enabled=false
#开启shutdown
endpoints.shutdown.enabled=true
#禁用shutdown的鉴权
endpoints.shutdown.sensitive=false
#开启重启支持
endpoints.restart.enabled=true

#admin管理的端点(actuator)
spring.boot.admin.routes.endpoints=env,metrics,dump,jolokia,info,configprops,trace,logfile,refresh,flyway,liquibase,heapdump,loggers,auditevents,hystrix.stream
# turbine服务id
spring.boot.admin.turbine.location=crm-turbine
3、Main方法
import org.springframework.boot.SpringApplication;
import org.springframework.boot.autoconfigure.SpringBootApplication;
import org.springframework.cloud.client.discovery.EnableDiscoveryClient;

import de.codecentric.boot.admin.config.EnableAdminServer;

@SpringBootApplication
@EnableDiscoveryClient
@EnableAdminServer
public class CrmAdminServerApplication {
    public static void main(String[] args) {
        SpringApplication.run(CrmAdminServerApplication.class, args);
    }
}
二、admin客户端
1、引用pom
对于SpringCloud项目来说会默认依赖actuator,只要再加入如下依赖即可
<dependency>
      <groupId>org.jolokia</groupId>
      <artifactId>jolokia-core</artifactId>
</dependency>
当然,简单省事的方案就是直接引用spring-boot-admin-starter-client
<dependency>
    <groupId>de.codecentric</groupId>
    <artifactId>spring-boot-admin-starter-client</artifactId>
</dependency>
2、application.properties
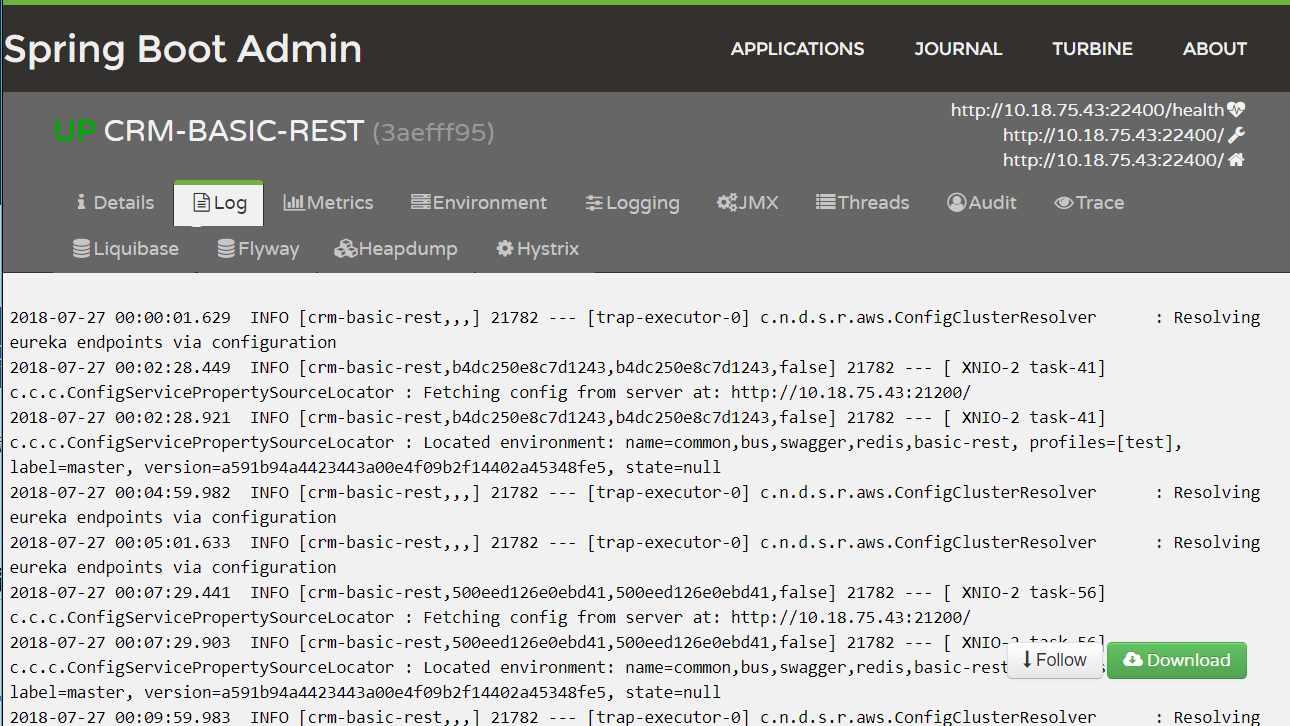
# 禁用actuator管理端鉴权
management.security.enabled=false
# 启用shutdown   host:port/shutdown
endpoints.shutdown.enabled=true
# 禁用密码验证
endpoints.shutdown.sensitive=false
# 开启重启支持
endpoints.restart.enabled=true

# admin的log选项卡用
logging.file=/data/logs/crm/${spring.application.name}.log
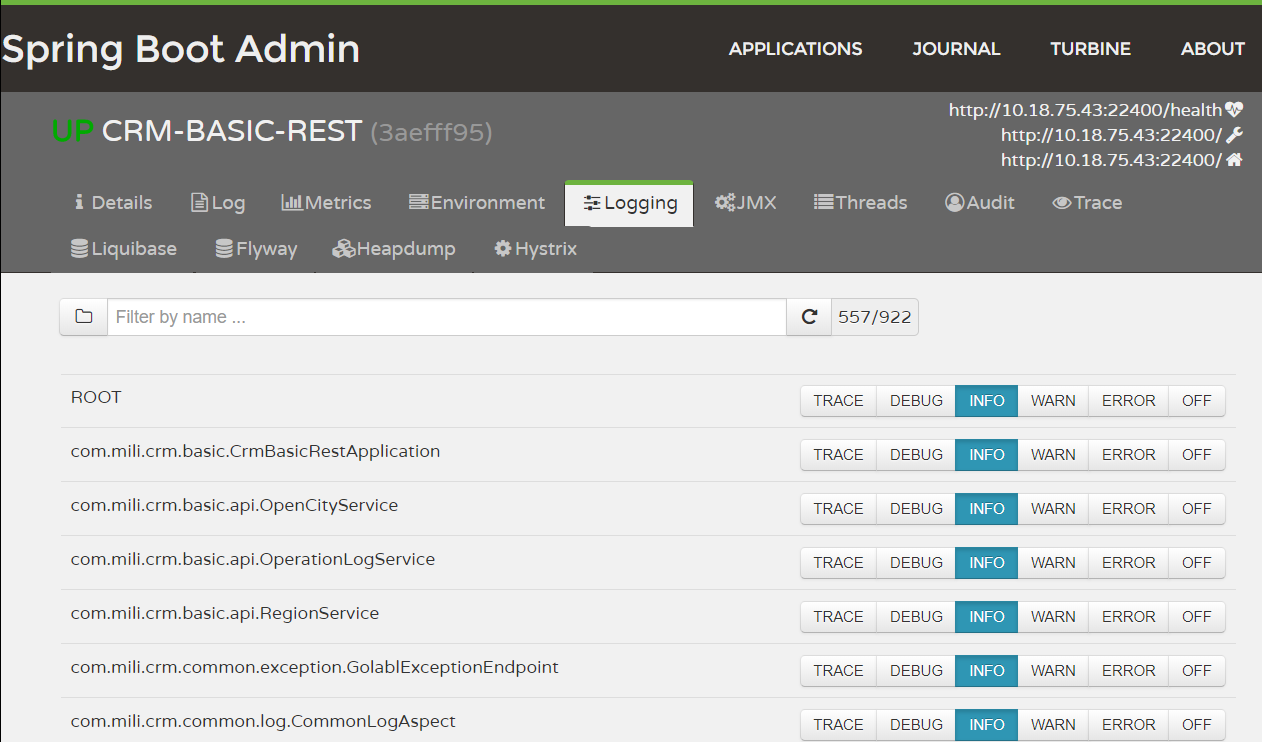
3、logback-spring.xml中增加对JMX的支持
<configuration>
    <include resource="org/springframework/boot/logging/logback/defaults.xml" />

    <jmxConfigurator/>
这样做的好处是可以在admin的ui界面动态改变某些的日志级别。
三、访问Spring Boot Admin UI界面

Admin Server的配置文件:
spring.boot.admin.routes.endpoints=env,metrics,dump,jolokia,info,configprops,trace,logfile,restart,shutdown,refresh,heapdump,loggers,auditevents,hystrix.stream
# turbine服务id
spring.boot.admin.turbine.location=crm-admin-server

spring.boot.admin.turbine.clusters=default
turbine.clusterNameExpression=new String("default")
#设置需要监控的serviceId
turbine.app-config=crm-security-rest,crm-security-service,crm-basic-rest,crm-basic-service,crm-customer-open-service,crm-customer-rest,crm-customer-service,crm-report-rest,crm-report-service,crm-gateway,crm-inside-gateway
#同一主机上的服务通过host和port的组合来进行区分
turbine.combine-host-port=true

spring.mail.host=smtp.exmail.qq.com
spring.mail.username=xx@qq.com
spring.mail.password=xxxxxx

spring.mail.properties.mail.smtp.auth=true
spring.mail.properties.mail.smtp.starttls.enable=true
spring.mail.properties.mail.smtp.starttls.required=true
spring.mail.properties.mail.smtp.ssl.enable=true
spring.mail.properties.mail.smtp.socket.factory.class=javax.net.ssl.SSLSocketFactory
spring.mail.properties.mail.smtp.socket.factory.fallback=false
spring.mail.properties.mail.smtp.port=465
spring.mail.properties.mail.transport.protocol=smtp

#需要忽略的状态改变通知,逗号分隔,例如不通知离线到上线的状态,则填写为OFFLINE:UP
#spring.boot.admin.notify.mail.ignore-changes=
#接收通知的邮箱地址,逗号分隔
spring.boot.admin.notify.mail.to=yangzhilong@qq.com
#需要抄送的邮箱地址,逗号分隔
#spring.boot.admin.notify.mail.cc=test1@qq.com
#邮件发送者,大部分情况与登录名相同
spring.boot.admin.notify.mail.from=${spring.mail.username}
#邮件主题,默认是:#{application.name} (#{application.id}) is #{to.status}
spring.boot.admin.notify.mail.subject=${spring.profiles.active} profile's #{application.name} (#{application.id}) is #{to.status}
#邮件内容,默认是:#{application.name} (#{application.id})
status changed from #{from.status} to #{to.status}

#{application.healthUrl}
spring.boot.admin.notify.mail.text=${spring.profiles.active} profile's #{application.name} (#{application.id})
status changed from #{from.status} to #{to.status}
#Comma-delimited list of status changes to be ignored. Format: "<from-status>:<to-status>". Wildcards allowed.默认值:"UNKNOWN:UP"
#spring.boot.admin.notify.mail.ignore-changes=