摘要:
Rancher2的单节点部署很简单1sudodockerrun-d--restart=unless-stopped-p80:80-p443:443rancher/rancherViewCodeRancher2的多节点HA部署在2.0.8之前需要直接rke部署,升级也比较麻烦,2.0.8以后的版本使用helm部署,相对于之前的版本在部署和升级上面好了很多,记录如下:2.0.8之前版本的部署需要ran
Rancher2的单节点部署很简单


1 sudo docker run -d --restart=unless-stopped -p 80:80 -p 443:443 rancher/rancher
Rancher2的多节点HA部署在2.0.8之前需要直接rke部署,升级也比较麻烦,2.0.8以后的版本使用helm部署,相对于之前的版本在部署和升级上面好了很多,记录如下:
2.0.8之前版本的部署需要rancher-cluster.yml文件
1 nodes:
2   - address: 192.168.40.104 # hostnameor IP to access nodes
3     user: root # root user (usually 'root')
4     role: [controlplane,etcd,worker] # K8s roles fornode
5     ssh_key_path: ~/.ssh/id_rsa # path to PEM file
6   - address: 192.168.40.105
7 user: root
8 role: [controlplane,etcd,worker]
9     ssh_key_path: ~/.ssh/id_rsa
10   - address: 192.168.40.106
11 user: root
12 role: [controlplane,etcd,worker]
13     ssh_key_path: ~/.ssh/id_rsa
14
15 services:
16 etcd:
17     snapshot: true
18 creation: 6h
19 retention: 24h
20
21 addons: |-
22   ---
23 kind: Namespace
24 apiVersion: v1
25 metadata:
26     name: cattle-system
27   ---
28 kind: ServiceAccount
29 apiVersion: v1
30 metadata:
31     name: cattle-admin
32     namespace: cattle-system
33   ---
34 kind: ClusterRoleBinding
35   apiVersion: rbac.authorization.k8s.io/v1
36 metadata:
37     name: cattle-crb
38     namespace: cattle-system
39 subjects:
40   -kind: ServiceAccount
41     name: cattle-admin
42     namespace: cattle-system
43 roleRef:
44 kind: ClusterRole
45     name: cluster-admin
46 apiGroup: rbac.authorization.k8s.io
47   ---
48 apiVersion: v1
49 kind: Secret
50 metadata:
51     name: cattle-keys-ingress
52     namespace: cattle-system
53 type: Opaque
54 data:
55 tls.crt: #添加自己的证书
56 tls.key: #添加自己的证书
57   ---
58 apiVersion: v1
59 kind: Secret
60 metadata:
61     name: cattle-keys-server
62     namespace: cattle-system
63 type: Opaque
64 data:
65 cacerts.pem: #添加自己的证书
66   ---
67 apiVersion: v1
68 kind: Service
69 metadata:
70     namespace: cattle-system
71     name: cattle-service
72 labels:
73 app: cattle
74 spec:
75 ports:
76     - port: 80
77       targetPort: 80
78 protocol: TCP
79 name: http
80     - port: 443
81       targetPort: 443
82 protocol: TCP
83 name: https
84 selector:
85 app: cattle
86   ---
87   apiVersion: extensions/v1beta1
88 kind: Ingress
89 metadata:
90     namespace: cattle-system
91     name: cattle-ingress-http
92 annotations:
93       nginx.ingress.kubernetes.io/proxy-connect-timeout: "30"
94       nginx.ingress.kubernetes.io/proxy-read-timeout: "1800"   # Max time in seconds forws to remain shell window open
95       nginx.ingress.kubernetes.io/proxy-send-timeout: "1800"   # Max time in seconds forws to remain shell window open
96 spec:
97 rules:
98     -host:   # FQDN to access cattle server
99 http:
100 paths:
101         -backend:
102             serviceName: cattle-service
103             servicePort: 80
104 tls:
105     - secretName: cattle-keys-ingress
106 hosts:
107       -# FQDN to access cattle server
108   ---
109 kind: Deployment
110   apiVersion: extensions/v1beta1
111 metadata:
112     namespace: cattle-system
113 name: cattle
114 spec:
115     replicas: 1
116 template:
117 metadata:
118 labels:
119 app: cattle
120 spec:
121         serviceAccountName: cattle-admin
122 containers:
123         # Rancher install via RKE addons is only supported up to v2.0.8
124         - image: rancher/rancher:stable
125 imagePullPolicy: Always
126           name: cattle-server
127   #       env:
128   #       -name: HTTP_PROXY
129   #         value: "http://your_proxy_address:port"
130   #       -name: HTTPS_PROXY
131   #         value: "http://your_proxy_address:port"
132   #       -name: NO_PROXY
133   #         value: "localhost,127.0.0.1,0.0.0.0,10.43.0.0/16,your_network_ranges_that_dont_need_proxy_to_access"
134 livenessProbe:
135 httpGet:
136               path: /ping
137               port: 80
138             initialDelaySeconds: 60
139             periodSeconds: 60
140 readinessProbe:
141 httpGet:
142               path: /ping
143               port: 80
144             initialDelaySeconds: 20
145             periodSeconds: 10
146 ports:
147           - containerPort: 80
148 protocol: TCP
149           - containerPort: 443
150 protocol: TCP
151 volumeMounts:
152           - mountPath: /etc/rancher/ssl
153             name: cattle-keys-volume
154             readOnly: true
155 volumes:
156         - name: cattle-keys-volume
157 secret:
158             defaultMode: 420
159             secretName: cattle-keys-server
2.0.8之后的rancher-cluster.yml文件要简洁很多
1 nodes:
2   - address: 192.168.40.104 # hostnameor IP to access nodes
3     internal_address: 192.168.40.104
4     user: root # root user (usually 'root')
5     role: [controlplane,etcd,worker] # K8s roles fornode
6     ssh_key_path: ~/.ssh/id_rsa # path to PEM file
7   - address: 192.168.40.105
8     internal_address: 192.168.40.105
9 user: root
10 role: [controlplane,etcd,worker]
11     ssh_key_path: ~/.ssh/id_rsa
12   - address: 192.168.40.106
13     internal_address: 192.168.40.106
14 user: root
15 role: [controlplane,etcd,worker]
16     ssh_key_path: ~/.ssh/id_rsa
17
18 services:
19 etcd:
20     snapshot: true
21 creation: 6h
22     retention: 24h
这里我设置三个节点做HA,关于架构借用rancher官方的图
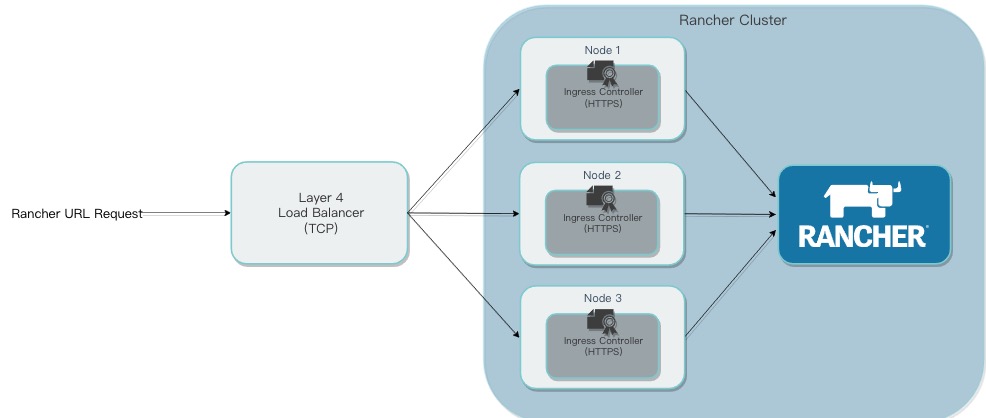
LB使用nginx,单独部署,不建议使用容器,直接部署实体就行,nginx.conf文件中要使用stream模块负责LB
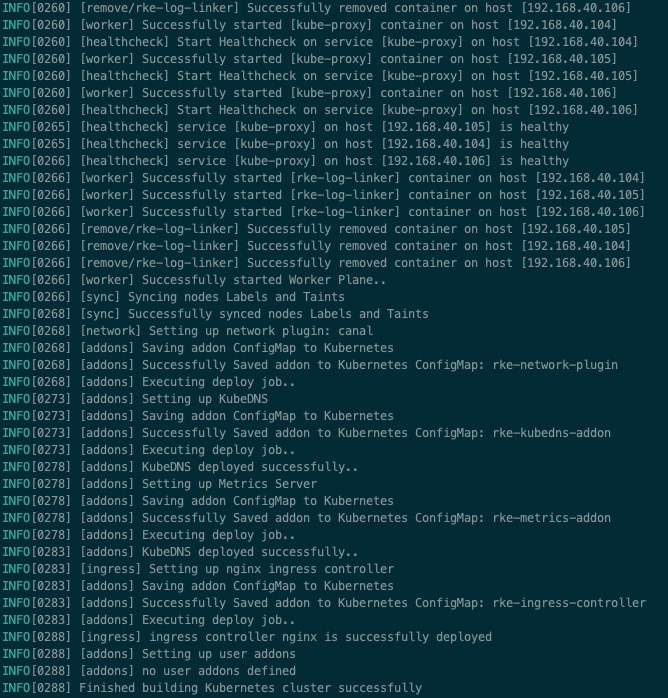
通过rke部署三个节点的k8s集群
rke up --config ./rancher-cluster.yml
部署完成后,在当前目录会生成kube_config_rancher-cluster.yml文件,这个文件要保留好,后期升级是不要使用的
export KUBECONFIG=$(pwd)/kube_config_rancher-cluster.yml
创建tiller 的pod
kubectl -n kube-system create serviceaccount tiller
kubectl create clusterrolebinding tiller --clusterrole cluster-admin --serviceaccount=kube-system:tiller
helm init --service-account tiller --tiller-image registry.cn-hangzhou.aliyuncs.com/google_containers/tiller:v2.11.0查看所有的pod
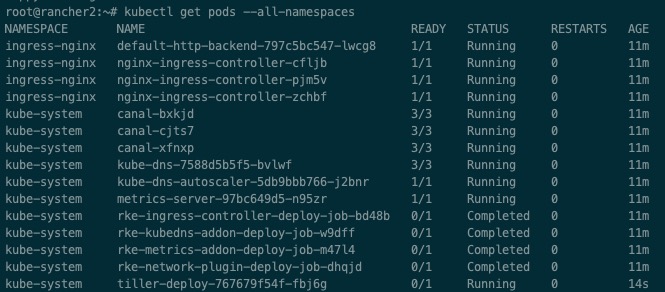
查看helm和tiller是否成功

部署rancher,需要把rancher加入helm的repository中
helm repo add rancher-stable https://releases.rancher.com/server-charts/stable
helm repo update
因为有自己的证书,所以在安装时候不用cert-manager工具
helm install rancher-stable/rancher --name rancher --namespace cattle-system --set hostname=(nginx中的域名) --set ingress.tls.source=secret

添加证书
kubectl -n cattle-system create secret tls tls-rancher-ingress --cert=tls.crt --key=tls.key
kubectl -n cattle-system create secret generic tls-ca --from-file=cacerts.pemrancher2HA模式部署完成
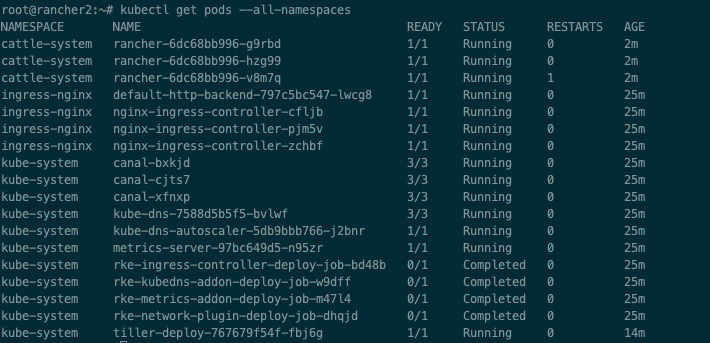
进入rancher2后,会发现一个local的k8s集群
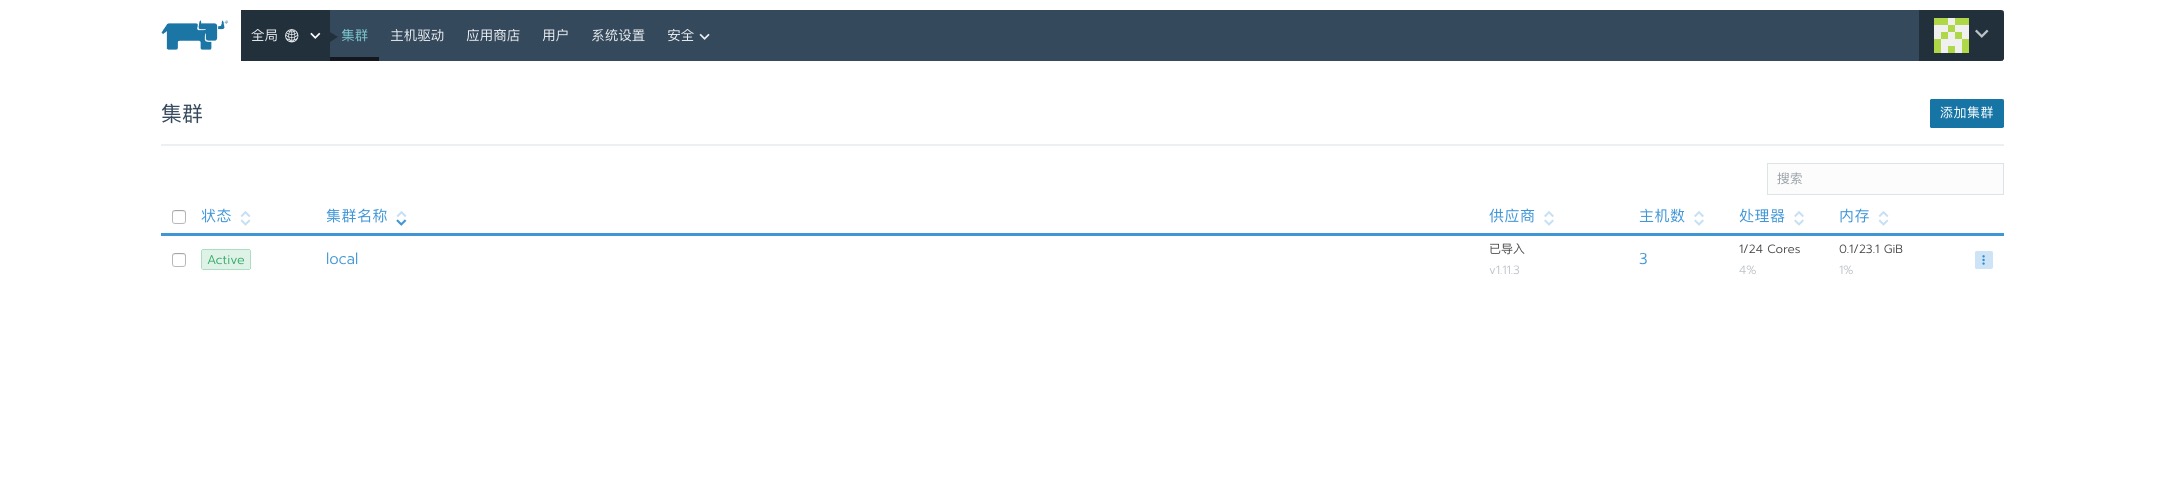
到此,rancher2.x(2.0.8以上版本)HA模式部署完成