为了完成这个需求,花了几天时间,各种求助。对于我这个菜鸟初学者而言确实有些难度。
在此整理一下,希望大家少走弯路。可能没考虑内存泄露等方面,因为我还没看这方面的东西,只满足需求先。
新建一个cocos2dx项目OpenCamera
由于要使用Cpp和OC混编,我们基于Cpp建一个混编类。
即先建一个C++类,再改后缀名到mm,主编码风格使用C++的。
在ios文件夹下新建C++类UtilBridge
将UtilBridge.cpp改名为UtilBridge.mm,在文件中随便打个空格保存一下。
声明静态方法后,各文件如下:
.h
 1 //
 2 //  UtilBridge.h
 3 //  OpenCamera
 4 //
 5 //  Created by HanHongmin on 13-12-30.
 6 //
 7 //
 8
 9 #ifndef __OpenCamera__UtilBridge__
10 #define __OpenCamera__UtilBridge__
11
12 #include "cocos2d.h"
13 using namespace cocos2d;
14 class UtilBridge:public CCObject{
15 public:
16     static void openCamera();
17 };
18
19 #endif /* defined(__OpenCamera__UtilBridge__) */
.mm
 1 //
 2 //  UtilBridge.cpp
 3 //  OpenCamera
 4 //
 5 //  Created by HanHongmin on 13-12-30.
 6 //
 7 //
 8
 9 #include "UtilBridge.h"
10
11 void UtilBridge::openCamera(){
12
13 }
打开ios摄像头等要用到oc代码,大家可以去搜一下原理。这里要用到一个代理类,我没有改RootViewController,而是新写了一个OC类,这么干我不知道会不会有问题,如果有请大家指出。
新建OC类PickerDelegate继承NSObject,文件创建好之后在声明中加上所需接口,之后文件内容如下:
.h
 1 //
 2 //  PickerDelegate.h
 3 //  OpenCamera
 4 //
 5 //  Created by HanHongmin on 13-12-30.
 6 //
 7 //
 8
 9 #import <Foundation/Foundation.h>
10
11 @interface PickerDelegate : NSObject<UINavigationControllerDelegate,UIImagePickerControllerDelegate>
12
13 @end
.m
 1 //
 2 //  PickerDelegate.m
 3 //  OpenCamera
 4 //
 5 //  Created by HanHongmin on 13-12-30.
 6 //
 7 //
 8
 9 #import "PickerDelegate.h"
10
11 @implementation PickerDelegate
12
13
14 -(id) init
15 {
16     if(self = [super init])
17     {
18     }
19     return self;
20 }
21
22 - (void)imagePickerController:(UIImagePickerController *)picker didFinishPickingMediaWithInfo:(NSDictionary *)info
23 {
24     //CCLog("selected");
25     //处理数据
26     UIImage* image = [info valueForKey:UIImagePickerControllerOriginalImage];
27
28     [picker dismissModalViewControllerAnimated: YES];
29     [picker release];
30 }
31
32
33 - (void)imagePickerControllerDidCancel:(UIImagePickerController *)picker
34 {
35     //CCLog("cancle");
36     [picker dismissModalViewControllerAnimated: YES];
37     [picker release];
38 }
39
40 @end
回到UtilBridge.mm实现openCamera方法
注意:在mm中#include "PickerDelegate.h",不要写道.h文件中。
#include "PickerDelegate.h"

void UtilBridge::openCamera(){

    UIImagePickerController *picker = [[UIImagePickerController alloc] init];
    //设置图像来源类型(先判断系统中哪种图像源是可用的)
    if ([UIImagePickerController isSourceTypeAvailable:UIImagePickerControllerSourceTypeCamera]) {
        picker.sourceType = UIImagePickerControllerSourceTypeCamera;
    }else if([UIImagePickerController isSourceTypeAvailable:UIImagePickerControllerSourceTypePhotoLibrary]){
        picker.sourceType = UIImagePickerControllerSourceTypePhotoLibrary;
    }else {
        picker.sourceType = UIImagePickerControllerSourceTypeSavedPhotosAlbum;
    }

    PickerDelegate* delegate = [[PickerDelegate alloc] init];
    picker.delegate = delegate;
    [[UIApplication sharedApplication].keyWindow.rootViewController presentModalViewController:picker animated:YES];

}
在HelloWorld::init方法中调用openCamera
bool HelloWorld::init()
{
    if ( !CCLayer::init() )
    {
        return false;
    }
    UtilBridge::openCamera();
    return true;
}
运行一下,报错了...
貌似跟横竖屏有关,把项目调整到竖屏,再试试。我的需求就是竖屏,所以深层次的原因我就不找啦~~~
模拟器没有摄像头设备,所以打开的是图库,试摄像头要到真机上。
我们在PickerDelegate中能够拿到UIImage,拿到后转变成cocos2dx可用的格式,回调HelloWord的方法再干一些事,比如显示出来。
关于把方法当参数传进来之类的我一概不懂,所以在PickerDelegate中直接调HelloWorld,所以.m改成.mm以实现混编。
我们先说UIImage的数据转换
- (void)imagePickerController:(UIImagePickerController *)picker didFinishPickingMediaWithInfo:(NSDictionary *)info
{
    //CCLog("selected");
    //处理数据
    UIImage* image = [info valueForKey:UIImagePickerControllerOriginalImage];

    CGImageRef imageRef = [image CGImage];
    NSUInteger width = CGImageGetWidth(imageRef);
    NSUInteger height = CGImageGetHeight(imageRef);
    CCLog("%i,%i",width,height);
    CGColorSpaceRef colorSpace = CGColorSpaceCreateDeviceRGB();
    unsigned char* rawData = (unsigned char*) calloc(height * width * 4, sizeof(unsigned char));
    NSUInteger bytesPerPixel = 4;
    NSUInteger bytesPerRow = bytesPerPixel * width;
    NSUInteger bitsPerComponent = 8;
    CGContextRef context = CGBitmapContextCreate(rawData, width, height, bitsPerComponent, bytesPerRow, colorSpace, kCGImageAlphaPremultipliedLast | kCGBitmapByteOrder32Big);
    CGColorSpaceRelease(colorSpace);
    CGContextDrawImage(context, CGRectMake(0, 0, width, height), imageRef);
    CGContextRelease(context);
    cocos2d::CCTexture2D *pickedImage = new cocos2d::CCTexture2D();
    pickedImage->initWithData(rawData, cocos2d::kCCTexture2DPixelFormat_RGBA8888, width, height, cocos2d::CCSizeMake(width, height));
    CCLOG("%f,%f",pickedImage->getContentSize().width,pickedImage->getContentSize().height);

    [picker dismissModalViewControllerAnimated: YES];
    [picker release];
}
以上,我们已经把图片数据转换到了CCTexture2D,至于为何这么转,我也是搜来哒~注意引入响应头文件,这个以后就不说了。
HelloWorld声明和定义接口,接收CCTexture2D并干一些我们想干的事。
.h
void pickedPhoto(CCTexture2D* texture);.cpp
void HelloWorld::pickedPhoto(CCTexture2D* texture){
    CCSprite* sprite = CCSprite::createWithTexture(texture);
    this->addChild(sprite);
}
OK,试一下。报错啦
断点停在了this->addChild(sprite);这一行。根据java的经验,this指针怎么可能是bad access...如果他是空指针,
delegate里的layer->pickedPhoto(pickedImage);就报啦。当然这不是java,比较纠结。
这里费死了劲,因为不会C++嘛,最后试来试去,HelloWorld的layer忘了设置tag。
CCScene* HelloWorld::scene()
{
    CCScene *scene = CCScene::create();
    HelloWorld *layer = HelloWorld::create();
    layer->setTag(1);
    scene->addChild(layer);

    return scene;
}
试一下是OK了,但是摄像头拍照的图为啥是横着的呢?
再次搜来搜去,解决之~
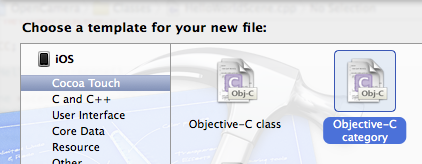
新建OC category扩展UIImage
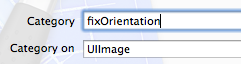
UIImage+fixOrientation.h文件
 1 //
 2 //  UIImage+fixOrientation.h
 3 //  OpenCamera
 4 //
 5 //  Created by HanHongmin on 13-12-30.
 6 //
 7 //
 8
 9 #import <UIKit/UIKit.h>
10
11 @interface UIImage (fixOrientation)
12 -(UIImage*) fixOrientation;
13 @end
UIImage+fixOrientation.m文件
 1 //
 2 //  UIImage+fixOrientation.m
 3 //  OpenCamera
 4 //
 5 //  Created by HanHongmin on 13-12-30.
 6 //
 7 //
 8
 9 #import "UIImage+fixOrientation.h"
10
11 @implementation UIImage (fixOrientation)
12 - (UIImage *)fixOrientation {
13     if (self.imageOrientation == UIImageOrientationUp) return self;
14
15     UIGraphicsBeginImageContextWithOptions(self.size, NO, self.scale);
16     [self drawInRect:(CGRect){0, 0, self.size}];
17     UIImage *normalizedImage = UIGraphicsGetImageFromCurrentImageContext();
18     UIGraphicsEndImageContext();
19     return normalizedImage;
20 }
21 @end
以上有啥不明白的,自己搜去吧我也说不明白。这个东西用了之后,据说手机内存会突然增大大概40-50M,求良药啊
在PickerDelegate中引用上面的头文件,得到UIImage后调一下。
UIImage* image = [info valueForKey:UIImagePickerControllerOriginalImage];image = [image fixOrientation];
试试~~
图片拾取后发现只显示了一部分,我在控制台看到摄像头拍完后图片是2448x3264的,所以这里应该没啥问题。
自行处理一下吧。我在项目中用的时候,sprite是早就创建好的,大小是整个屏幕,只是获得Texture的时候更换到了sprite中,没啥问题的。
至于如何调节分辨率啥的,有空再研究吧。