摘要:
碎碎念 如果你在项目初期就想着要将应用推向国际市场,就要注意字符串一定要养成习惯全部写在string.xml里,不然后期再加真的很崩溃。创建多语言的string.xml我们的目标是,应用跟随系统语言改变而改变。然后选择Locale类别,添加进来,名称就叫string.xml然后选择对应的语言,地区选择全部这样你就得到了两份string.xml文件,一份是原版的即中文,另一份是英文的对照版本。
我在写app的时候,无论是布局上的字符串还是代码中的,我都喜欢直接敲上去,无视那个善意提醒的波浪线。
对于小项目来说,我觉得无可厚非,虽然不规范但方便直观,不需要苦于给字符串起名字。
如果你在项目初期就想着要将应用推向国际市场,就要注意字符串一定要养成习惯全部写在string.xml里,不然后期再加真的很崩溃。
创建多语言的string.xml我们的目标是,应用跟随系统语言改变而改变。
首先是创建对应的语言的string.xml文件。
选中res/values文件夹,右键新建一个资源文件。
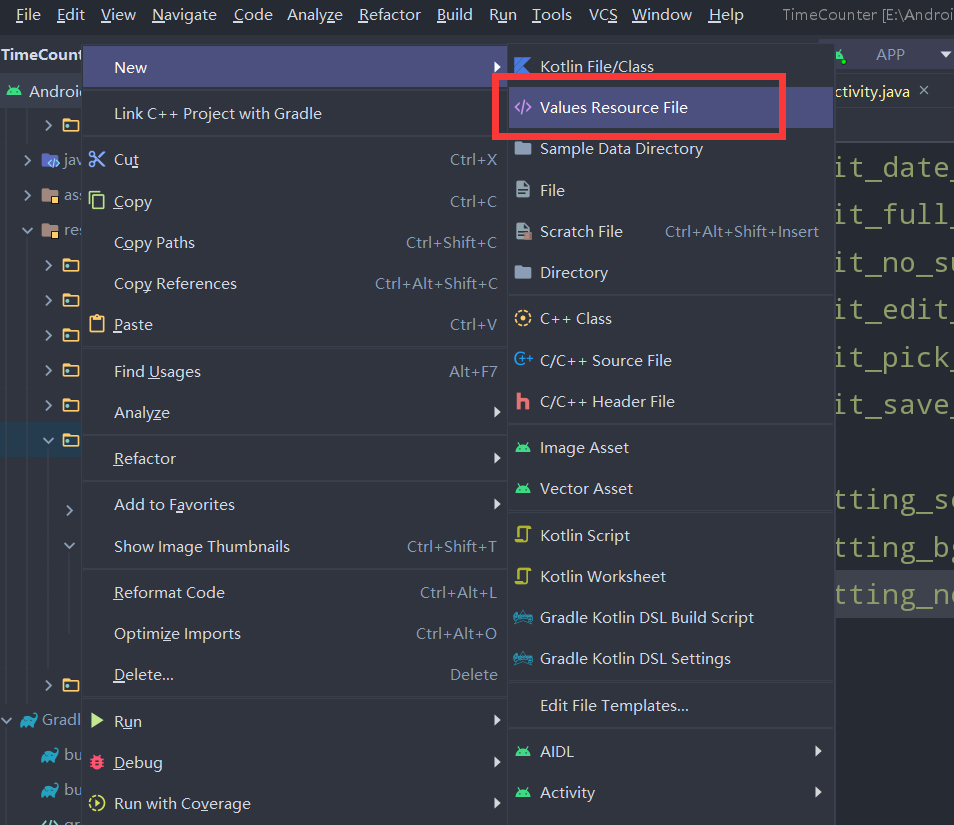
然后选择Locale类别,添加进来,名称就叫string.xml
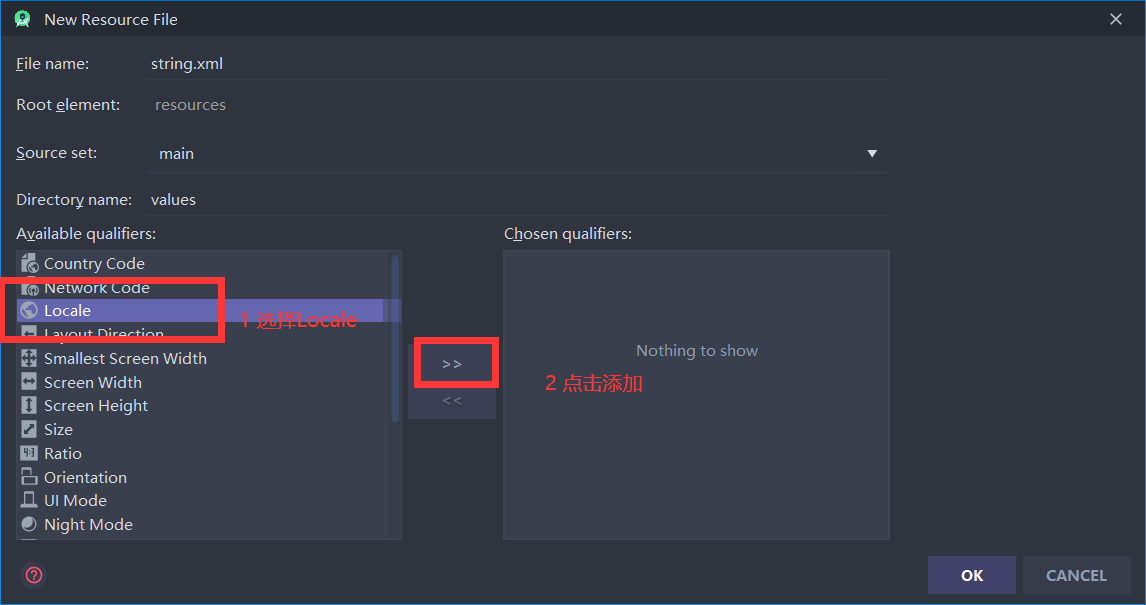
然后选择对应的语言,地区选择全部

这样你就得到了两份string.xml文件,一份是原版的即中文,另一份是英文的对照版本。
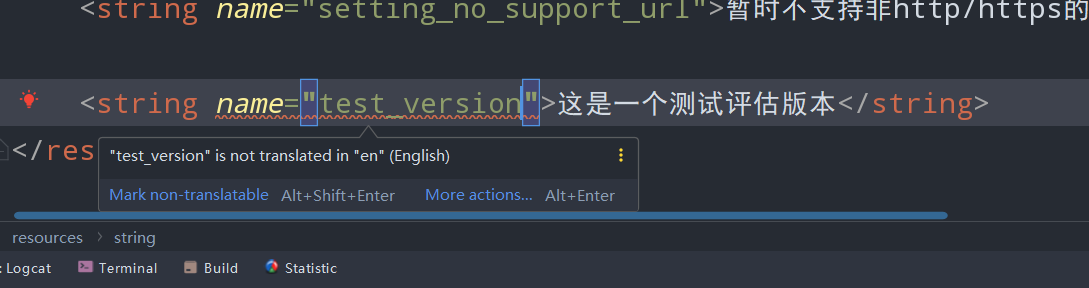
在中文的中创建一个字符串,会有相应的提示需要在英文对照版本中创建一份翻译的版本。

在布局中可以直接使用@string形式来加载,在代码中使用:
 /*** 加载字符串
     * @paramid 字符串id
     * */
    public static String getStaticString(Context context,intid){
        returncontext.getResources().getString(id);
    }
为了实现自动切换功能,我们需要封装一个LanguageUtil(参考自 简书)
importandroid.content.Context;
importandroid.content.SharedPreferences;
importandroid.content.res.Configuration;
importandroid.os.Build;
importandroid.util.DisplayMetrics;

importcom.google.gson.Gson;

importjava.util.Locale;

public classLanguageUtil {
    private static final String LOCALE_SP = "LOCALE_SP";
    private static final String LOCALE_SP_KEY = "LOCALE_SP_KEY";


    public staticLocale getLocale(Context context) {
        SharedPreferences spLocale =context.getSharedPreferences(LOCALE_SP, Context.MODE_PRIVATE);
        String localeJson = spLocale.getString(LOCALE_SP_KEY, "");
        Gson gson = newGson();
        return gson.fromJson(localeJson, Locale.class);
    }


    private static voidsetLocale(Context pContext, Locale pUserLocale) {
        SharedPreferences spLocal =pContext.getSharedPreferences(LOCALE_SP, Context.MODE_PRIVATE);
        SharedPreferences.Editor edit =spLocal.edit();
        String json = newGson().toJson(pUserLocale);
        edit.putString(LOCALE_SP_KEY, json);
        edit.apply();
    }


    public static booleanupdateLocale(Context context, Locale locale) {
        if(needUpdateLocale(context, locale)) {
            Configuration configuration =context.getResources().getConfiguration();
            if (Build.VERSION.SDK_INT >=Build.VERSION_CODES.JELLY_BEAN_MR1) {
                configuration.setLocale(locale);
            } else{
                configuration.locale =locale;
            }
            DisplayMetrics displayMetrics =context.getResources().getDisplayMetrics();
            context.getResources().updateConfiguration(configuration, displayMetrics);
            setLocale(context, locale);
            return true;
        }
        return false;
    }

    public static booleanneedUpdateLocale(Context pContext, Locale newUserLocale) {
        return newUserLocale != null && !getCurrentLocale(pContext).equals(newUserLocale);
    }
    public staticLocale getCurrentLocale(Context context) {
        Locale locale;
        if (Build.VERSION.SDK_INT >= Build.VERSION_CODES.N) { //7.0有多语言设置获取顶部的语言
            locale = context.getResources().getConfiguration().getLocales().get(0);
        } else{
            locale =context.getResources().getConfiguration().locale;
        }
        returnlocale;
    }
}
紧接着我们创建一个Application来自动加载
public class MyApplication extendsApplication {
    @Override
    public voidonCreate() {
        super.onCreate();
        languageWork();
    }

    @Override
    public voidonConfigurationChanged(Configuration newConfig) {
        super.onConfigurationChanged(newConfig);
        languageWork();
    }

    private voidlanguageWork() {
        Locale locale = LanguageUtil.getLocale(this);
        LanguageUtil.updateLocale(this, locale);
    }
}
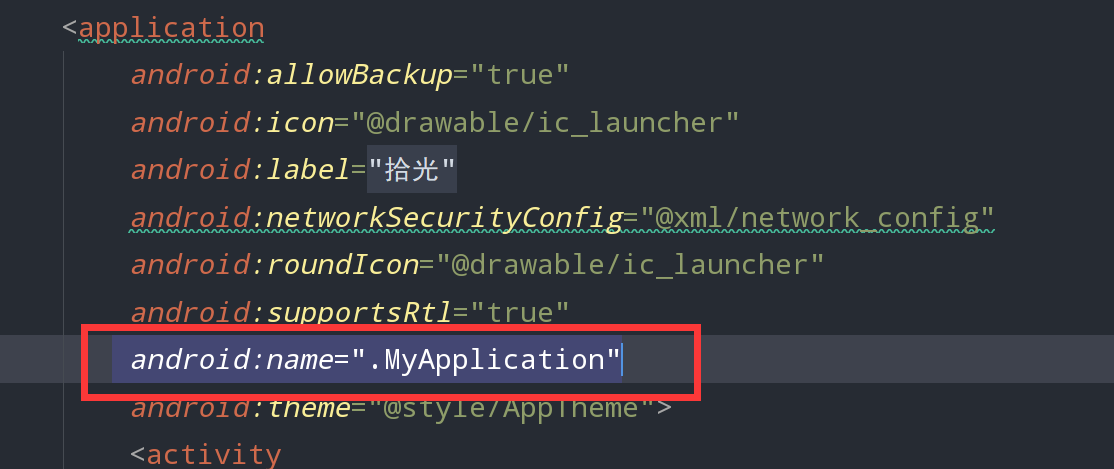
在AndroidManifest.xml中配置一下:
android:name=".MyApplication"
如图所示:
愉快的去使用吧~