摘要:
下载DevExpress v20.1完整版富文本控件是否困难?通过DevExpressWPFControls,您可以创建具有强大交互功能的XAML基本应用程序。这些应用程序专注于当代客户的需求,并构建新一代的解决方案,以支持未来的触摸。步骤1.编写应用程序步骤2.为图表和系列绑定添加数据步骤3.配置系列视图结果步骤1.编写一个应用程序。可以将具有Model和ViewModel类的数据文件添加到项目中。安装标准数据csv文件将复制到项目目录中新创建的Data目录中。注意:默认情况下,此文件位于C:\UsersPublicDocumentsDevExpressDemos0.1ComponentsWPFCSChartsDemo中。WpfData目录。
富文本控件难上手?这堂公开课你一定不能错过,不同视图不同应用场景全解!
通过DevExpress WPF Controls,您能创建有着强大互动功能的XAML基础应用程序,这些应用程序专注于当代客户的需求和构建未来新一代支持触摸的解决方案。
在本教程中,您将完成可视化数据源所需的步骤。
应该执行以下步骤,本文我们将为大家介绍3个步骤及最后结果,更多完整内容欢迎持续关注!
- Step 1. 编写一个应用程序
- Step 2. 为图表和系列绑定添加数据
- Step 3. 配置系列视图
- 结果
Step 1. 编写一个应用程序
您将带有Model和ViewModel类的数据文件添加到项目中。
- 运行MS Visual Studio 2010、2012、2013或2015。
- 创建一个全新的WPF Application项目
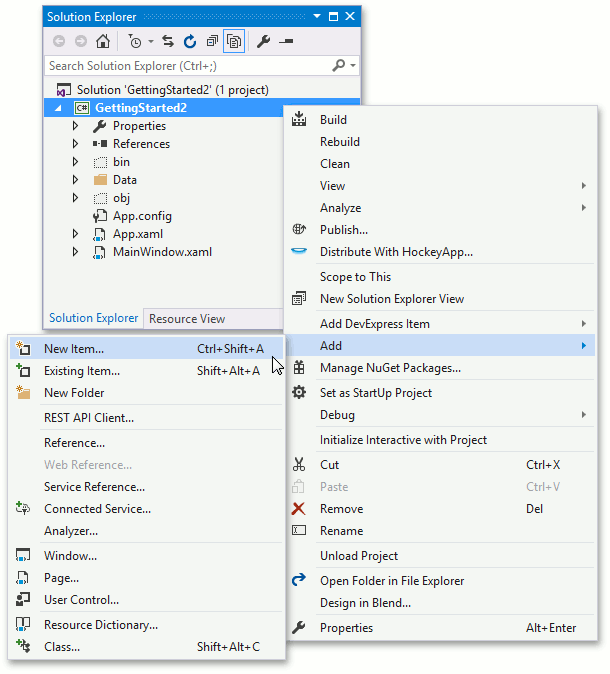
- 添加一个新的模型类。 为此,在解决方案资源管理器中右键单击该项目。从invoked菜单中,选择Add | New Item... element。
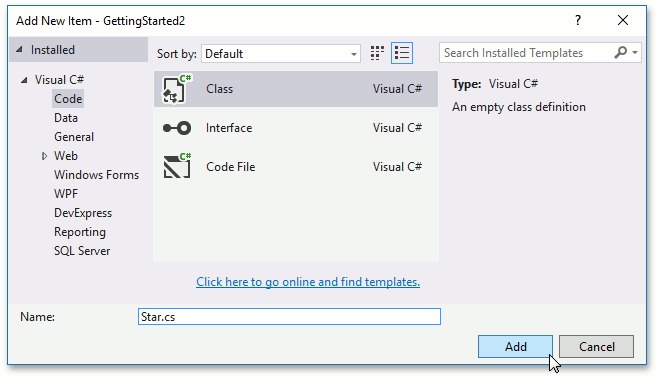
在调用的Add New Item对话框中,选择Code组,然后从项目列表中选择Class,将文件名设置为Star.cs,然后单击OK。
- 将添加的文件包含的代码替换为以下代码,该代码描述此入门课程中使用的模型对象。
C#
namespace GettingStarted2 {
public struct Star {
public int HipID { get; private set; }
public string Spectr { get; private set; }
public double Luminocity { get; private set; }
public double ColorIndex { get; private set; }
public double X { get; private set; }
public double Y { get; private set; }
public double Z { get; private set; }

public Star(
int id,
double x,
double y,
double z,
string spectr,
double luminocity,
double colorIndex
) {
HipID = id;
X = x;
Y = y;
Z = z;
Spectr = spectr;
Luminocity = luminocity;
ColorIndex = colorIndex;
}
}
}
VB.NET
Public Class Star
Dim mHipID As Int32
Dim mSpectr As String
Dim mX, mY, mZ, mLuminocity, mColorIndex As Double

Public ReadOnly Property HipID() As Int32
Get
Return mHipID
End Get
End Property

Public ReadOnly Property Spectr() As String
Get
Return mSpectr
End Get
End Property

Public ReadOnly Property X() As Double
Get
Return mX
End Get
End Property

Public ReadOnly Property Y() As Double
Get
Return mY
End Get
End Property

Public ReadOnly Property Z() As Double
Get
Return mZ
End Get
End Property

Public ReadOnly Property Luminocity() As Double
Get
Return mLuminocity
End Get
End Property

Public ReadOnly Property ColorIndex() As Double
Get
Return mColorIndex
End Get
End Property

Public Sub New(
ByVal id As Int32,
ByVal x As Double,
ByVal y As Double,
ByVal z As Double,
ByVal spectr As String,
ByVal luminocity As Double,
ByVal colorIndex As Double)
mHipID = id
mX = x
mY = y
mZ = z
mSpectr = spectr
mLuminocity = luminocity
mColorIndex = colorIndex
End Sub
End Class
- 将数据文件添加到项目中。 将DevExpress Charts Demo随附的stardata.csv文件复制到项目目录新创建的Data目录中。
注意:默认情况下,该文件位于C:UsersPublicDocumentsDevExpress Demos 20.1ComponentsWPFCSChartsDemo.WpfData目录中。
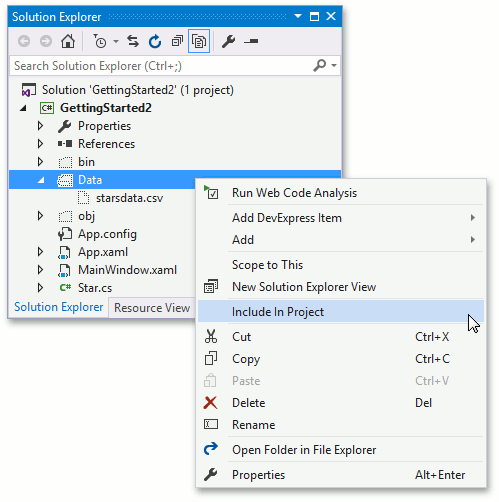
在解决方案资源管理器中,切换Show All Files按钮,然后右键单击Data目录。从调用的菜单中,选择Include In Project。
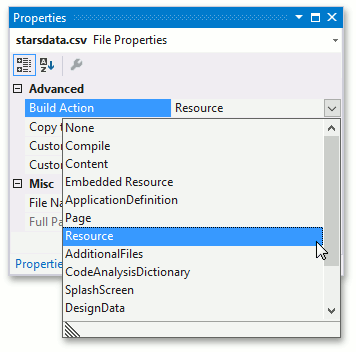
单击解决方案资源管理器中的stardata.csv文件,然后在Properties窗口中,将Build Action属性设置为Resource。
- ViewModel应该从数据文件加载模型对象,像以前一样,将文件添加到ViewModel的项目中。
用以下代码替换新文件中的代码。
C#
using System;
using System.Collections.Generic;
using System.Collections.ObjectModel;
using System.Globalization;
using System.IO;
using System.Windows;
using System.Windows.Resources;

namespace GettingStarted2 {
public class StarStatisticsViewModel {
public IEnumerable<Star> Stars { get; }

public StarStatisticsViewModel() {
Stars = StarStatisticsLoader.Load("/Data/starsdata.csv");
}
}

static class StarStatisticsLoader {
public static IEnumerable<Star> Load(string filepath) {
StreamResourceInfo streamInfo = Application.GetResourceStream(
new Uri(filepath, UriKind.RelativeOrAbsolute)
);
StreamReader reader = new StreamReader(streamInfo.Stream);
Collection<Star> stars = new Collection<Star>();
while (!reader.EndOfStream) {
String dataLine = reader.ReadLine();
String[] serializedValues = dataLine.Split(';');
stars.Add(
new Star(
id: Convert.ToInt32(serializedValues[0], CultureInfo.InvariantCulture),
x: Convert.ToDouble(serializedValues[3], CultureInfo.InvariantCulture),
y: Convert.ToDouble(serializedValues[4], CultureInfo.InvariantCulture),
z: Convert.ToDouble(serializedValues[5], CultureInfo.InvariantCulture),
spectr: serializedValues[1],
luminocity: Convert.ToDouble(serializedValues[6], CultureInfo.InvariantCulture),
colorIndex: Convert.ToDouble(serializedValues[2], CultureInfo.InvariantCulture)
)
);
}

return stars;
}
}
}
VB.NET
Imports System.Collections.ObjectModel
Imports System.Globalization
Imports System.IO
Imports System.Windows.Resources

Public Class StarDataViewModel
Dim mStars As IEnumerable(Of Star)
Public ReadOnly Property Stars As IEnumerable(Of Star)
Get
Return mStars
End Get
End Property

Public Sub New()
mStars = StarStatisticsLoader.Load("/Data/starsdata.csv")
End Sub
End Class

Public Module StarStatisticsLoader
Public Function Load(ByVal filepath As String) As IEnumerable(Of Star)
Dim streamInfo As StreamResourceInfo = Application.GetResourceStream(
New Uri(filepath, UriKind.RelativeOrAbsolute)
)
Dim reader As StreamReader = New StreamReader(streamInfo.Stream)
Dim stars As Collection(Of Star) = New Collection(Of Star)()
While (Not reader.EndOfStream)
Dim dataLine As String = reader.ReadLine()
Dim serializedValues As String() = dataLine.Split(";")
stars.Add(
New Star(
id:=Convert.ToInt32(serializedValues(0), CultureInfo.InvariantCulture),
x:=Convert.ToDouble(serializedValues(3), CultureInfo.InvariantCulture),
y:=Convert.ToDouble(serializedValues(4), CultureInfo.InvariantCulture),
z:=Convert.ToDouble(serializedValues(5), CultureInfo.InvariantCulture),
spectr:=serializedValues(1),
luminocity:=Convert.ToDouble(serializedValues(6), CultureInfo.InvariantCulture),
colorIndex:=Convert.ToDouble(serializedValues(2), CultureInfo.InvariantCulture)
)
)
End While
Return stars
End Function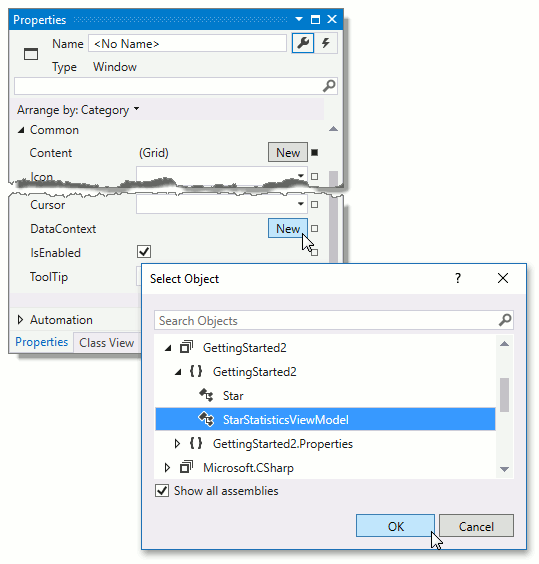
End Module- 现在,将ViewModel分配给Window.DataContext属性:选择Window,找到DataContext属性,然后单击New按钮。在调用的窗口中,选择GettingStarted.StarDataViewModel类,然后单击OK。
准备工作完成,这下一篇文章中将详细说明如何添加Chart3D控件,分配数据和自定义显示设置。
DevExpress技术交流群2:775869749 欢迎一起进群讨论