Tips:本篇已加入系列文章阅读目录,可点击查看更多相关文章。
前言上一篇【.Net Core微服务入门全纪录(三)——Consul-服务注册与发现(下)】已经使用Consul完成了服务的注册与发现,实际中光有服务注册与发现往往是不够的,我们需要一个统一的入口来连接客户端与服务。
Ocelot官网:https://ocelot.readthedocs.io/
Ocelot正是为.Net微服务体系提供一个统一的入口点,称为:Gateway(网关)。
- 上手Ocelot:
首先创建一个空的asp.net core web项目。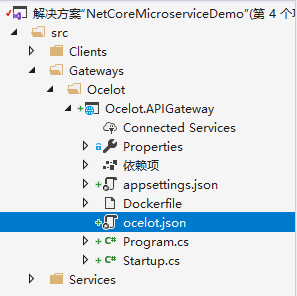
注意ocelot.json是我们添加的Ocelot的配置文件,记得设置生成时复制到输出目录。ocelot.json的文件名不是固定的,可以自己定义。
NuGet安装一下Ocelot:
只需简单的修改几处默认代码:
Program.cs:
    public class Program
    {
        public static void Main(string[] args)
        {
            CreateHostBuilder(args).Build().Run();
        }

        public static IHostBuilder CreateHostBuilder(string[] args) =>
            Host.CreateDefaultBuilder(args)
                .ConfigureAppConfiguration((hostingContext, config) =>
                {
                    config.AddJsonFile("ocelot.json");
                })
                .ConfigureWebHostDefaults(webBuilder =>
                {
                    webBuilder.UseStartup<Startup>();
                });
    }
Startup.cs:
    public class Startup
    {
        // This method gets called by the runtime. Use this method to add services to the container.
        // For more information on how to configure your application, visit https://go.microsoft.com/fwlink/?LinkID=398940
        public void ConfigureServices(IServiceCollection services)
        {
            //添加ocelot服务
            services.AddOcelot();
        }

        // This method gets called by the runtime. Use this method to configure the HTTP request pipeline.
        public void Configure(IApplicationBuilder app, IWebHostEnvironment env)
        {
            //设置Ocelot中间件
            app.UseOcelot().Wait();
        }
    }
ocelot.json:
{
  "Routes": [
    {
      "DownstreamPathTemplate": "/products",
      "DownstreamScheme": "http",
      "DownstreamHostAndPorts": [
        {
          "Host": "localhost",
          "Port": 9050
        },
        {
          "Host": "localhost",
          "Port": 9051
        },
        {
          "Host": "localhost",
          "Port": 9052
        }
      ],
      "UpstreamPathTemplate": "/products",
      "UpstreamHttpMethod": [
        "Get"
      ],
      "LoadBalancerOptions": {
        "Type": "RoundRobin" //负载均衡,轮询机制 LeastConnection/RoundRobin/NoLoadBalancer/CookieStickySessions
      }
    },
    {
      "DownstreamPathTemplate": "/orders",
      "DownstreamScheme": "http",
      "DownstreamHostAndPorts": [
        {
          "Host": "localhost",
          "Port": 9060
        },
        {
          "Host": "localhost",
          "Port": 9061
        },
        {
          "Host": "localhost",
          "Port": 9062
        }
      ],
      "UpstreamPathTemplate": "/orders",
      "UpstreamHttpMethod": [
        "Get"
      ],
      "LoadBalancerOptions": {
        "Type": "RoundRobin" //负载均衡,轮询机制 LeastConnection/RoundRobin/NoLoadBalancer/CookieStickySessions
      }
    }
  ],
  "GlobalConfiguration": {
    "BaseUrl": "http://localhost:9070"
  }
}
我们先暂时忽略Consul,将服务实例的地址都写在配置文件中。要知道Consul、Ocelot等组件都是可以独立存在的。
配置文件中的Routes节点用来配置路由,Downstream代表下游,也就是服务实例,Upstream代表上游,也就是客户端。我们的路径比较简单,只有/products、/orders,路径中如果有不固定参数则使用{}匹配。我们这个配置的意思呢就是客户端访问网关的/orders、/products,网关会转发给服务实例的/orders、/products,注意这个上游的路径不一定要和下游一致,比如上游路径可以配置成/api/orders,/xxx都可以。
LoadBalancerOptions节点用来配置负载均衡,Ocelot内置了 LeastConnection、RoundRobin、NoLoadBalancer、CookieStickySessions 4种负载均衡策略。
BaseUrl节点就是配置我们ocelot网关将要运行的地址。
- 运行gateway:
目前不考虑网关集群,就不放在docker里了。直接控制台执行:`dotnet Ocelot.APIGateway.dll --urls="http://*:9070"
用浏览器测试一下: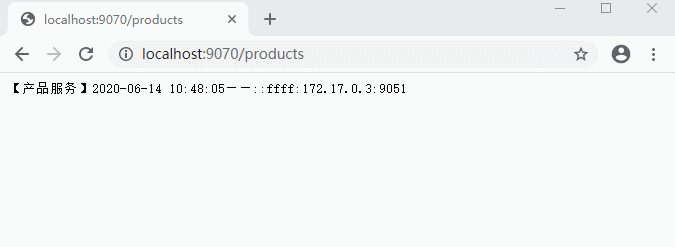

测试正常,我们通过网关可以正常的访问到服务实例。
- 接下来继续改造客户端代码:
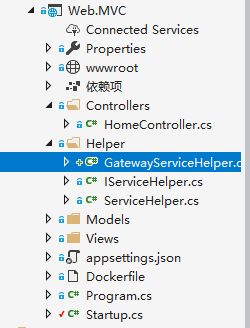
因为改动太多就直接新建一个GatewayServiceHelper来做。
GatewayServiceHelper:
    /// <summary>
    /// 通过gateway调用服务
    /// </summary>
    public class GatewayServiceHelper : IServiceHelper
    {
        public async Task<string> GetOrder()
        {
            var Client = new RestClient("http://localhost:9070");
            var request = new RestRequest("/orders", Method.GET);

            var response = await Client.ExecuteAsync(request);
            return response.Content;
        }

        public async Task<string> GetProduct()
        {
            var Client = new RestClient("http://localhost:9070");
            var request = new RestRequest("/products", Method.GET);

            var response = await Client.ExecuteAsync(request);
            return response.Content;
        }

        public void GetServices()
        {
            throw new NotImplementedException();
        }
    }
然后在Startup中修改一下注入的类型,别的就不用改了,这就是依赖注入的好处之一。。。
Startup.ConfigureServices():
//注入IServiceHelper
//services.AddSingleton<IServiceHelper, ServiceHelper>();

//注入IServiceHelper
services.AddSingleton<IServiceHelper, GatewayServiceHelper>();
Startup.Configure():
//程序启动时 获取服务列表
//serviceHelper.GetServices();
运行客户端测试: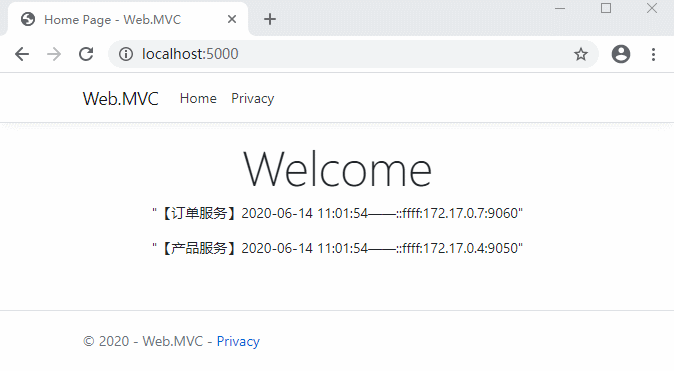
好了,现在客户端对服务的调用都通过网关进行中转,客户端再也不用去关心那一堆服务实例的地址,只需要知道网关地址就可以了。另外,服务端也避免了服务地址直接暴露给客户端。这样做对客户端,服务都非常友好。
至于我们的api网关呢,又要说到服务发现的问题了。目前我们的服务地址是写在ocelot.json配置文件里的,当然这种做法在服务实例不经常变化的情况下是没有问题的,一旦服务变化,需要人为的修改配置文件,这又显得不太合理了。
当然,强大的Ocelot为我们提供了服务发现的方案。
代码放在:https://github.com/xiajingren/NetCoreMicroserviceDemo
未完待续...