摘要:
添加依赖项<;--<;-->;&书信电报;importorg.apache.activemq.command.activemq主题;importorg.springframework.jms.core.JmsMessagingTemplate;“admin”;
一,activeMq安装
1,下载activeMq,放置到电脑某个目录,
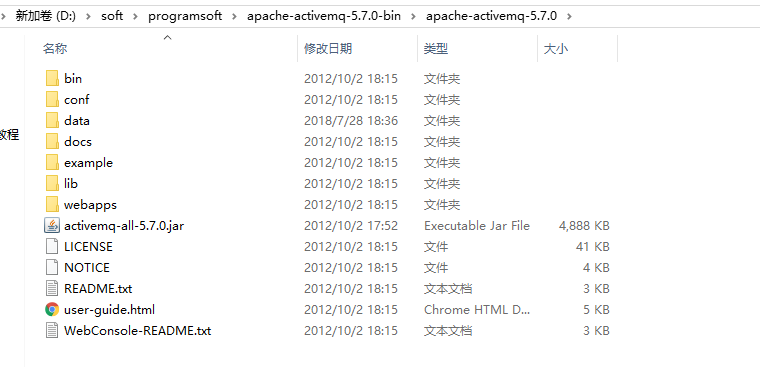
2,直接运行
/bin/activemq.bat脚本,即可启动activeMq
3,访问网址localhost:8161,即可查看activeMq网页界面
4,activeMq目录中有一些例子,可以参考;
二,springboot集成activeMQ
1,添加依赖
<!-- mq begin -->
        <dependency>
            <groupId>org.springframework.boot</groupId>
            <artifactId>spring-boot-starter-activemq</artifactId>
        </dependency>

        <dependency>
            <groupId>org.apache.activemq</groupId>
            <artifactId>activemq-pool</artifactId>
            <!-- <version>5.7.0</version> -->
        </dependency>

        <!-- mq end -->
2,添加activeMQ配置信息
spring.activemq.broker-url=tcp://localhost:61616   #activeMQ地址信息,注意访问端口是61616
#spring.activemq.broker-url=failover:(tcp://localhost:61616,tcp://localhost:61617)
spring.activemq.close-timeout=5000
spring.activemq.in-memory=false
#spring.activemq.pool.enabled=true
spring.activemq.pool.max-connections=100
spring.activemq.send-timeout=3000
#activeMQ发送topic消息,需要此配置
#spring.jms.pub-sub-domain=true
#信任所有的包
spring.activemq.packages.trust-all=true
#queque 及 topic配置信息
queque.police=queque.police
queue.edu=queue.edu
topic.pbc=topic.pbc
topic.veh=topic.veh
3,配置类
package org.spring.web.component;

import javax.jms.Queue;
import javax.jms.Topic;

import org.apache.activemq.ActiveMQConnectionFactory;
import org.apache.activemq.command.ActiveMQQueue;
import org.apache.activemq.command.ActiveMQTopic;
import org.springframework.context.annotation.Bean;
import org.springframework.context.annotation.Configuration;
import org.springframework.jms.config.DefaultJmsListenerContainerFactory;
import org.springframework.jms.config.JmsListenerContainerFactory;
import org.springframework.jms.core.JmsMessagingTemplate;

//MQ configuration class
//主要配置 配置信息中的  spring.jms.pub-sub-domain  属性值信息,可以实现同时发送queue和topic信息
@Configuration public class MqConfig { /* @Bean public ActiveMQConnectionFactory connectionFactory() { return new ActiveMQConnectionFactory("admin", "admin", "tcp://localhost:61616"); }*/ @Bean public JmsListenerContainerFactory<?> jmsListenerContainerTopic(ActiveMQConnectionFactory connectionFactory) { DefaultJmsListenerContainerFactory bean = new DefaultJmsListenerContainerFactory(); bean.setPubSubDomain(true); bean.setConnectionFactory(connectionFactory); System.out.println("注入的connectionFactory>>>>>"+connectionFactory.getUserName()); return bean; }

    @Bean
    public JmsListenerContainerFactory<?> jmsListenerContainerQueue(ActiveMQConnectionFactory connectionFactory) {
        DefaultJmsListenerContainerFactory bean = new DefaultJmsListenerContainerFactory();
        bean.setConnectionFactory(connectionFactory);
        bean.setPubSubDomain(false);
        return bean;
    }
  /*
    @Bean
    public JmsMessagingTemplate jmsMessagingTemplate(ActiveMQConnectionFactory connectionFactory){
        return new JmsMessagingTemplate(connectionFactory);
    }*/
}
4,注入mqBeans
package org.spring.web.mq;

import javax.jms.Queue;
import javax.jms.Topic;

import org.apache.activemq.command.ActiveMQQueue;
import org.apache.activemq.command.ActiveMQTopic;
import org.springframework.beans.factory.annotation.Value;
import org.springframework.context.annotation.Bean;
import org.springframework.context.annotation.Configuration;
import org.springframework.jms.annotation.EnableJms;

/**
 *
 * 项目名称:spring-web 类名称:MqBans 类描述: 创建人:john 创建时间:2018年7月30日 上午7:30:18 修改人:john
 * 修改时间:2018年7月30日 上午7:30:18 修改备注:
 *
 * @version
 *
 */
@Configuration
@EnableJms
public class MqBans {
    @Value("${queque.police}")
    private String policeQueue;
    @Value("${queue.edu}")
    private String eduQueue;
    @Value("${topic.pbc}")
    private String pbcTopic;
    @Value("${topic.veh}")
    private String vehTopic;

    @Bean
    public Queue policeQueue() {
        return new ActiveMQQueue(policeQueue);
    }

    @Bean
    public Queue eduQueue() {
        return new ActiveMQQueue(eduQueue);
    }

    @Bean
    public Topic pbcTopic() {
        return new ActiveMQTopic(pbcTopic);
    }

    @Bean
    public Topic vehTopic() {
        return new ActiveMQTopic(vehTopic);
    }

}
5,生产者
package org.spring.web.mq;
import javax.jms.Queue;
import javax.jms.Topic;

import org.spring.web.entity.User;
import org.springframework.beans.factory.annotation.Autowired;
import org.springframework.boot.CommandLineRunner;
import org.springframework.jms.core.JmsMessagingTemplate;
import org.springframework.stereotype.Component;

@Component
public class Producer implements CommandLineRunner {

    @Autowired
    private JmsMessagingTemplate jmsMessagingTemplate;

    @Autowired
    private Queue policeQueue;

    @Autowired
    private Topic pbcTopic;

    @Autowired
    private Topic vehTopic;

    @Override
    public void run(String... args) throws Exception {
        for(int i=0;i<1;i++){
            send("Sample message"+i);
        }
        sendTopic("topic send");
    }

    public void send(String msg) {
        this.jmsMessagingTemplate.convertAndSend(this.policeQueue, msg);
        System.out.println("Message was sent to the policeQueue");

    }

    public void sendTopic(String msg){
        System.out.println("消费者发送topic消息");
        this.jmsMessagingTemplate.convertAndSend(this.pbcTopic,msg);
        System.out.println("Message was sent to the pbcTopic");
    }


}
6,消费者
package org.spring.web.mq;

import javax.jms.JMSException;
import javax.jms.Message;
import javax.jms.ObjectMessage;

import org.spring.web.entity.User;
import org.springframework.jms.annotation.JmsListener;
import org.springframework.messaging.handler.annotation.SendTo;
import org.springframework.stereotype.Component;

@Component
public class Consumer {

    @JmsListener(destination = "${queque.police}",containerFactory="jmsListenerContainerQueue")
    @SendTo("out.queue")
    public String receiveQueue(String text) {
        System.out.println("police消费者1接受到的消息");
        System.out.println(text);
        return "sample.queue接受的消息>>>>>" + text;
    }

    @JmsListener(destination = "${queque.police}",containerFactory="jmsListenerContainerQueue")
    public void receiveQueue2(String text){
       System.out.println("police消费者2接受到的消息");
       System.out.println(text);

    }

    @JmsListener(destination = "out.queue",containerFactory="jmsListenerContainerQueue")
    public void receiveOutQueue(String text) {
        System.out.println("out.Queue接受到的信息" + text);
    }

    @JmsListener(destination = "${topic.pbc}",containerFactory="jmsListenerContainerTopic")
    public void receiveTopic(String text){
        System.out.println("pbc1消费者接受的信息");
        System.out.println(text);
    }
    @JmsListener(destination = "${topic.pbc}",containerFactory="jmsListenerContainerTopic")
    public void receiveTopic2(String text){
        System.out.println("pbc2消费者接受的信息"+text);
    }

    @JmsListener(destination = "${topic.veh}",containerFactory="jmsListenerContainerTopic")
    public void receiveTopicUser(Message m){
        System.out.println("接受到的对象信息message>>>>"+m);
        User  user=new User();
         if(m instanceof  ObjectMessage){
             ObjectMessage objectMessage=(ObjectMessage) m;
             System.out.println("objectMessage>>>>>>>"+objectMessage);
             try {
                user=(User) objectMessage.getObject();

            } catch (JMSException e) {
                // TODO Auto-generated catch block
                e.printStackTrace();
            }
         }

        System.out.println("消费者接受的用户对象信息"+user);
    }

}
总结:
1,activeMq的端口号是61616;
2,使用topic,需要配置 spring.jms.pub-sub-domain=true;
3,queque如果没有消费者,会将信息存储到queue中;
4,主方法启动的时候,消费者的监听已经生效;
5,发送的消息为对象的时候,需要将对象序列化;消费者接受对象信息的时候需要使用ObjectMessage进行转化;
6,使用JmsListener注解中的containerFactory属性,可以配置spring.jms.pub-sub属性,实现同事接收queque和topic;
7,queque为点对点模式;tipic为发布订阅模式;