摘要:
一.说明 一.说明将ApacheNiFi做为关系型数据与非关系型数据库的数据同步工具使用,在此场景中需要将mysql导出的avro数据格式转化为json入库HBase二.开拔Ⅰ).配置ExecuteSQLRecorda).选择ExecuteSQLRecord在Processor中搜索ExecuteSQLRecordb).配置ExecuteSQLRecord1.创建DatabaseConnectionPool
将Apache NiFi做为关系型数据与非关系型数据库的数据同步工具使用,在此场景中需要将mysql导出的avro数据格式转化为json入库HBase
二.开拔Ⅰ).配置ExecuteSQLRecord
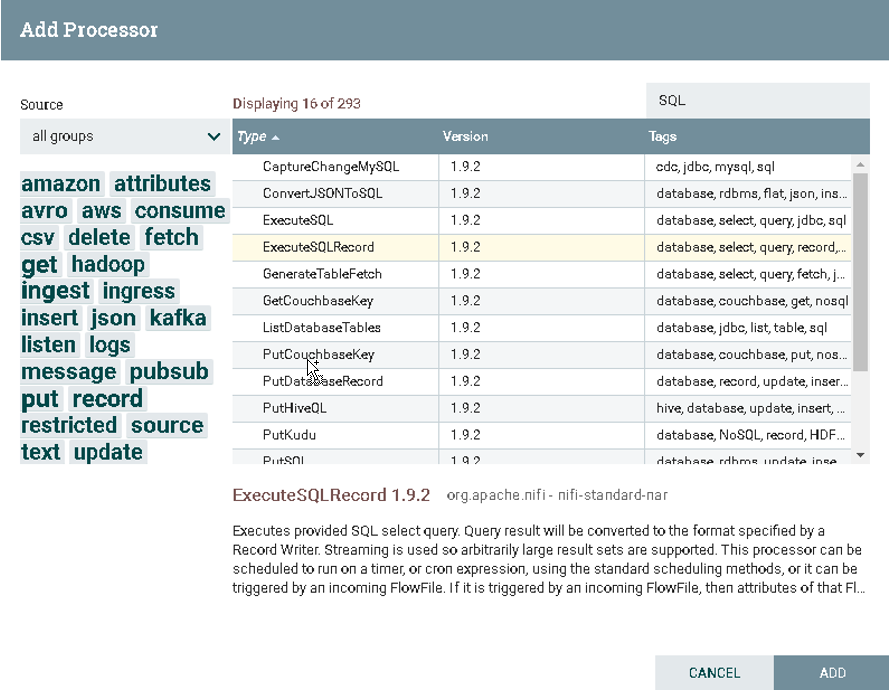
a).选择ExecuteSQLRecord
在Processor中搜索ExecuteSQLRecord
b).配置ExecuteSQLRecord
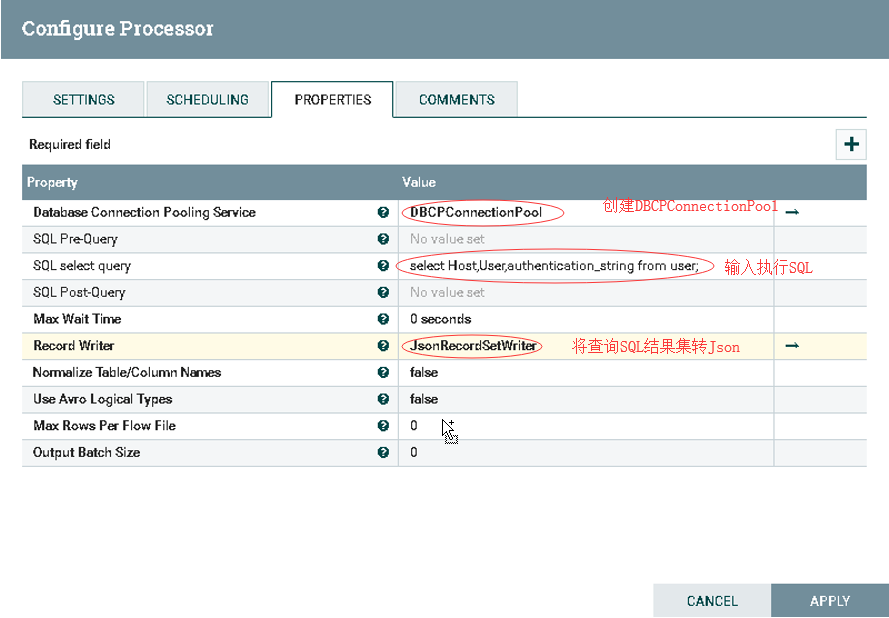
1.创建Database Connection Pool
2.创建JsonRecordSetWriter
3.配置SQL select query
select Host,User,authentication_string from mysql.user;
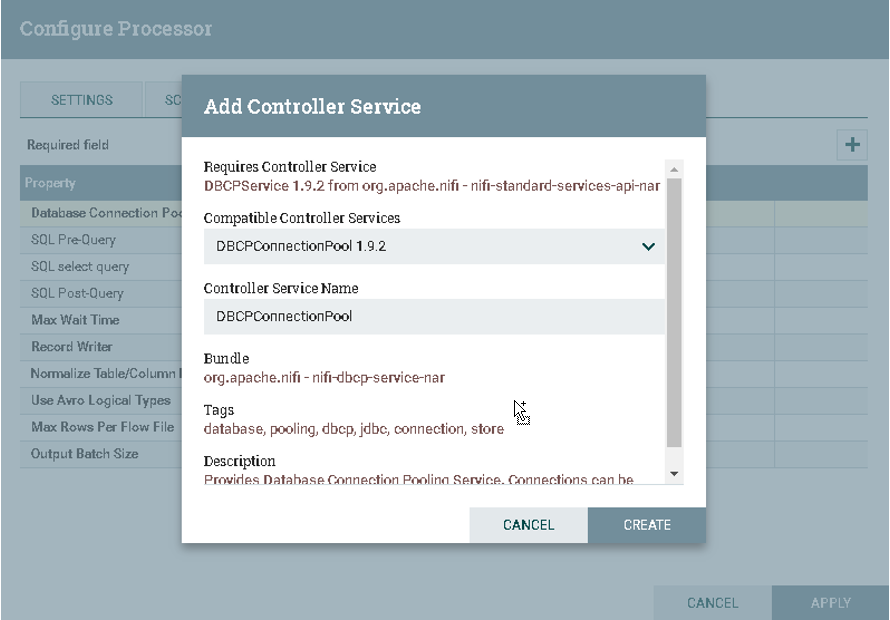
c).创建DBCPConnectionPool
在Database Connection Pool中选择DBCPConnectionPool
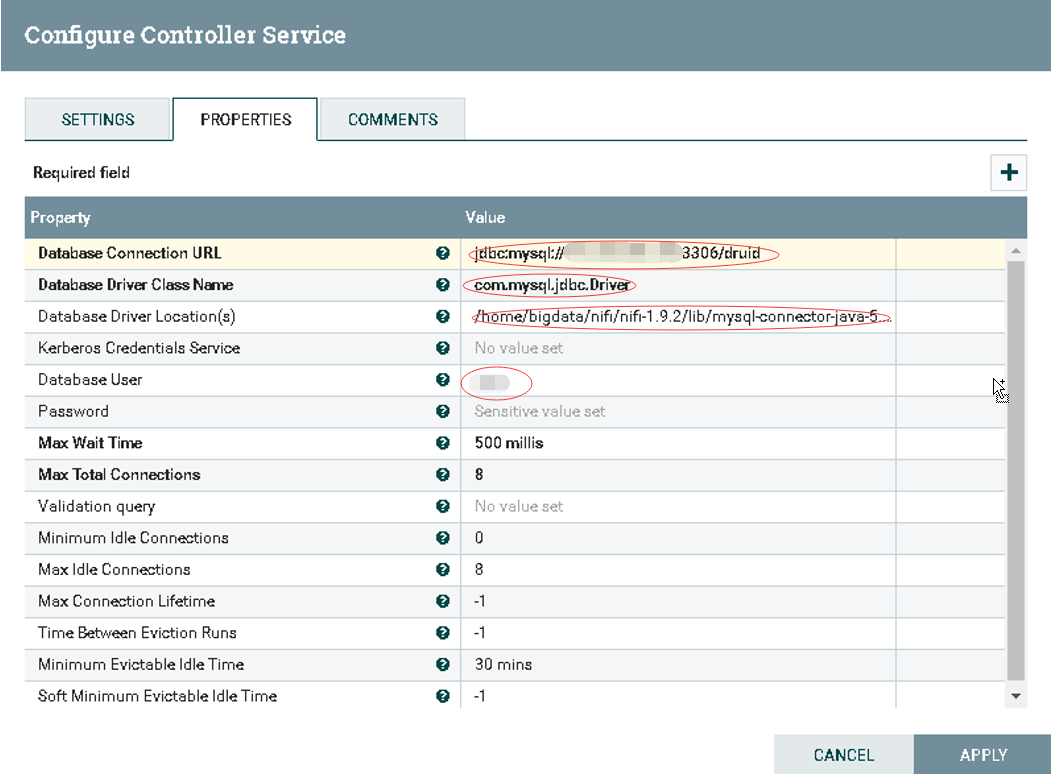
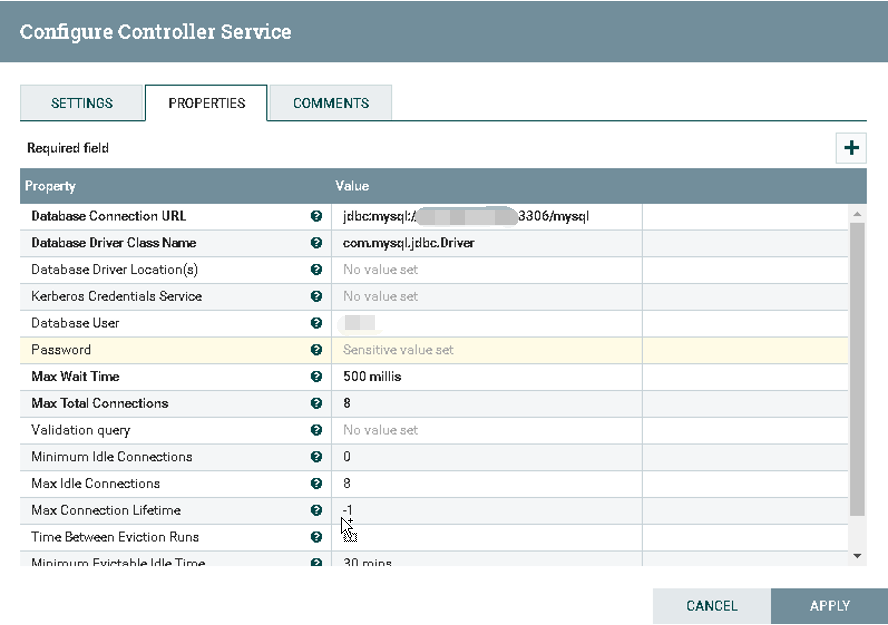
d).配置DBCPConnectionPool
1.Database Connection URL: jdbc:mysql://hostname:3306/druid
2.Database Driver Class Name: com.mysql.jdbc.Driver
3.Database User: username
4.Database Password: password
e).激活服务

Ⅱ).配置ConvertAvroToJSON
a).选择ConvertAvroToJSON
在Processor中搜索ConvertAvroToJSON
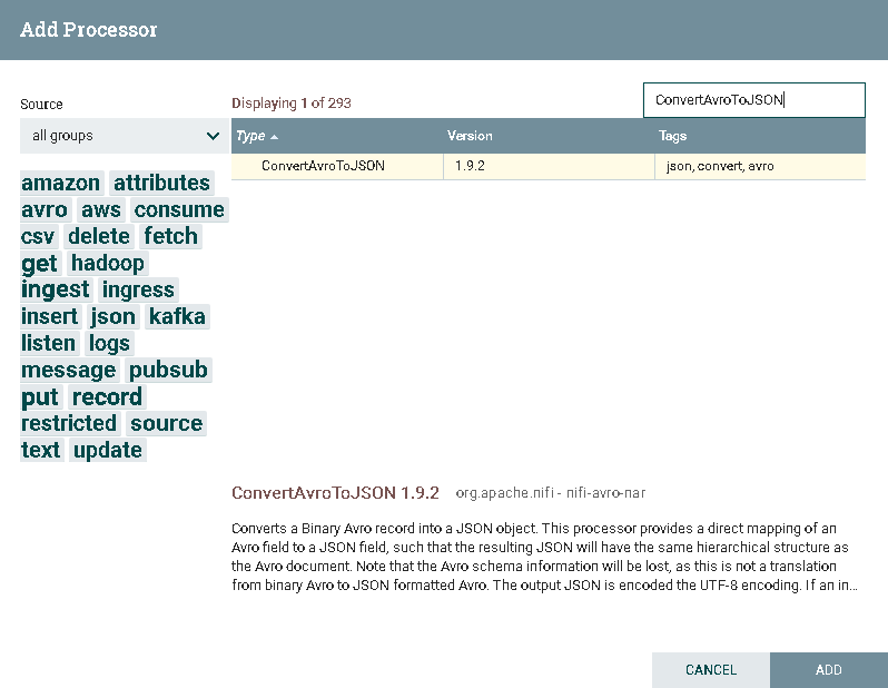
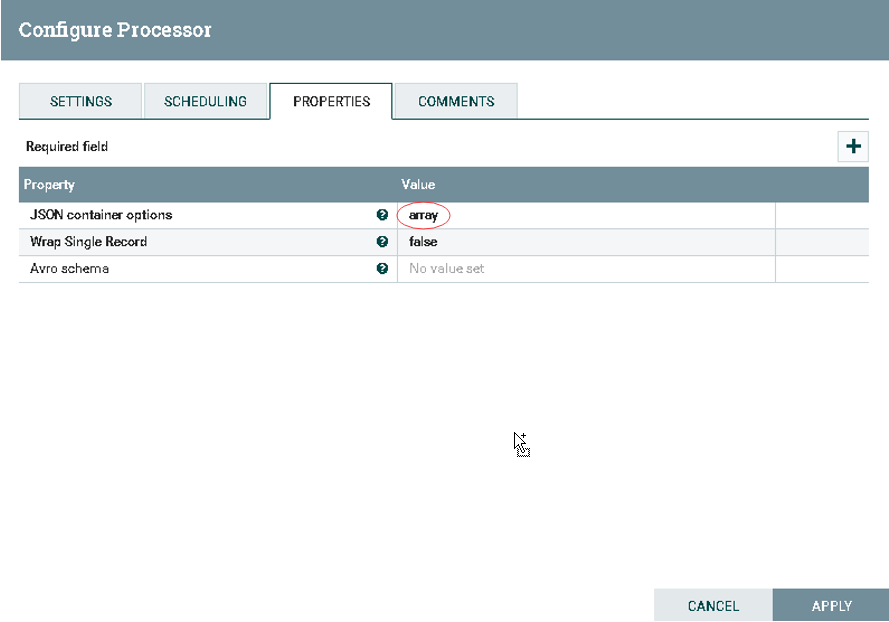
b).配置ConvertAvroToJSON
Ⅲ).配置SplitJson
a).选择SplitJson
在Processor中搜索SplitJson

b).配置SplitJson

Ⅳ).配置PutHBaseJSON
a).选择PutHBaseJSON
在Processor中搜索PutHBaseJSON
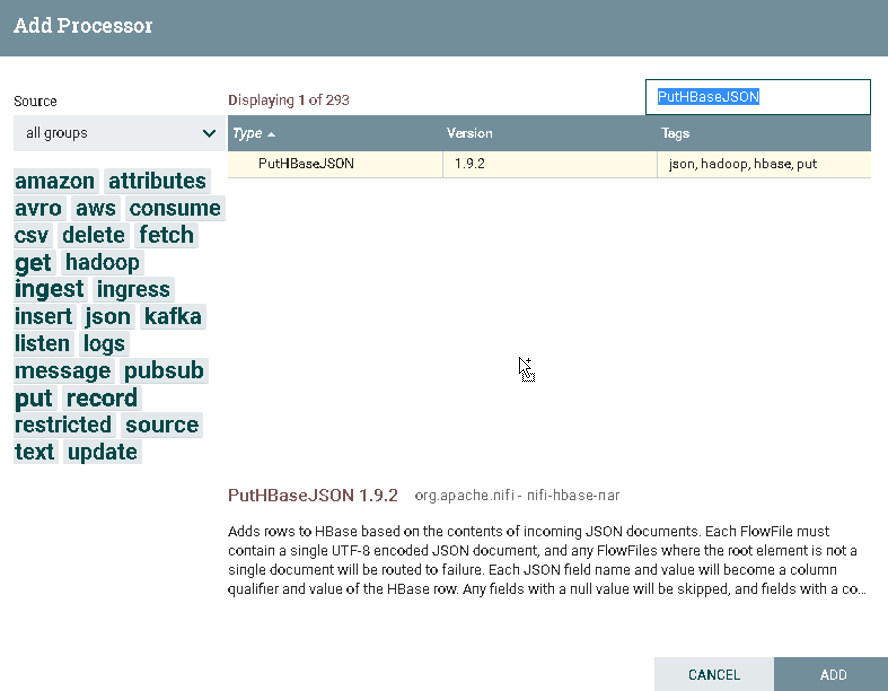
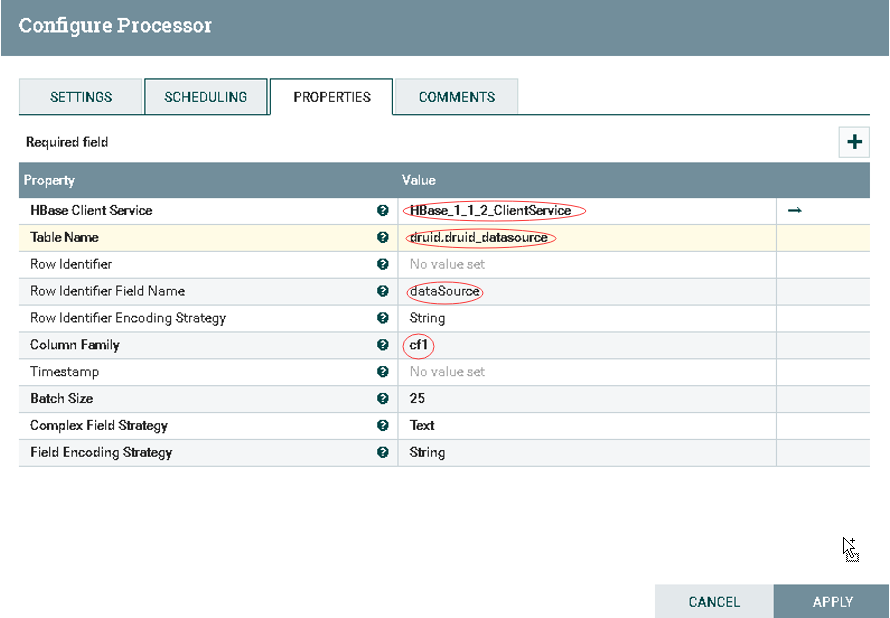
b).配置PutHBaseJSON
1.HBase Client Service: 选择匹配版本的HBaseClient
2.Table Name: 配置入库HBase表名
3.Row Identifier Field Name: 配置RowKey值
4.Column Family: 配置列簇
c).选择HBase_1_1_2_ClientService
在Processor中搜索HBase_1_1_2_ClientService
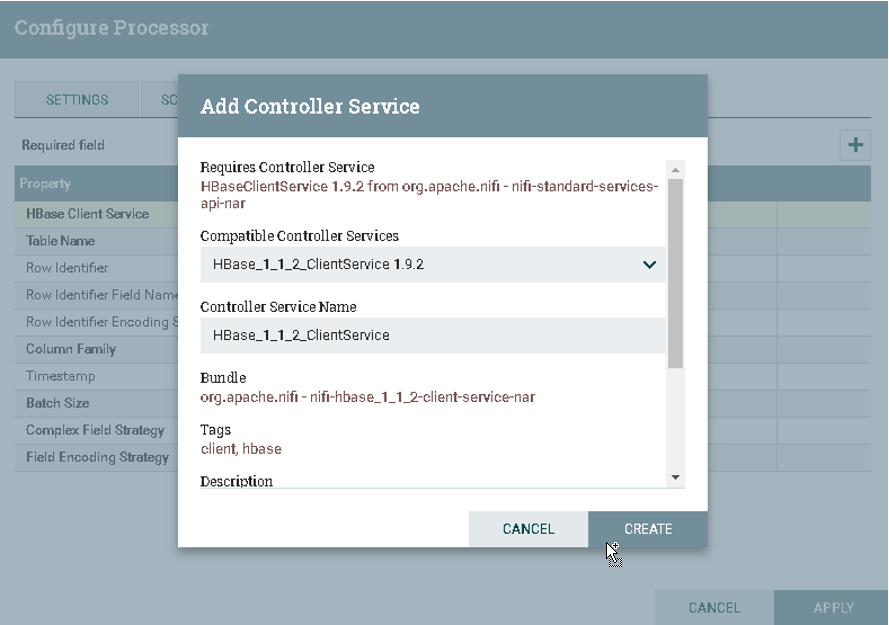
d).配置HBase_1_1_2_ClientService
1.Zookeeper Quorum: hostname1:2181,hostname2:2181,hostname3:2181
2.Zookeeper Client Port: 2181
3.Zookeeper ZNode Parent: /hbase

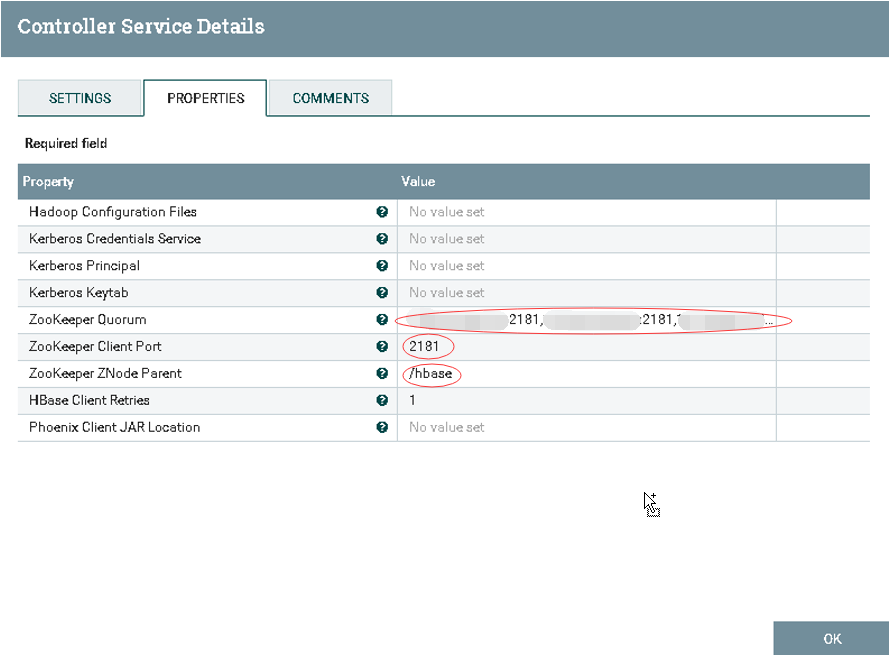
e).激活HBase_1_1_2_ClientService

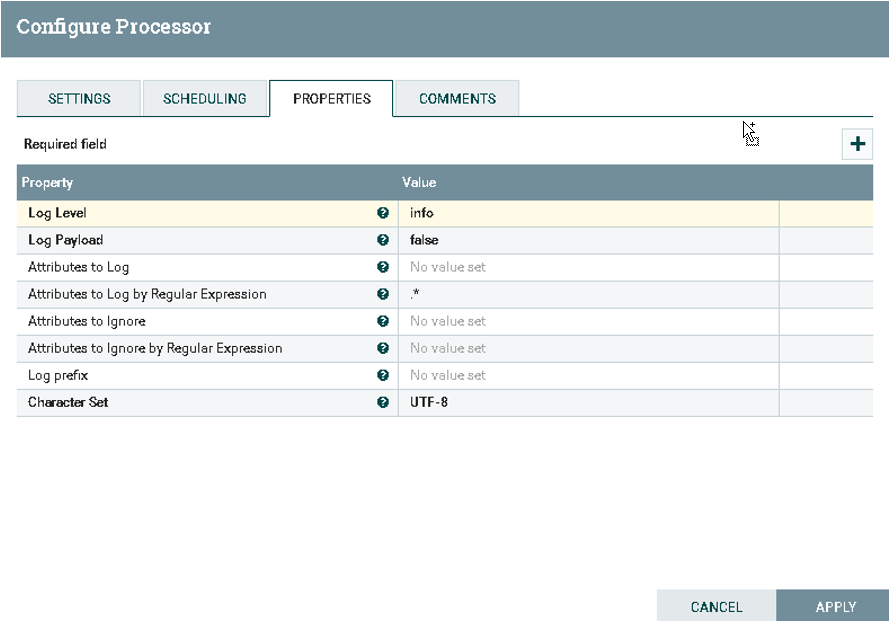
Ⅴ).配置LogAttribute
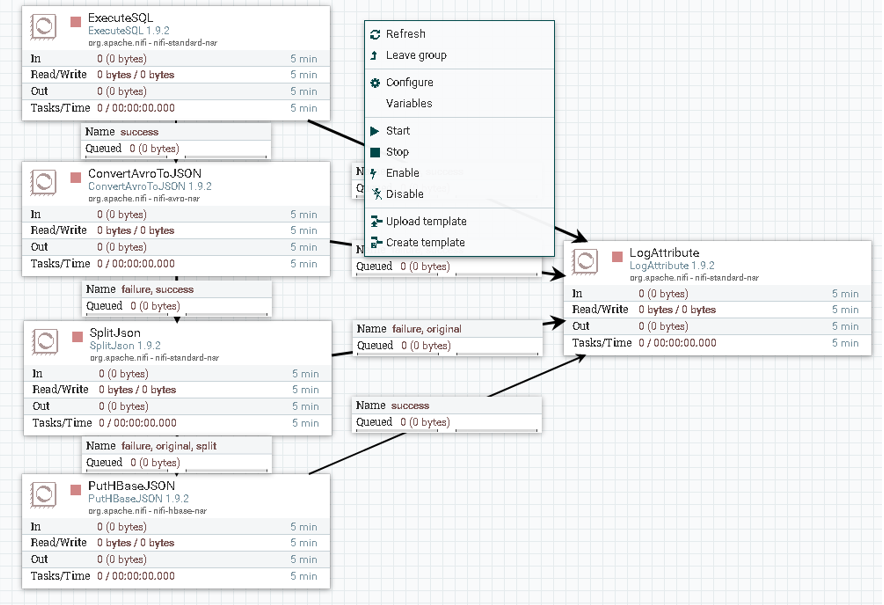
Ⅵ).启动服务
可以点击选择单个Processor启动,也可以在空白处点击流程启动
Ⅶ).验证结果
a).MySQL源数据
select * from druid.druid_datasource;

b).HBase入库数据
scan 'druid.druid_datasource',{LIMIT=>10}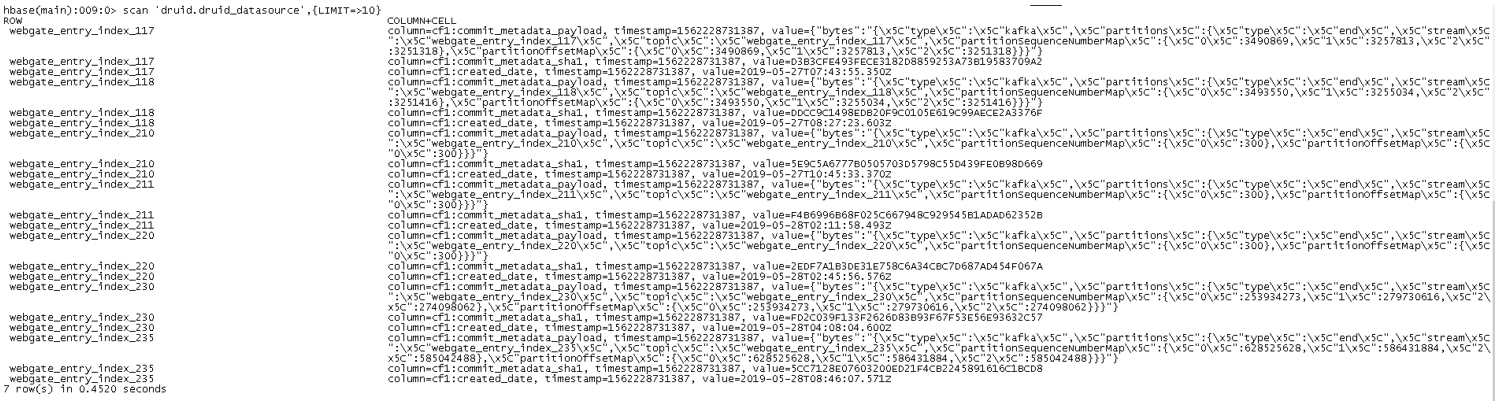
## 创建表空间
create_namespace 'druid'
## 查看表空间
list_namespace_tables 'druid'
## 创建表
create 'druid.druid_datasource','cf1'
## 查看表数据
scan 'druid.druid_datasource',{LIMIT=>10}
a).解决方案一
将mysql驱动包放到nifi按照目录的lib中,重启nifi;如图中无需配置:Database Driver Location(s)项
b).解决方案二
如图配置:Database Driver Location(s)项,则驱动包可放在任何可访问的地址,无需重启nifi