一 环境准备
1.1 环境说明
master 192.168.132.131 docker-server1
node1 192.168.132.132 docker-server2
node2 192.168.132.133 docker-server3
1.2 docker版本
[root@docker-server1 ~]# docker version
Client: Docker Engine - Community
 Version:           19.03.5
 API version:       1.40
 Go version:        go1.12.12
 Git commit:        633a0ea
 Built:             Wed Nov 13 07:25:41 2019
 OS/Arch:           linux/amd64
 Experimental:      false

Server: Docker Engine - Community
 Engine:
  Version:          19.03.5
  API version:      1.40 (minimum version 1.12)
  Go version:       go1.12.12
  Git commit:       633a0ea
  Built:            Wed Nov 13 07:24:18 2019
  OS/Arch:          linux/amd64
  Experimental:     false
 containerd:
  Version:          1.2.10
  GitCommit:        b34a5c8af56e510852c35414db4c1f4fa6172339
 runc:
  Version:          1.0.0-rc8+dev
  GitCommit:        3e425f80a8c931f88e6d94a8c831b9d5aa481657
 docker-init:
  Version:          0.18.0
  GitCommit:        fec3683
关闭selinxu,防火墙
1.3 相关组件版本说明
| 组件 | 版本 | 说明 |
|---|---|---|
| kubernetes | 1.16.2 | 主程序 |
| docker | 19.03.3 | 容器 |
| flannel | 0.11.0 | 网络插件 |
| etcd | 3.3.15 | 数据库 |
| coredns | 1.6.2 | dns组件 |
| kubernetes-dashboard | 2.0.0-beta5 | web界面 |
| ingress-nginx | 0.26.1 | ingress |
二 安装kubernetes 1.17.0
2.1 组件
三个节点都需要安装下面三个组件
kubeadm:安装工具,安装后,所有的组件都会以容器的方式运行
kubectl:是一个客户端
kubelet:运行在node节点,用来启动容器的工具
使用yum安装,使用阿里云的yum源https://developer.aliyun.com/mirror
https://developer.aliyun.com/mirror/kubernetes?spm=a2c6h.13651102.0.0.53322f705Hg6zu
2.2 配置yum源
根据文档,给三台机器配置yum源,安装
cat <<EOF > /etc/yum.repos.d/kubernetes.repo
[kubernetes]
name=Kubernetes
baseurl=https://mirrors.aliyun.com/kubernetes/yum/repos/kubernetes-el7-x86_64/
enabled=1
gpgcheck=1
repo_gpgcheck=1
gpgkey=https://mirrors.aliyun.com/kubernetes/yum/doc/yum-key.gpg https://mirrors.aliyun.com/kubernetes/yum/doc/rpm-package-key.gpg
EOF
[root@docker-server1 ~]# yum info kubeadm
Loaded plugins: fastestmirror
Loading mirror speeds from cached hostfile
 * base: mirror.hostlink.com.hk
 * epel: my.fedora.ipserverone.com
 * extras: mirror.hostlink.com.hk
 * updates: hk.mirrors.thegigabit.com
Available Packages
Name        : kubeadm
Arch        : x86_64
Version     : 1.17.0
Release     : 0
Size        : 8.7 M
Repo        : kubernetes
Summary     : Command-line utility for administering a Kubernetes cluster.
URL         : https://kubernetes.io
License     : ASL 2.0
Description : Command-line utility for administering a Kubernetes cluster.
目前最新版本是1.17
2.3 安装
[root@docker-server1 ~]# yum install -y kubelet kubeadm kubectl
[root@docker-server2 ~]# yum install -y kubelet kubeadm kubectl
[root@docker-server3 ~]# yum install -y kubelet kubeadm kubectl
[root@docker-server1 ~]# rpm -aq|grep kube
kubeadm-1.17.0-0.x86_64
kubernetes-cni-0.7.5-0.x86_64
kubectl-1.17.0-0.x86_64
kubelet-1.17.0-0.x86_64
[root@docker-server1 ~]# systemctl enable kubelet && systemctl start kubelet
[root@docker-server2 ~]# systemctl enable kubelet && systemctl start kubelet
[root@docker-server3 ~]# systemctl enable kubelet && systemctl start kubelet
2.4 加载内核模块
所有节点操作
cat > /etc/sysconfig/modules/ipvs.modules <<EOF
#!/bin/bash
modprobe -- br_netfilter
modprobe -- ip_vs
modprobe -- ip_vs_rr
modprobe -- ip_vs_wrr
modprobe -- ip_vs_sh
modprobe -- nf_conntrack_ipv4
EOF

chmod 755 /etc/sysconfig/modules/ipvs.modules &&
bash /etc/sysconfig/modules/ipvs.modules &&
lsmod | grep -E "ip_vs|nf_conntrack_ipv4"
输出结果
ip_vs_sh               12688  0
ip_vs_wrr              12697  0
ip_vs_rr               12600  0
ip_vs                 145497  6 ip_vs_rr,ip_vs_sh,ip_vs_wrr
nf_conntrack_ipv4      15053  5
nf_defrag_ipv4         12729  1 nf_conntrack_ipv4
nf_conntrack          139224  7 ip_vs,nf_nat,nf_nat_ipv4,xt_conntrack,nf_nat_masquerade_ipv4,nf_conntrack_netlink,nf_conntrack_ipv4
libcrc32c              12644  4 xfs,ip_vs,nf_nat,nf_conntrack
2.5 配置kubeadm-config.yaml
kubeadm-config.yaml组成部署说明:
- InitConfiguration: 用于定义一些初始化配置,如初始化使用的token以及apiserver地址等
- ClusterConfiguration:用于定义apiserver、etcd、network、scheduler、controller-manager等master组件相关配置项
- KubeletConfiguration:用于定义kubelet组件相关的配置项
- KubeProxyConfiguration:用于定义kube-proxy组件相关的配置项
在master节点安装,master定于为192.168.132.131,通过如下指令创建默认的kubeadm-config.yaml文件:
[root@docker-server1 ~]# kubeadm config print init-defaults > kubeadm-config.yaml
W0109 11:47:10.868273    8650 validation.go:28] Cannot validate kube-proxy config - no validator is available
W0109 11:47:10.868611    8650 validation.go:28] Cannot validate kubelet config - no validator is available
kubeadm-config.yaml配置
[root@docker-server1 ~]# vim kubeadm-config.yam
apiVersion: kubeadm.k8s.io/v1beta2
bootstrapTokens:
- groups:
  - system:bootstrappers:kubeadm:default-node-token
  token: abcdef.0123456789abcdef
  ttl: 24h0m0s
  usages:
  - signing
  - authentication
kind: InitConfiguration
localAPIEndpoint:
  advertiseAddress: 192.168.132.131       #master节点的IP
  bindPort: 6443
nodeRegistration:
  criSocket: /var/run/dockershim.sock
  name: 192.168.132.131                   #这里修改为IP地址,使用域名,必须保证解析
  taints:
  - effect: NoSchedule
    key: node-role.kubernetes.io/master
---
apiServer:
  timeoutForControlPlane: 4m0s
apiVersion: kubeadm.k8s.io/v1beta2
certificatesDir: /etc/kubernetes/pki
clusterName: kubernetes
controllerManager: {}
dns:
  type: CoreDNS
etcd:
  local:
    dataDir: /var/lib/etcd      #把etcd容器的目录挂载到本地的/var/lib/etcd目录下,防止数据丢失
imageRepository: k8s.gcr.io     #镜像仓库地址,在国内的话,可以修改为gcr.azk8s.cn/google_containers
kind: ClusterConfiguration
kubernetesVersion: v1.17.0      #k8s版本
networking:
  dnsDomain: cluster.local
  serviceSubnet: 10.96.0.0/12
scheduler: {}
2.6 部署master
安装matser节点
[root@docker-server1 ~]# kubeadm init --config kubeadm-config.yaml
W0109 12:00:50.984638   10134 validation.go:28] Cannot validate kube-proxy config - no validator is available
W0109 12:00:50.984791   10134 validation.go:28] Cannot validate kubelet config - no validator is available
[init] Using Kubernetes version: v1.17.0
[preflight] Running pre-flight checks
    [WARNING Service-Docker]: docker service is not enabled, please run 'systemctl enable docker.service'
    [WARNING IsDockerSystemdCheck]: detected "cgroupfs" as the Docker cgroup driver. The recommended driver is "systemd". Please follow the guide at https://kubernetes.io/docs/setup/cri/
error execution phase preflight: [preflight] Some fatal errors occurred:
    [ERROR Swap]: running with swap on is not supported. Please disable swap
    [ERROR DirAvailable--var-lib-etcd]: /var/lib/etcd is not empty
[preflight] If you know what you are doing, you can make a check non-fatal with `--ignore-preflight-errors=...`
To see the stack trace of this error execute with --v=5 or higher
是在学习docker安装的etcd,删除这个文件
[root@docker-server1 ~]# rm -rf /var/lib/etcd/
[root@docker-server1 ~]# kubeadm init --config kubeadm-config.yaml
W0109 12:01:13.214429   10319 validation.go:28] Cannot validate kube-proxy config - no validator is available
W0109 12:01:13.214516   10319 validation.go:28] Cannot validate kubelet config - no validator is available
[init] Using Kubernetes version: v1.17.0
[preflight] Running pre-flight checks
    [WARNING Service-Docker]: docker service is not enabled, please run 'systemctl enable docker.service'
    [WARNING IsDockerSystemdCheck]: detected "cgroupfs" as the Docker cgroup driver. The recommended driver is "systemd". Please follow the guide at https://kubernetes.io/docs/setup/cri/
error execution phase preflight: [preflight] Some fatal errors occurred:
    [ERROR Swap]: running with swap on is not supported. Please disable swap
[preflight] If you know what you are doing, you can make a check non-fatal with `--ignore-preflight-errors=...`
To see the stack trace of this error execute with --v=5 or higher
执行
[root@docker-server1 ~]# systemctl enable docker.service
并disable swap
[root@docker-server1 ~]# cat /etc/fstab
#
# /etc/fstab
# Created by anaconda on Mon Aug 12 10:34:55 2019
#
# Accessible filesystems, by reference, are maintained under '/dev/disk'
# See man pages fstab(5), findfs(8), mount(8) and/or blkid(8) for more info
#
/dev/mapper/centos-root / xfs defaults 0 0
UUID=e792ce5a-c008-4849-98d2-dacfa848f2a0 /boot xfs defaults 0 0
# /dev/mapper/centos-swap swap swap defaults 0 0    #注释这个挂载
[root@docker-server1 ~]# swapoff /dev/mapper/centos-swap
[root@docker-server1 ~]# free -h
  total        used        free      shared  buff/cache   available
Mem:           7.6G        273M        6.3G         11M        1.0G        7.1G
Swap:            0B          0B          0B
[root@docker-server1 ~]# kubeadm init --config kubeadm-config.yaml
W0109 12:08:45.192524   11408 validation.go:28] Cannot validate kube-proxy config - no validator is available
W0109 12:08:45.192590   11408 validation.go:28] Cannot validate kubelet config - no validator is available
[init] Using Kubernetes version: v1.17.0
[preflight] Running pre-flight checks
    [WARNING IsDockerSystemdCheck]: detected "cgroupfs" as the Docker cgroup driver. The recommended driver is "systemd". Please follow the guide at https://kubernetes.io/docs/setup/cri/
[preflight] Pulling images required for setting up a Kubernetes cluster
[preflight] This might take a minute or two, depending on the speed of your internet connection
[preflight] You can also perform this action in beforehand using 'kubeadm config images pull'
[kubelet-start] Writing kubelet environment file with flags to file "/var/lib/kubelet/kubeadm-flags.env"
[kubelet-start] Writing kubelet configuration to file "/var/lib/kubelet/config.yaml"
[kubelet-start] Starting the kubelet
[certs] Using certificateDir folder "/etc/kubernetes/pki"
[certs] Generating "ca" certificate and key
[certs] Generating "apiserver" certificate and key
[certs] apiserver serving cert is signed for DNS names [192.168.132.131 kubernetes kubernetes.default kubernetes.default.svc kubernetes.default.svc.cluster.local] and IPs [10.96.0.1 192.168.132.131]
[certs] Generating "apiserver-kubelet-client" certificate and key
[certs] Generating "front-proxy-ca" certificate and key
[certs] Generating "front-proxy-client" certificate and key
[certs] Generating "etcd/ca" certificate and key
[certs] Generating "etcd/server" certificate and key
[certs] etcd/server serving cert is signed for DNS names [192.168.132.131 localhost] and IPs [192.168.132.131 127.0.0.1 ::1]
[certs] Generating "etcd/peer" certificate and key
[certs] etcd/peer serving cert is signed for DNS names [192.168.132.131 localhost] and IPs [192.168.132.131 127.0.0.1 ::1]
[certs] Generating "etcd/healthcheck-client" certificate and key
[certs] Generating "apiserver-etcd-client" certificate and key
[certs] Generating "sa" key and public key
[kubeconfig] Using kubeconfig folder "/etc/kubernetes"
[kubeconfig] Writing "admin.conf" kubeconfig file
[kubeconfig] Writing "kubelet.conf" kubeconfig file
[kubeconfig] Writing "controller-manager.conf" kubeconfig file
[kubeconfig] Writing "scheduler.conf" kubeconfig file
[control-plane] Using manifest folder "/etc/kubernetes/manifests"
[control-plane] Creating static Pod manifest for "kube-apiserver"
[control-plane] Creating static Pod manifest for "kube-controller-manager"
W0109 12:11:02.496349   11408 manifests.go:214] the default kube-apiserver authorization-mode is "Node,RBAC"; using "Node,RBAC"
[control-plane] Creating static Pod manifest for "kube-scheduler"
W0109 12:11:02.497925   11408 manifests.go:214] the default kube-apiserver authorization-mode is "Node,RBAC"; using "Node,RBAC"
[etcd] Creating static Pod manifest for local etcd in "/etc/kubernetes/manifests"
[wait-control-plane] Waiting for the kubelet to boot up the control plane as static Pods from directory "/etc/kubernetes/manifests". This can take up to 4m0s
[apiclient] All control plane components are healthy after 18.503839 seconds
[upload-config] Storing the configuration used in ConfigMap "kubeadm-config" in the "kube-system" Namespace
[kubelet] Creating a ConfigMap "kubelet-config-1.17" in namespace kube-system with the configuration for the kubelets in the cluster
[upload-certs] Skipping phase. Please see --upload-certs
[mark-control-plane] Marking the node 192.168.132.131 as control-plane by adding the label "node-role.kubernetes.io/master=''"
[mark-control-plane] Marking the node 192.168.132.131 as control-plane by adding the taints [node-role.kubernetes.io/master:NoSchedule]
[bootstrap-token] Using token: abcdef.0123456789abcdef
[bootstrap-token] Configuring bootstrap tokens, cluster-info ConfigMap, RBAC Roles
[bootstrap-token] configured RBAC rules to allow Node Bootstrap tokens to post CSRs in order for nodes to get long term certificate credentials
[bootstrap-token] configured RBAC rules to allow the csrapprover controller automatically approve CSRs from a Node Bootstrap Token
[bootstrap-token] configured RBAC rules to allow certificate rotation for all node client certificates in the cluster
[bootstrap-token] Creating the "cluster-info" ConfigMap in the "kube-public" namespace
[kubelet-finalize] Updating "/etc/kubernetes/kubelet.conf" to point to a rotatable kubelet client certificate and key
[addons] Applied essential addon: CoreDNS
[addons] Applied essential addon: kube-proxy

Your Kubernetes control-plane has initialized successfully!

To start using your cluster, you need to run the following as a regular user:    #安装完成,在master上操作

  mkdir -p $HOME/.kube
  sudo cp -i /etc/kubernetes/admin.conf $HOME/.kube/config
  sudo chown $(id -u):$(id -g) $HOME/.kube/config

You should now deploy a pod network to the cluster.
Run "kubectl apply -f [podnetwork].yaml" with one of the options listed at:
  https://kubernetes.io/docs/concepts/cluster-administration/addons/

Then you can join any number of worker nodes by running the following on each as root:

kubeadm join 192.168.132.131:6443 --token abcdef.0123456789abcdef
    --discovery-token-ca-cert-hash sha256:69b08312889f1841d5e451f87485aa2ec39d85fa24ebbf62521b4993bfc782e4     #添加node节点
安装完成
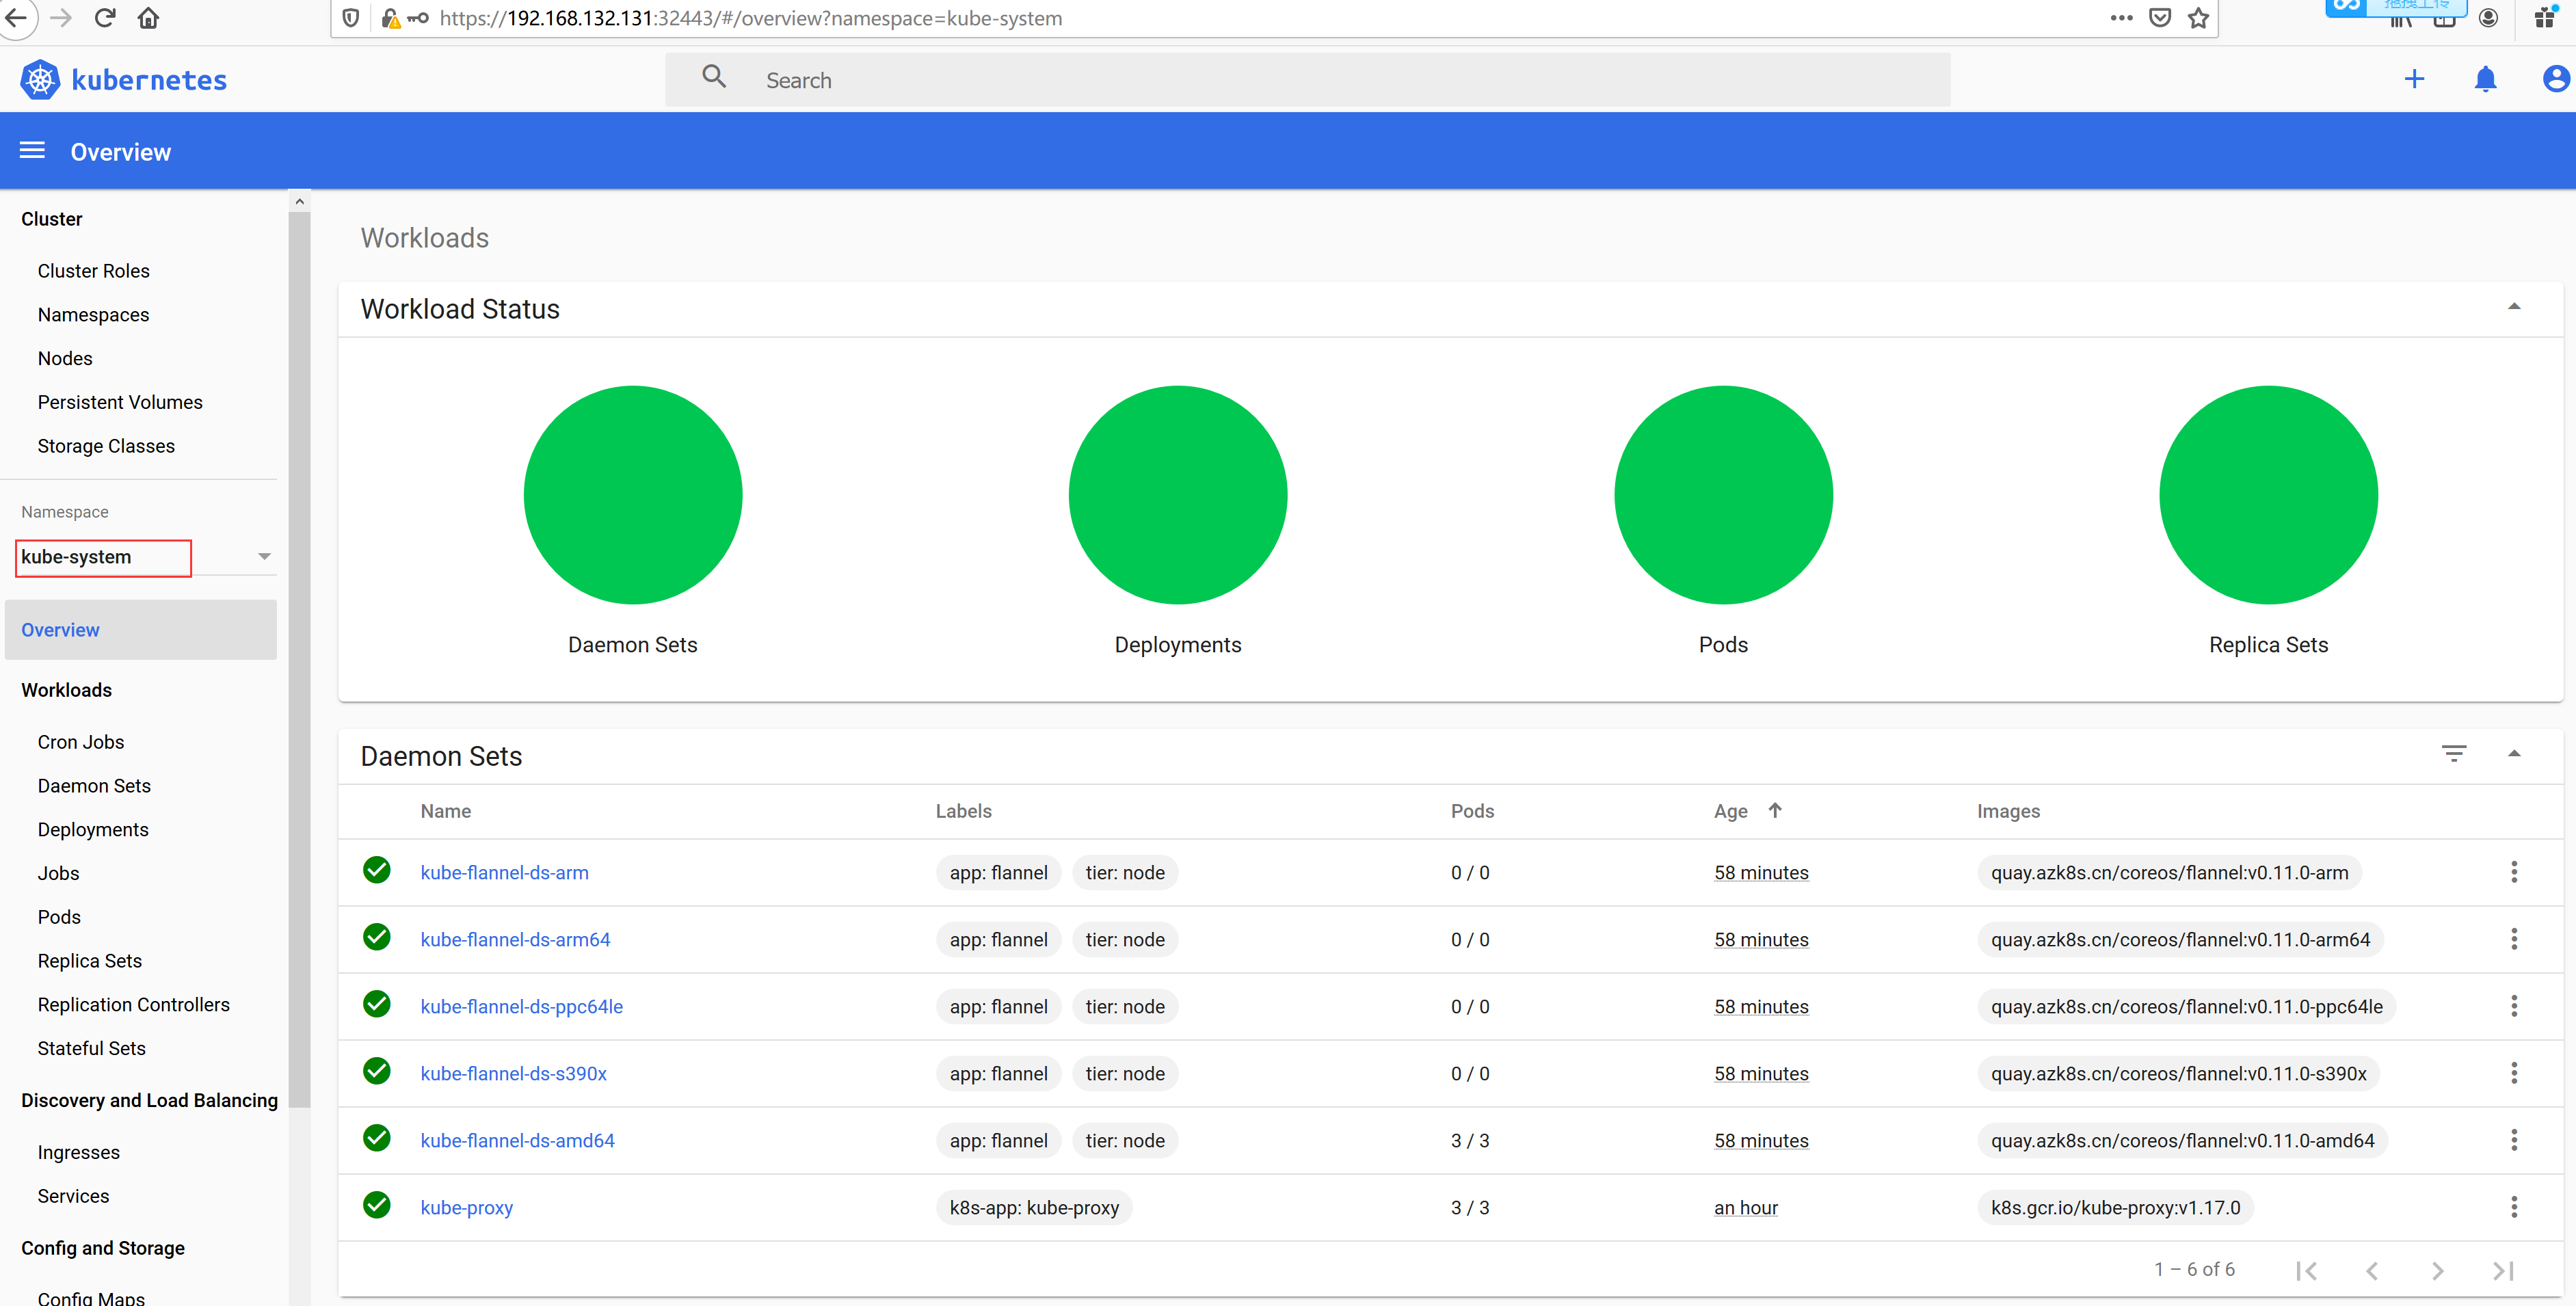
2.7 查看容器
[root@docker-server1 ~]# docker ps -a
CONTAINER ID        IMAGE                  COMMAND                  CREATED             STATUS                    PORTS               NAMES
ae8549a82b77        7d54289267dc           "/usr/local/bin/kube…"   3 minutes ago       Up 3 minutes                                  k8s_kube-proxy_kube-proxy-85wct_kube-system_ba75ad88-ad40-48ff-8df3-b275d5e633b3_0
bd43e8ed43d4        k8s.gcr.io/pause:3.1   "/pause"                 3 minutes ago       Up 3 minutes                                  k8s_POD_kube-proxy-85wct_kube-system_ba75ad88-ad40-48ff-8df3-b275d5e633b3_0
4251da77267b        78c190f736b1           "kube-scheduler --au…"   4 minutes ago       Up 4 minutes                                  k8s_kube-scheduler_kube-scheduler-192.168.132.131_kube-system_ff67867321338ffd885039e188f6b424_0
dc0f77b83a11        5eb3b7486872           "kube-controller-man…"   4 minutes ago       Up 4 minutes                                  k8s_kube-controller-manager_kube-controller-manager-192.168.132.131_kube-system_c2005b6581bec7a243719295b4c45211_0
9423af2e2815        303ce5db0e90           "etcd --advertise-cl…"   4 minutes ago       Up 4 minutes                                  k8s_etcd_etcd-192.168.132.131_kube-system_9efa80759e8a266de518d018d831e47c_0
50ad1f661532        0cae8d5cc64c           "kube-apiserver --ad…"   4 minutes ago       Up 4 minutes                                  k8s_kube-apiserver_kube-apiserver-192.168.132.131_kube-system_35be3047d357a34596bdda175ae3edd5_0
4e6d45ca5f26        k8s.gcr.io/pause:3.1   "/pause"                 4 minutes ago       Up 4 minutes                                  k8s_POD_kube-scheduler-192.168.132.131_kube-system_ff67867321338ffd885039e188f6b424_0
a5dbe134219e        k8s.gcr.io/pause:3.1   "/pause"                 4 minutes ago       Up 4 minutes                                  k8s_POD_kube-controller-manager-192.168.132.131_kube-system_c2005b6581bec7a243719295b4c45211_0
f459231c57f0        k8s.gcr.io/pause:3.1   "/pause"                 4 minutes ago       Up 4 minutes                                  k8s_POD_kube-apiserver-192.168.132.131_kube-system_35be3047d357a34596bdda175ae3edd5_0
46fc5b0bc652        k8s.gcr.io/pause:3.1   "/pause"                 4 minutes ago       Up 4 minutes                                  k8s_POD_etcd-192.168.132.131_kube-system_9efa80759e8a266de518d018d831e47c_0
73c1d78829a8        busybox                "sh"                     2 months ago        Exited (0) 2 months ago                       relaxed_rosalind
根据提示操作
[root@docker-server1 ~]# mkdir -p $HOME/.kube
[root@docker-server1 ~]# sudo cp -i /etc/kubernetes/admin.conf $HOME/.kube/config
[root@docker-server1 ~]# sudo chown $(id -u):$(id -g) $HOME/.kube/config
现在就安装完成
查看node节点
[root@docker-server1 ~]# kubectl get nodes
NAME              STATUS     ROLES    AGE   VERSION
192.168.132.131   NotReady   master   28m   v1.17.0
[root@docker-server1 ~]# kubectl get pods -n kube-system
NAME                                      READY   STATUS    RESTARTS   AGE
coredns-6955765f44-5x84f                  0/1     Pending   0          29m
coredns-6955765f44-74z8d                  0/1     Pending   0          29m
etcd-192.168.132.131                      1/1     Running   0          29m
kube-apiserver-192.168.132.131            1/1     Running   0          29m
kube-controller-manager-192.168.132.131   1/1     Running   0          29m
kube-proxy-85wct                          1/1     Running   0          29m
kube-scheduler-192.168.132.131            1/1     Running   0          29m
发现两个问题
1 core节点为pending:是因为需要node节点,但是还没有安装node节点,所以是pending
2 status是notready状态:是因为还没有安装网络插件
2.8 安装flannel
https://github.com/coreos/flannel/blob/master/Documentation/kube-flannel.yml
[root@docker-server1 ~]# wget https://raw.githubusercontent.com/coreos/flannel/master/Documentation/kube-flannel.yml
[root@docker-server1 ~]# sed -i 's@quay.io@quay.azk8s.cn@g' kube-flannel.yml
[root@docker-server1 ~]# kubectl apply -f kube-flannel.yml
podsecuritypolicy.policy/psp.flannel.unprivileged created
clusterrole.rbac.authorization.k8s.io/flannel created
clusterrolebinding.rbac.authorization.k8s.io/flannel created
serviceaccount/flannel created
configmap/kube-flannel-cfg created
daemonset.apps/kube-flannel-ds-amd64 created
daemonset.apps/kube-flannel-ds-arm64 created
daemonset.apps/kube-flannel-ds-arm created
daemonset.apps/kube-flannel-ds-ppc64le created
daemonset.apps/kube-flannel-ds-s390x created
[root@docker-server1 ~]# kubectl get nodes
NAME              STATUS   ROLES    AGE   VERSION
192.168.132.131   Ready    master   39m   v1.17.0
已经是ready状态
2.9 安装node节点
根据提示安装node节点
[root@docker-server2 ~]# kubeadm join 192.168.132.131:6443 --token abcdef.0123456789abcdef
--discovery-token-ca-cert-hash sha256:69b08312889f1841d5e451f87485aa2ec39d85fa24ebbf62521b4993bfc782e4
>     --discovery-token-ca-cert-hash sha256:69b08312889f1841d5e451f87485aa2ec39d85fa24ebbf62521b4993bfc782e4
W0109 12:55:20.074145   17526 join.go:346] [preflight] WARNING: JoinControlPane.controlPlane settings will be ignored when control-plane flag is not set.
[preflight] Running pre-flight checks
    [WARNING IsDockerSystemdCheck]: detected "cgroupfs" as the Docker cgroup driver. The recommended driver is "systemd". Please follow the guide at https://kubernetes.io/docs/setup/cri/
    [WARNING Hostname]: hostname "docker-server2" could not be reached
    [WARNING Hostname]: hostname "docker-server2": lookup docker-server2 on 8.8.8.8:53: no such host
[preflight] Reading configuration from the cluster...
[preflight] FYI: You can look at this config file with 'kubectl -n kube-system get cm kubeadm-config -oyaml'
[kubelet-start] Downloading configuration for the kubelet from the "kubelet-config-1.17" ConfigMap in the kube-system namespace
[kubelet-start] Writing kubelet configuration to file "/var/lib/kubelet/config.yaml"
[kubelet-start] Writing kubelet environment file with flags to file "/var/lib/kubelet/kubeadm-flags.env"
[kubelet-start] Starting the kubelet
[kubelet-start] Waiting for the kubelet to perform the TLS Bootstrap...

This node has joined the cluster:
* Certificate signing request was sent to apiserver and a response was received.
* The Kubelet was informed of the new secure connection details.

Run 'kubectl get nodes' on the control-plane to see this node join the cluster.
[root@docker-server1 ~]# kubectl get nodes
NAME              STATUS   ROLES    AGE   VERSION
192.168.132.131   Ready    master   45m   v1.17.0
docker-server2    Ready    <none>   87s   v1.17.0
在另一个节点使用另一种方式安装
master节点的token信息
[root@docker-server1 ~]# cat kubeadm-config.yaml |grep token
- system:bootstrappers:kubeadm:default-node-token
  token: abcdef.0123456789abcdef
[root@docker-server3 ~]# kubeadm config print join-defaults > kubeadm-config.yaml
[root@docker-server3 ~]# vi kubeadm-config.yaml
apiVersion: kubeadm.k8s.io/v1beta2
caCertPath: /etc/kubernetes/pki/ca.crt
discovery:
  bootstrapToken:
    apiServerEndpoint: 192.168.132.131:6443
    token: abcdef.0123456789abcdef
    unsafeSkipCAVerification: true
  timeout: 5m0s
  tlsBootstrapToken: abcdef.0123456789abcdef
kind: JoinConfiguration
nodeRegistration:
  criSocket: /var/run/dockershim.sock
  name: 192.168.132.133
  taints: null
[root@docker-server3 ~]# kubeadm join --config kubeadm-config.yaml
W0109 13:03:47.889071   65148 join.go:346] [preflight] WARNING: JoinControlPane.controlPlane settings will be ignored when control-plane flag is not set.
[preflight] Running pre-flight checks
    [WARNING IsDockerSystemdCheck]: detected "cgroupfs" as the Docker cgroup driver. The recommended driver is "systemd". Please follow the guide at https://kubernetes.io/docs/setup/cri/
[preflight] Reading configuration from the cluster...
[preflight] FYI: You can look at this config file with 'kubectl -n kube-system get cm kubeadm-config -oyaml'
[kubelet-start] Downloading configuration for the kubelet from the "kubelet-config-1.17" ConfigMap in the kube-system namespace
[kubelet-start] Writing kubelet configuration to file "/var/lib/kubelet/config.yaml"
[kubelet-start] Writing kubelet environment file with flags to file "/var/lib/kubelet/kubeadm-flags.env"
[kubelet-start] Starting the kubelet
[kubelet-start] Waiting for the kubelet to perform the TLS Bootstrap...

This node has joined the cluster:
* Certificate signing request was sent to apiserver and a response was received.
* The Kubelet was informed of the new secure connection details.

Run 'kubectl get nodes' on the control-plane to see this node join the cluster.
[root@docker-server1 ~]# kubectl get nodes
NAME              STATUS   ROLES    AGE     VERSION
192.168.132.131   Ready    master   53m     v1.17.0
192.168.132.133   Ready    <none>   53s     v1.17.0
docker-server2    Ready    <none>   9m58s   v1.17.0
[root@docker-server2 ~]# cat /usr/lib/systemd/system/kubelet.service.d/10-kubeadm.conf
# Note: This dropin only works with kubeadm and kubelet v1.11+
[Service]
Environment="KUBELET_KUBECONFIG_ARGS=--bootstrap-kubeconfig=/etc/kubernetes/bootstrap-kubelet.conf --kubeconfig=/etc/kubernetes/kubelet.conf"
Environment="KUBELET_CONFIG_ARGS=--config=/var/lib/kubelet/config.yaml"
# This is a file that "kubeadm init" and "kubeadm join" generates at runtime, populating the KUBELET_KUBEADM_ARGS variable dynamically
EnvironmentFile=-/var/lib/kubelet/kubeadm-flags.env
# This is a file that the user can use for overrides of the kubelet args as a last resort. Preferably, the user should use
# the .NodeRegistration.KubeletExtraArgs object in the configuration files instead. KUBELET_EXTRA_ARGS should be sourced from this file.
EnvironmentFile=-/etc/sysconfig/kubelet
ExecStart=
ExecStart=/usr/bin/kubelet $KUBELET_KUBECONFIG_ARGS $KUBELET_CONFIG_ARGS $KUBELET_KUBEADM_ARGS $KUBELET_EXTRA_ARGS
[root@docker-server1 ~]# kubectl get pods -n kube-system
NAME                                      READY   STATUS              RESTARTS   AGE
coredns-6955765f44-5x84f                  0/1     ContainerCreating   0          62m
coredns-6955765f44-74z8d                  0/1     ContainerCreating   0          62m
etcd-192.168.132.131                      1/1     Running             0          62m
kube-apiserver-192.168.132.131            1/1     Running             0          62m
kube-controller-manager-192.168.132.131   1/1     Running             0          62m
kube-flannel-ds-amd64-6f72q               0/1     CrashLoopBackOff    8          18m
kube-flannel-ds-amd64-ktcw7               0/1     CrashLoopBackOff    6          9m53s
kube-flannel-ds-amd64-w7dbz               0/1     CrashLoopBackOff    9          23m
kube-proxy-85wct                          1/1     Running             0          62m
kube-proxy-8xq2q                          1/1     Running             0          9m53s
kube-proxy-8zmvf                          1/1     Running             0          18m
kube-scheduler-192.168.132.131            1/1     Running             0          62m
三 重新安装环境
3.1 重置master
[root@docker-server1 ~]# kubeadm reset
[reset] Reading configuration from the cluster...
[reset] FYI: You can look at this config file with 'kubectl -n kube-system get cm kubeadm-config -oyaml'
[reset] WARNING: Changes made to this host by 'kubeadm init' or 'kubeadm join' will be reverted.
[reset] Are you sure you want to proceed? [y/N]: y
[preflight] Running pre-flight checks
[reset] Removing info for node "192.168.132.131" from the ConfigMap "kubeadm-config" in the "kube-system" Namespace
W0109 13:15:22.217588   56673 removeetcdmember.go:61] [reset] failed to remove etcd member: error syncing endpoints with etc: etcdclient: no available endpoints
.Please manually remove this etcd member using etcdctl
[reset] Stopping the kubelet service
[reset] Unmounting mounted directories in "/var/lib/kubelet"
[reset] Deleting contents of config directories: [/etc/kubernetes/manifests /etc/kubernetes/pki]
[reset] Deleting files: [/etc/kubernetes/admin.conf /etc/kubernetes/kubelet.conf /etc/kubernetes/bootstrap-kubelet.conf /etc/kubernetes/controller-manager.conf /etc/kubernetes/scheduler.conf]
[reset] Deleting contents of stateful directories: [/var/lib/etcd /var/lib/kubelet /var/lib/dockershim /var/run/kubernetes /var/lib/cni]

The reset process does not clean CNI configuration. To do so, you must remove /etc/cni/net.d

The reset process does not reset or clean up iptables rules or IPVS tables.
If you wish to reset iptables, you must do so manually by using the "iptables" command.

If your cluster was setup to utilize IPVS, run ipvsadm --clear (or similar)
to reset your system's IPVS tables.

The reset process does not clean your kubeconfig files and you must remove them manually.
Please, check the contents of the $HOME/.kube/config file.
[root@docker-server1 ~]# kubectl get nodes
The connection to the server 192.168.132.131:6443 was refused - did you specify the right host or port?
3.2 修改配置
[root@docker-server1 ~]# vi kubeadm-config.yaml
networking:
  dnsDomain: cluster.local
  serviceSubnet: 10.96.0.0/12
  podSubnet: 10.244.0.0/16        #添加这个内容
[root@docker-server1 ~]# kubeadm init --config kubeadm-config.yaml
W0109 13:18:41.342579   58496 validation.go:28] Cannot validate kube-proxy config - no validator is available
W0109 13:18:41.342660   58496 validation.go:28] Cannot validate kubelet config - no validator is available
[init] Using Kubernetes version: v1.17.0
[preflight] Running pre-flight checks
    [WARNING IsDockerSystemdCheck]: detected "cgroupfs" as the Docker cgroup driver. The recommended driver is "systemd". Please follow the guide at https://kubernetes.io/docs/setup/cri/
[preflight] Pulling images required for setting up a Kubernetes cluster
[preflight] This might take a minute or two, depending on the speed of your internet connection
[preflight] You can also perform this action in beforehand using 'kubeadm config images pull'
[kubelet-start] Writing kubelet environment file with flags to file "/var/lib/kubelet/kubeadm-flags.env"
[kubelet-start] Writing kubelet configuration to file "/var/lib/kubelet/config.yaml"
[kubelet-start] Starting the kubelet
[certs] Using certificateDir folder "/etc/kubernetes/pki"
[certs] Generating "ca" certificate and key
[certs] Generating "apiserver" certificate and key
[certs] apiserver serving cert is signed for DNS names [192.168.132.131 kubernetes kubernetes.default kubernetes.default.svc kubernetes.default.svc.cluster.local] and IPs [10.96.0.1 192.168.132.131]
[certs] Generating "apiserver-kubelet-client" certificate and key
[certs] Generating "front-proxy-ca" certificate and key
[certs] Generating "front-proxy-client" certificate and key
[certs] Generating "etcd/ca" certificate and key
[certs] Generating "etcd/server" certificate and key
[certs] etcd/server serving cert is signed for DNS names [192.168.132.131 localhost] and IPs [192.168.132.131 127.0.0.1 ::1]
[certs] Generating "etcd/peer" certificate and key
[certs] etcd/peer serving cert is signed for DNS names [192.168.132.131 localhost] and IPs [192.168.132.131 127.0.0.1 ::1]
[certs] Generating "etcd/healthcheck-client" certificate and key
[certs] Generating "apiserver-etcd-client" certificate and key
[certs] Generating "sa" key and public key
[kubeconfig] Using kubeconfig folder "/etc/kubernetes"
[kubeconfig] Writing "admin.conf" kubeconfig file
[kubeconfig] Writing "kubelet.conf" kubeconfig file
[kubeconfig] Writing "controller-manager.conf" kubeconfig file
[kubeconfig] Writing "scheduler.conf" kubeconfig file
[control-plane] Using manifest folder "/etc/kubernetes/manifests"
[control-plane] Creating static Pod manifest for "kube-apiserver"
[control-plane] Creating static Pod manifest for "kube-controller-manager"
W0109 13:18:47.268638   58496 manifests.go:214] the default kube-apiserver authorization-mode is "Node,RBAC"; using "Node,RBAC"
[control-plane] Creating static Pod manifest for "kube-scheduler"
W0109 13:18:47.272039   58496 manifests.go:214] the default kube-apiserver authorization-mode is "Node,RBAC"; using "Node,RBAC"
[etcd] Creating static Pod manifest for local etcd in "/etc/kubernetes/manifests"
[wait-control-plane] Waiting for the kubelet to boot up the control plane as static Pods from directory "/etc/kubernetes/manifests". This can take up to 4m0s
[apiclient] All control plane components are healthy after 13.503410 seconds
[upload-config] Storing the configuration used in ConfigMap "kubeadm-config" in the "kube-system" Namespace
[kubelet] Creating a ConfigMap "kubelet-config-1.17" in namespace kube-system with the configuration for the kubelets in the cluster
[upload-certs] Skipping phase. Please see --upload-certs
[mark-control-plane] Marking the node 192.168.132.131 as control-plane by adding the label "node-role.kubernetes.io/master=''"
[mark-control-plane] Marking the node 192.168.132.131 as control-plane by adding the taints [node-role.kubernetes.io/master:NoSchedule]
[bootstrap-token] Using token: abcdef.0123456789abcdef
[bootstrap-token] Configuring bootstrap tokens, cluster-info ConfigMap, RBAC Roles
[bootstrap-token] configured RBAC rules to allow Node Bootstrap tokens to post CSRs in order for nodes to get long term certificate credentials
[bootstrap-token] configured RBAC rules to allow the csrapprover controller automatically approve CSRs from a Node Bootstrap Token
[bootstrap-token] configured RBAC rules to allow certificate rotation for all node client certificates in the cluster
[bootstrap-token] Creating the "cluster-info" ConfigMap in the "kube-public" namespace
[kubelet-finalize] Updating "/etc/kubernetes/kubelet.conf" to point to a rotatable kubelet client certificate and key
[addons] Applied essential addon: CoreDNS
[addons] Applied essential addon: kube-proxy

Your Kubernetes control-plane has initialized successfully!

To start using your cluster, you need to run the following as a regular user:

  mkdir -p $HOME/.kube
  sudo cp -i /etc/kubernetes/admin.conf $HOME/.kube/config
  sudo chown $(id -u):$(id -g) $HOME/.kube/config

You should now deploy a pod network to the cluster.
Run "kubectl apply -f [podnetwork].yaml" with one of the options listed at:
  https://kubernetes.io/docs/concepts/cluster-administration/addons/

Then you can join any number of worker nodes by running the following on each as root:

kubeadm join 192.168.132.131:6443 --token abcdef.0123456789abcdef
    --discovery-token-ca-cert-hash sha256:1d9bb00debd5812c1d5bf1ceb6f64151f32a489b8fc5c61d88a999798e3e2fe3
[root@docker-server1 ~]# mkdir -p $HOME/.kube
[root@docker-server1 ~]# cp -i /etc/kubernetes/admin.conf $HOME/.kube/config
[root@docker-server1 ~]# chown $(id -u):$(id -g) $HOME/.kube/config
[root@docker-server1 ~]# kubectl get nodes
NAME              STATUS   ROLES    AGE     VERSION
192.168.132.131   Ready    master   2m40s   v1.17.0
[root@docker-server1 ~]# kubectl apply -f kube-flannel.yml
podsecuritypolicy.policy/psp.flannel.unprivileged created
clusterrole.rbac.authorization.k8s.io/flannel created
clusterrolebinding.rbac.authorization.k8s.io/flannel created
serviceaccount/flannel created
configmap/kube-flannel-cfg created
daemonset.apps/kube-flannel-ds-amd64 created
daemonset.apps/kube-flannel-ds-arm64 created
daemonset.apps/kube-flannel-ds-arm created
daemonset.apps/kube-flannel-ds-ppc64le created
daemonset.apps/kube-flannel-ds-s390x created
[root@docker-server1 ~]# kubectl get pods -n kube-system
NAME                                      READY   STATUS    RESTARTS   AGE
coredns-6955765f44-8kxdg                  1/1     Running   0          3m37s
coredns-6955765f44-m66bw                  0/1     Running   0          3m37s
etcd-192.168.132.131                      1/1     Running   0          3m52s
kube-apiserver-192.168.132.131            1/1     Running   0          3m52s
kube-controller-manager-192.168.132.131   1/1     Running   0          3m52s
kube-flannel-ds-amd64-m9lgq               1/1     Running   0          12s
kube-proxy-q867d                          1/1     Running   0          3m37s
kube-scheduler-192.168.132.131            1/1     Running   0          3m52s
3.3 重新添加节点
[root@docker-server2 ~]# kubeadm config print join-defaults > kubeadm-config.yaml
[root@docker-server2 ~]# vi kubeadm-config.yaml
apiVersion: kubeadm.k8s.io/v1beta2
caCertPath: /etc/kubernetes/pki/ca.crt
discovery:
  bootstrapToken:
    apiServerEndpoint: 192.168.132.131:6443
    token: abcdef.0123456789abcdef
    unsafeSkipCAVerification: true
  timeout: 5m0s
  tlsBootstrapToken: abcdef.0123456789abcdef
kind: JoinConfiguration
nodeRegistration:
  criSocket: /var/run/dockershim.sock
  name: 192.168.132.132
  taints: null
[root@docker-server2 ~]# docker ps -aq|xargs docker rm -f
[root@docker-server2 ~]# systemctl stop kubelet
[root@docker-server2 ~]# rm -rf /etc/kubernetes/*
[root@docker-server2 ~]# rm -rf /var/lib/kubelet/*
[root@docker-server2 ~]# kubeadm join --config kubeadm-config.yaml
第二个节点
[root@docker-server3 ~]# systemctl stop kubelet
[root@docker-server3 ~]# rm -rf /etc/kubernetes/
[root@docker-server3 ~]# rm -rf /var/lib/kubelet/*
[root@docker-server3 ~]# docker ps -aq|xargs docker rm -f
[root@docker-server3 ~]# kubeadm join --config kubeadm-config.yaml
查看:
[root@docker-server1 ~]# kubectl get nodes
NAME              STATUS   ROLES    AGE     VERSION
192.168.132.131   Ready    master   16m     v1.17.0
192.168.132.132   Ready    <none>   3m13s   v1.17.0
192.168.132.133   Ready    <none>   65s     v1.17.0
[root@docker-server1 ~]# kubectl get pods -n kube-system
NAME                                      READY   STATUS    RESTARTS   AGE
coredns-6955765f44-8kxdg                  1/1     Running   0          16m
coredns-6955765f44-m66bw                  1/1     Running   0          16m
etcd-192.168.132.131                      1/1     Running   0          16m
kube-apiserver-192.168.132.131            1/1     Running   0          16m
kube-controller-manager-192.168.132.131   1/1     Running   0          16m
kube-flannel-ds-amd64-dbckr               1/1     Running   0          3m43s
kube-flannel-ds-amd64-fg972               1/1     Running   0          95s
kube-flannel-ds-amd64-m9lgq               1/1     Running   0          12m
kube-proxy-7xgt9                          1/1     Running   0          3m43s
kube-proxy-k8kb7                          1/1     Running   0          95s
kube-proxy-q867d                          1/1     Running   0          16m
kube-scheduler-192.168.132.131            1/1     Running   0          16m
四 安装Dashboard
dashboard的github仓库地址:https://github.com/kubernetes/dashboard
代码仓库当中,有给出安装示例的相关部署文件,我们可以直接获取之后,直接部署即可
4.1 下载yml文件
[root@docker-server1 ~]# wget https://raw.githubusercontent.com/kubernetes/dashboard/master/aio/deploy/recommended.yaml
默认这个部署文件当中,会单独创建一个名为kubernetes-dashboard的命名空间,并将kubernetes-dashboard部署在该命名空间下。dashboard的镜像来自docker hub官方,所以可不用修改镜像地址,直接从官方获取即可。
[root@docker-server1 ~]# kubectl apply -f recommended.yaml
namespace/kubernetes-dashboard created
serviceaccount/kubernetes-dashboard created
service/kubernetes-dashboard created
secret/kubernetes-dashboard-certs created
secret/kubernetes-dashboard-csrf created
secret/kubernetes-dashboard-key-holder created
configmap/kubernetes-dashboard-settings created
role.rbac.authorization.k8s.io/kubernetes-dashboard created
clusterrole.rbac.authorization.k8s.io/kubernetes-dashboard created
rolebinding.rbac.authorization.k8s.io/kubernetes-dashboard created
clusterrolebinding.rbac.authorization.k8s.io/kubernetes-dashboard created
deployment.apps/kubernetes-dashboard created
service/dashboard-metrics-scraper created
deployment.apps/dashboard-metrics-scraper created
[root@docker-server1 ~]# kubectl get pods -n kubernetes-dashboard
NAME                                         READY   STATUS    RESTARTS   AGE
dashboard-metrics-scraper-76585494d8-5jtvw   1/1     Running   0          86s
kubernetes-dashboard-b7ffbc8cb-4xcdp         1/1     Running   0          86s
已经运行
4.2 开放端口设置
在默认情况下,dashboard并不对外开放访问端口,这里简化操作,直接使用nodePort的方式将其端口暴露出来,修改serivce部分的定义:
[root@docker-server1 ~]# vi recommended.yaml
kind: Service
apiVersion: v1
metadata:
  labels:
    k8s-app: kubernetes-dashboard
  name: kubernetes-dashboard
  namespace: kubernetes-dashboard
spec:
  type: NodePort
  ports:
    - port: 443
      targetPort: 8443
      nodePort: 32443
  selector:
    k8s-app: kubernetes-dashboard
[root@docker-server1 ~]# kubectl delete -f recommended.yaml
namespace "kubernetes-dashboard" deleted
serviceaccount "kubernetes-dashboard" deleted
service "kubernetes-dashboard" deleted
secret "kubernetes-dashboard-certs" deleted
secret "kubernetes-dashboard-csrf" deleted
secret "kubernetes-dashboard-key-holder" deleted
configmap "kubernetes-dashboard-settings" deleted
role.rbac.authorization.k8s.io "kubernetes-dashboard" deleted
clusterrole.rbac.authorization.k8s.io "kubernetes-dashboard" deleted
rolebinding.rbac.authorization.k8s.io "kubernetes-dashboard" deleted
clusterrolebinding.rbac.authorization.k8s.io "kubernetes-dashboard" deleted
deployment.apps "kubernetes-dashboard" deleted
service "dashboard-metrics-scraper" deleted
deployment.apps "dashboard-metrics-scraper" deleted
[root@docker-server1 ~]# kubectl apply -f recommended.yaml
[root@docker-server1 ~]# kubectl get pods -n kubernetes-dashboard
NAME                                         READY   STATUS              RESTARTS   AGE
dashboard-metrics-scraper-76585494d8-cj9n9   1/1     Running             0          4s
kubernetes-dashboard-b7ffbc8cb-nswqq         0/1     ContainerCreating   0          4s
4.3 访问Token配置
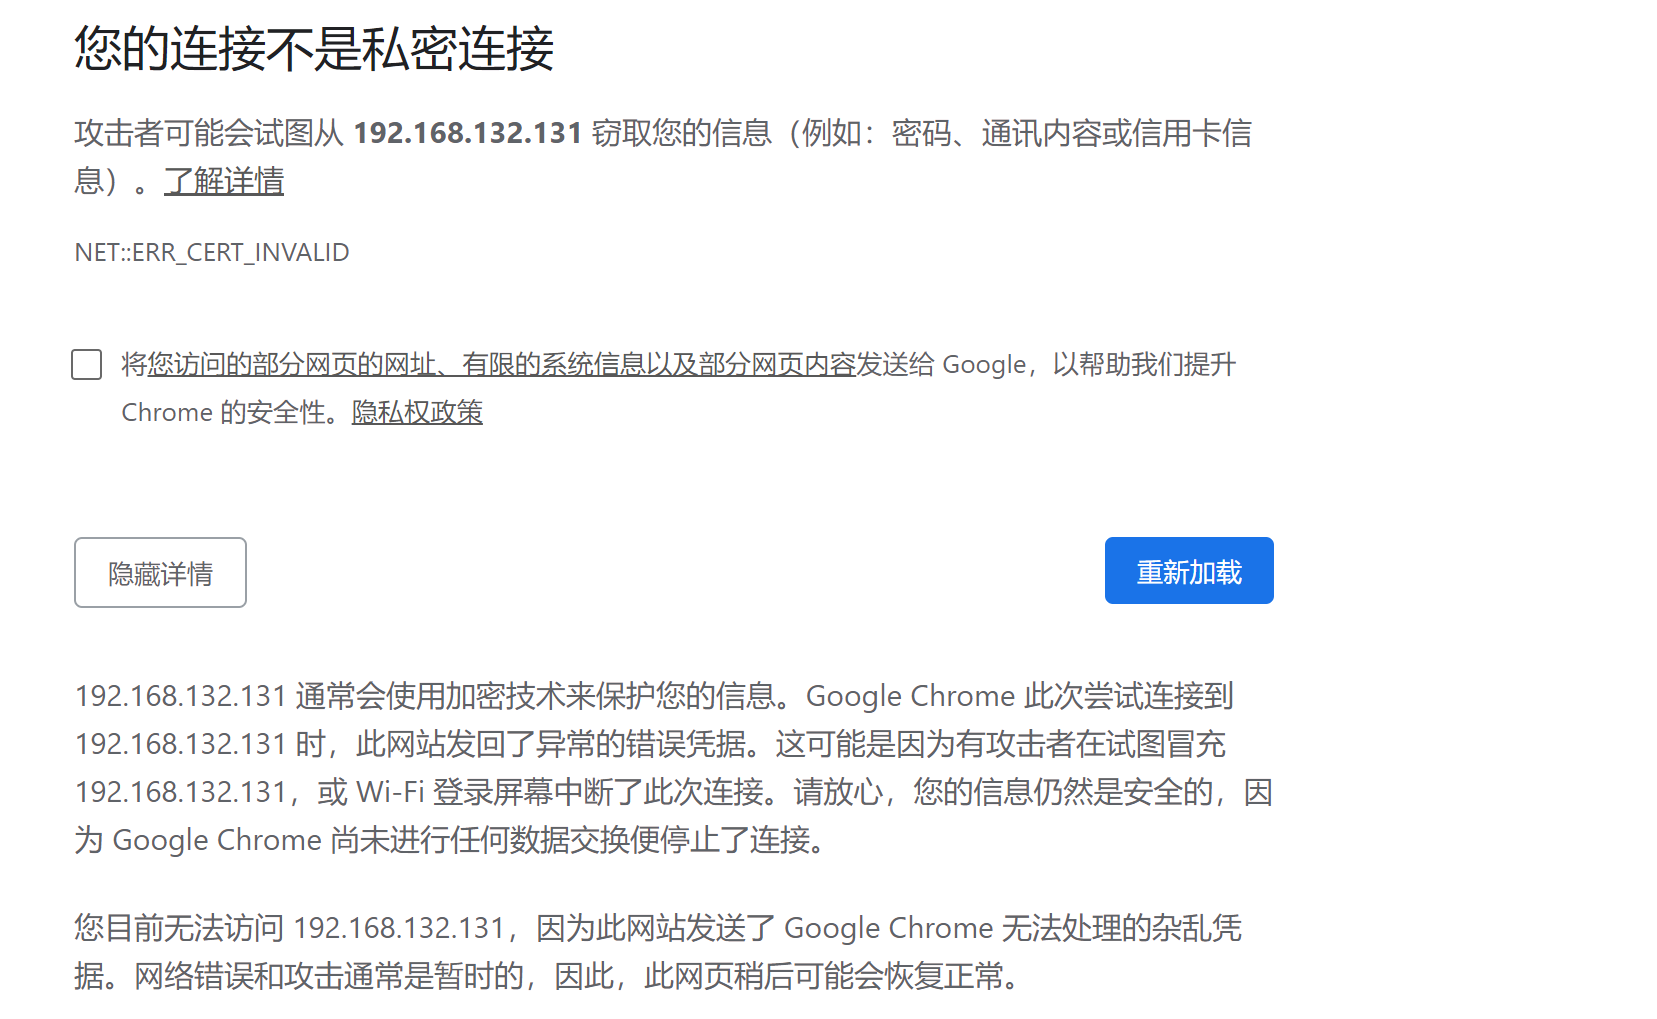
使用谷歌访问https://192.168.132.131:32443/出现
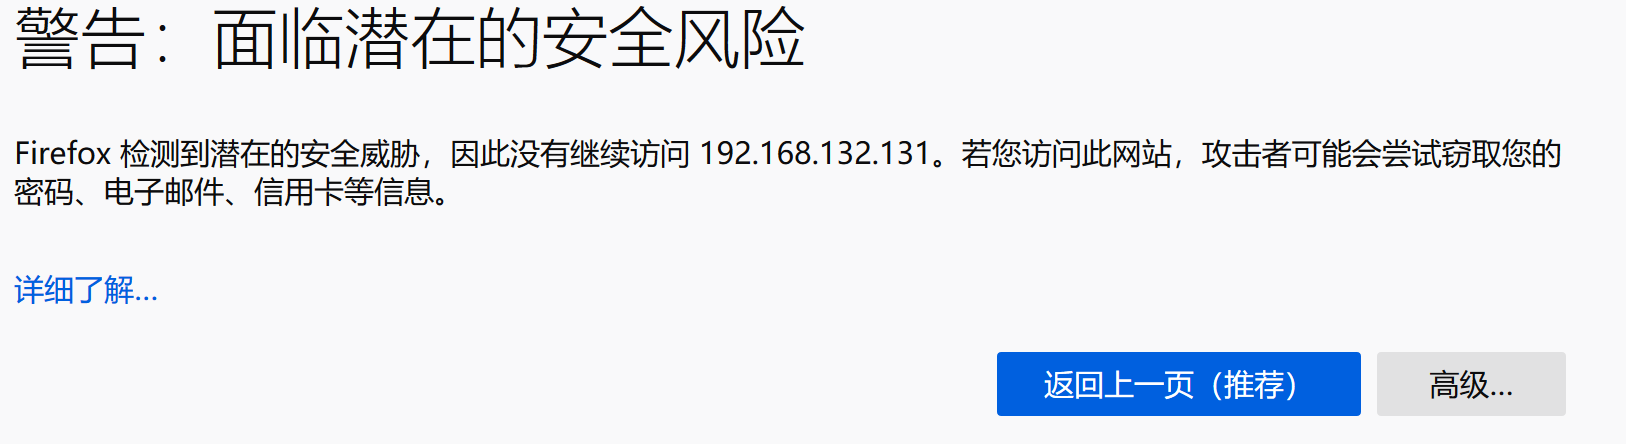
使用火狐浏览器访问
点击高级
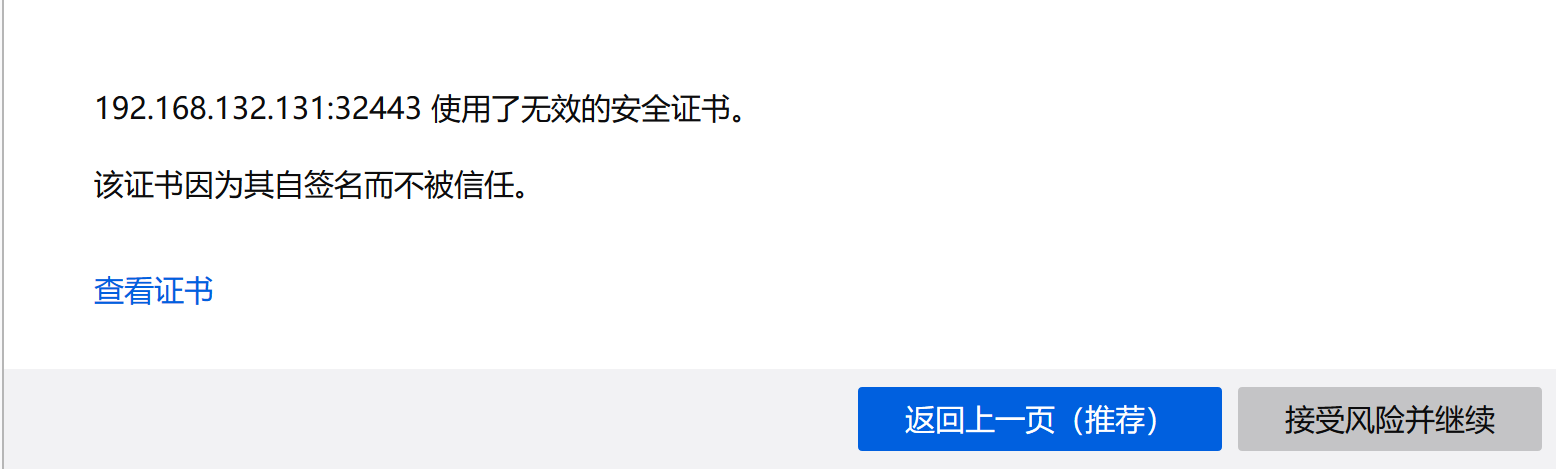
接受风险并继续
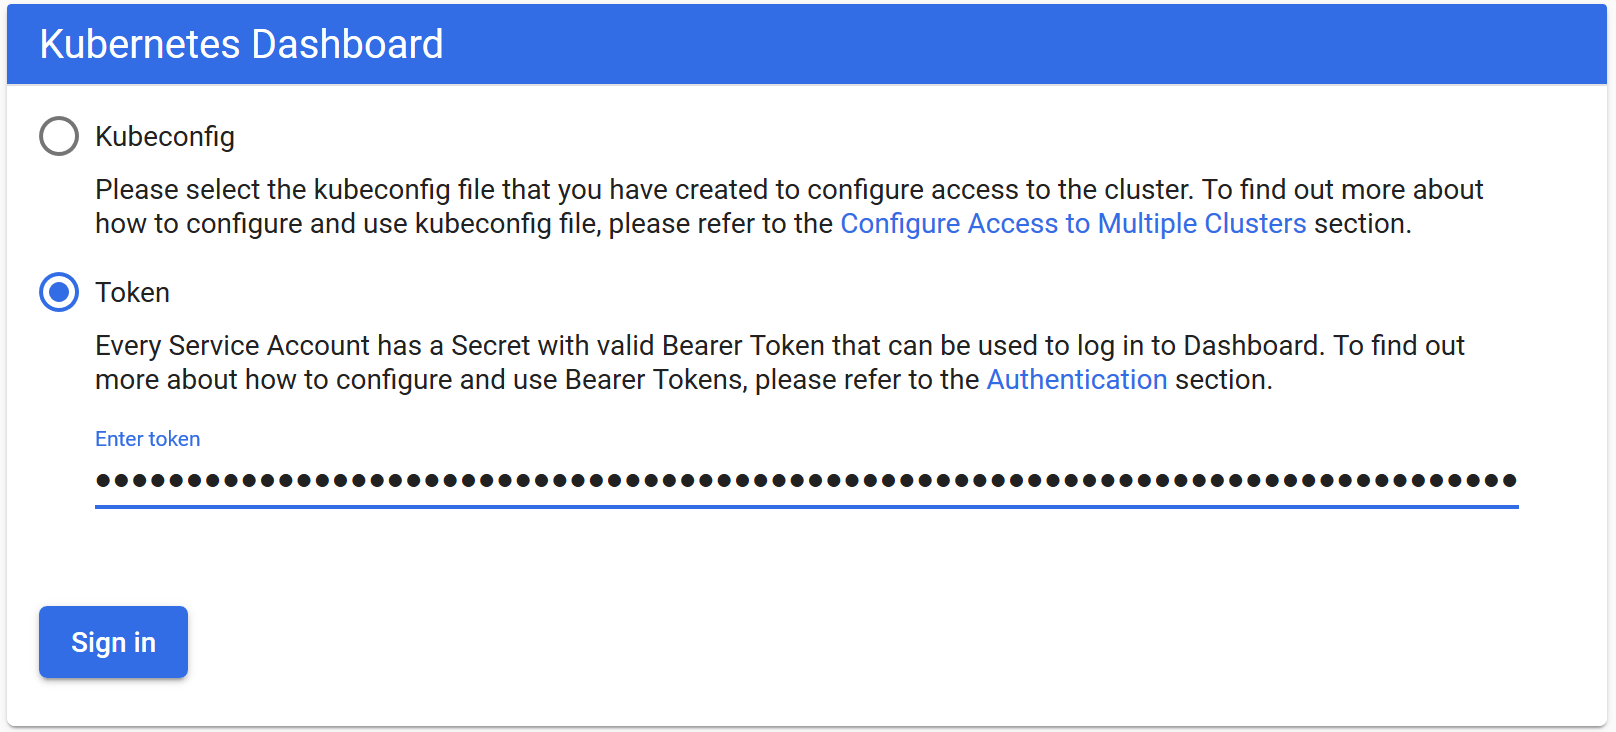
使用Token

可以看到出现如上图画面,需要我们输入一个kubeconfig文件或者一个token。事实上在安装dashboard时,也为我们默认创建好了一个serviceaccount,为kubernetes-dashboard,并为其生成好了token,我们可以通过如下指令获取该sa的token:
[root@docker-server1 ~]# kubectl describe secret -n kubernetes-dashboard $(kubectl get secret -n kubernetes-dashboard |grep kubernetes-dashboard-token | awk '{print $1}') |grep token | awk '{print $2}'
kubernetes-dashboard-token-kvtdw
kubernetes.io/service-account-token
eyJhbGciOiJSUzI1NiIsImtpZCI6Inl0U2JtWkVaSkNjbFpCMGpkVktHTGtTUTFvZFc3LVUxeUllRkRyalcxYncifQ.eyJpc3MiOiJrdWJlcm5ldGVzL3NlcnZpY2VhY2NvdW50Iiwia3ViZXJuZXRlcy5pby9zZXJ2aWNlYWNjb3VudC9uYW1lc3BhY2UiOiJrdWJlcm5ldGVzLWRhc2hib2FyZCIsImt1YmVybmV0ZXMuaW8vc2VydmljZWFjY291bnQvc2VjcmV0Lm5hbWUiOiJrdWJlcm5ldGVzLWRhc2hib2FyZC10b2tlbi1rdnRkdyIsImt1YmVybmV0ZXMuaW8vc2VydmljZWFjY291bnQvc2VydmljZS1hY2NvdW50Lm5hbWUiOiJrdWJlcm5ldGVzLWRhc2hib2FyZCIsImt1YmVybmV0ZXMuaW8vc2VydmljZWFjY291bnQvc2VydmljZS1hY2NvdW50LnVpZCI6IjMyMTgxNjhiLTM2N2ItNDZjMi1iZWE0LWI2MzM3YWIxZmZjMCIsInN1YiI6InN5c3RlbTpzZXJ2aWNlYWNjb3VudDprdWJlcm5ldGVzLWRhc2hib2FyZDprdWJlcm5ldGVzLWRhc2hib2FyZCJ9.oLAu-403EhotW7CQ9BVT4R9CbFmvtJekPoH2hZD2ifkG43GpAqWm8YrOqqjJpl0bVvToFY5i4kaBHzOSiPk8CresCodaYC-qt19uzam-E894rKWz6X9OlKudgR7agAkZdtYQPqpmkd4FKoF0JdyT3k1V5Kc0Jm3_8Fz4Vg9R76p_BWTZQjr_ed-HqOyQ1-zaBA3bImx7h8VQZm_V70EUu4CEnLFoPbpSRIkN5PfwBGHXYIMvnyHLyxuqfVKvtpldXTKF3IYcIb2Rp5ctHJz0abaxR2W-BeQ07nMX9D9oBRwVoxnXJSqgUL4pHLD4IuZS4PShAJwcswp04r7bxOFbtQ
复制上面内容粘贴
登陆

4.4 权限配置
由于这个权限太小,修改一个超级管理员权限
[root@docker-server1 ~]# vi recommended.yaml
apiVersion: rbac.authorization.k8s.io/v1
kind: ClusterRoleBinding
metadata:
  name: kubernetes-dashboard
roleRef:
  apiGroup: rbac.authorization.k8s.io
  kind: ClusterRole
  name: cluster-admin
subjects:
  - kind: ServiceAccount
    name: kubernetes-dashboard
    namespace: kubernetes-dashboard
[root@docker-server1 ~]# kubectl delete -f recommended.yaml ;kubectl apply -f recommended.yaml
重新获取token
[root@docker-server1 ~]# kubectl describe secret -n kubernetes-dashboard $(kubectl get secret -n kubernetes-dashboard |grep kubernetes-dashboard-token | awk '{print $1}') |grep token | awk '{print $2}'
eyJhbGciOiJSUzI1NiIsImtpZCI6Inl0U2JtWkVaSkNjbFpCMGpkVktHTGtTUTFvZFc3LVUxeUllRkRyalcxYncifQ.eyJpc3MiOiJrdWJlcm5ldGVzL3NlcnZpY2VhY2NvdW50Iiwia3ViZXJuZXRlcy5pby9zZXJ2aWNlYWNjb3VudC9uYW1lc3BhY2UiOiJrdWJlcm5ldGVzLWRhc2hib2FyZCIsImt1YmVybmV0ZXMuaW8vc2VydmljZWFjY291bnQvc2VjcmV0Lm5hbWUiOiJrdWJlcm5ldGVzLWRhc2hib2FyZC10b2tlbi1qOHNrOSIsImt1YmVybmV0ZXMuaW8vc2VydmljZWFjY291bnQvc2VydmljZS1hY2NvdW50Lm5hbWUiOiJrdWJlcm5ldGVzLWRhc2hib2FyZCIsImt1YmVybmV0ZXMuaW8vc2VydmljZWFjY291bnQvc2VydmljZS1hY2NvdW50LnVpZCI6IjRjZDQxY2QwLTMyNTQtNGM2ZC05YmI5LTFmNjYxYzAwY2YxYSIsInN1YiI6InN5c3RlbTpzZXJ2aWNlYWNjb3VudDprdWJlcm5ldGVzLWRhc2hib2FyZDprdWJlcm5ldGVzLWRhc2hib2FyZCJ9.CR-SJO9K4w7dKaoLVsDGZ9j-pq3XH5a2YPpjRiSERT5bRQO0MVBM-fvXdc9oX-Dyp5smXkYpe-K6DsIZ_G4w01miDko_oCgPlNXq6yVrbh8X-DHB-JKNOnMCq7Ax2TqWEnJ54OyJTcguyJY_H2lFtFd3LP6vcNVFFhZfvW9u3tXOBAlVnUR_u4L3KkzrZi4TPd3OLM8Dt6FDNqrXolbVqdnfFtRNfUginWeUOngXf0sLQpvqmG7YxKkVkkdBavO5qG-up8dV3hIw1RrBCnsRGjtzxmkGEx4DF2_Mxd3yjZw6uqoLLMYEmMhKZ7xwWNbPw7AIxUDGSLj_tcidmVxsFA
再次使用token就会看到以下信息
集群安装安装完成
https://github.com/fanux/sealos
kubernetes高可用安装工具,一条命令,离线安装,包含所有依赖,内核负载不依赖haproxy keepalived,纯golang开发,99年证书,支持v1.16.4 v1.15.7 v1.14.10 v1.17.0! https://sealyun.com
博主声明:本文的内容来源主要来自誉天教育晏威老师,由本人实验完成操作验证,需要的博友请联系誉天教育(http://www.yutianedu.com/),获得官方同意或者晏老师(https://www.cnblogs.com/breezey/)本人同意即可转载,谢谢!