摘要:
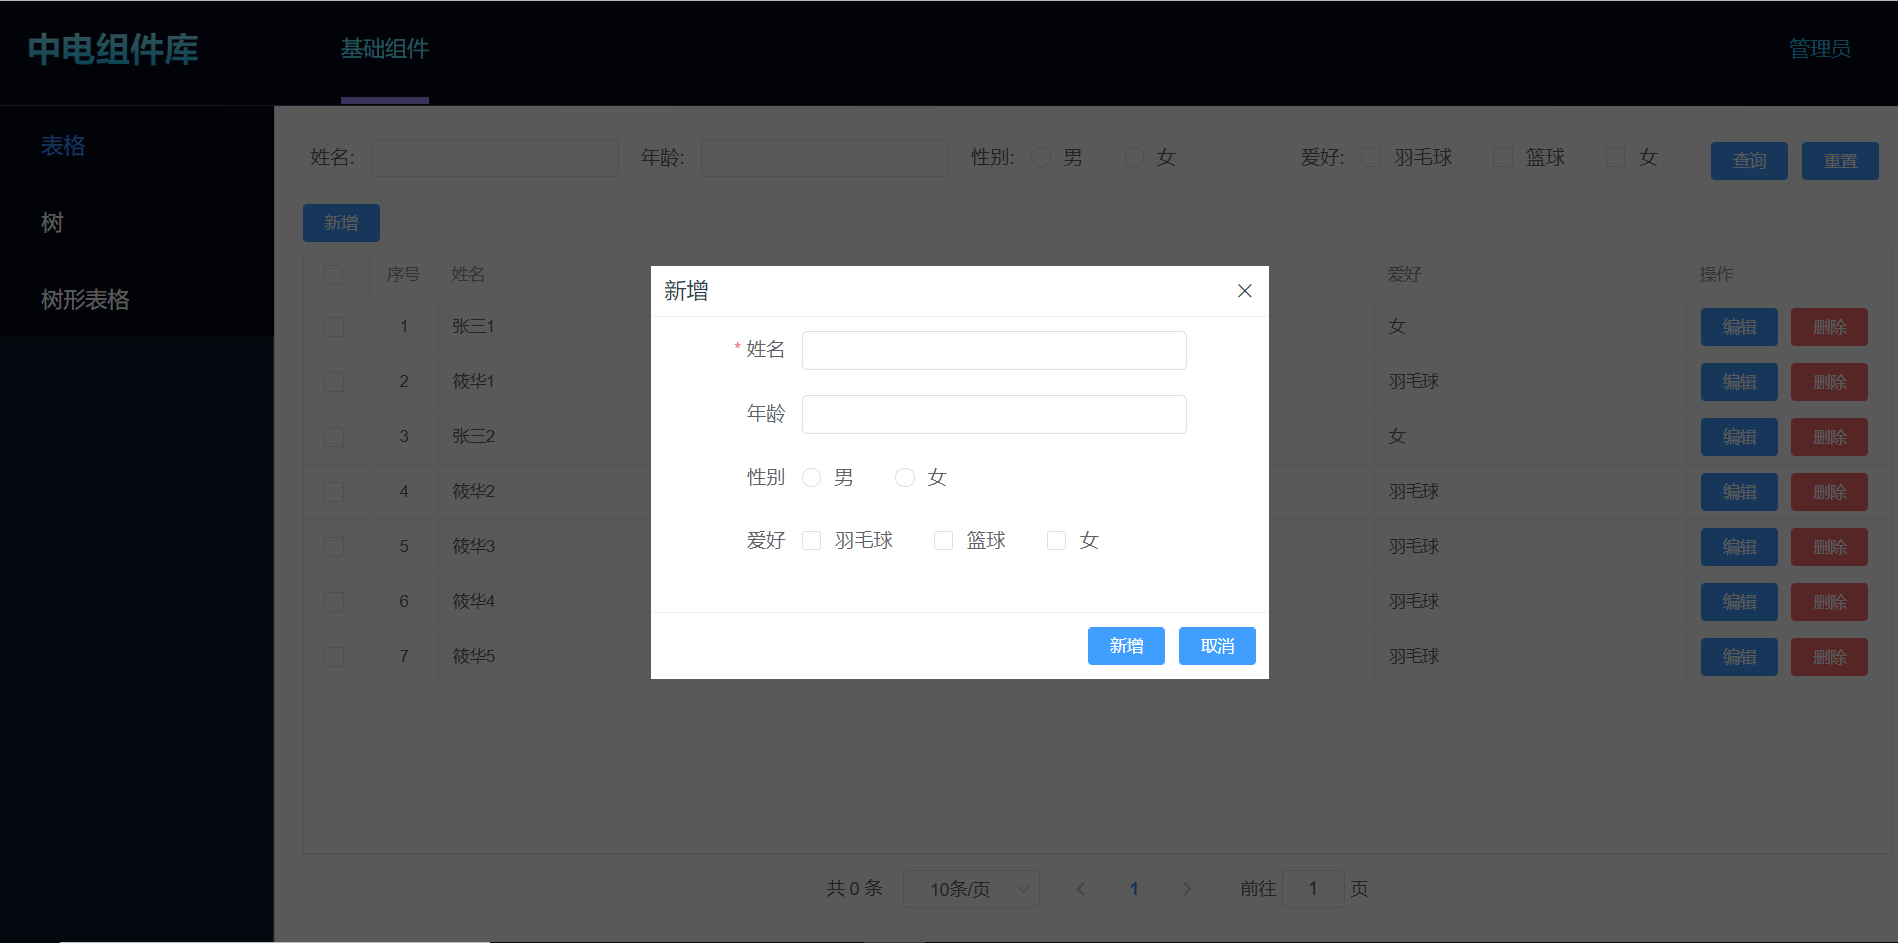
源码链接:弹窗组件组件源码:{{item.label}}exportdefault{props:{that:{type:Object,default:this},modalCfg:{visible:false,title:'',handles:[]},{type:String,default:'50%'},isHeader:{type:Boolean,default:true},modalLoading:{type:Boolean,default:false},isHandle:{type:Boolean,default:true}},computed:{},methods:{close(){this.$emit}}}ViewCode页面调用:因为该组件和其他组件合在一起,这是一个系列˂!
源码链接:弹窗组件
组件源码:
<template>
<transition name="el-fade-in">
<div v-if="modalCfg.visible" style="100%;height:100%;position:fixed;top:0px;left:0px;z-index:8;">
    <!-- 遮罩 -->
    <div class="ces-mask"></div>
    <div class="ces-modal-wrap">
      <div   :style="{width}">
        <!-- 标题头部 -->
          <section    v-if="isHeader">
              <div   >
              <div>{{modalCfg.title}}</div>
              <i   @click="modalCfg.close(that)"></i>
              </div>
          </section>
          <!-- body -->
          <section     v-loading="modalLoading">
              <slot></slot>
          </section>
          <!-- 操作底部 -->
          <section   v-if='isHandle'>
              <div class="ces-modal__footer">
              <span>
                <el-button v-for='item in modalCfg.handles' :key="item.label":type='item.type':icon='item.icon':size='item.size':disabled='item.disabled'@click="item.handle(that)">{{item.label}}</el-button>
              </span>
              </div>
          </section>
      </div>
  </div>
</div>
</transition>
</template>

<script>
export default{

    props:{
      that: { type: Object, default: this},
      modalCfg:{
        visible:false,
        title:'',
        handles:[]
      },
      {
        type:String,
        default:'50%'},
      isHeader:{
        type:Boolean,
        default:true},
      modalLoading:{
        type:Boolean,
        default:false},
      isHandle:{
        type:Boolean,
        default:true}

    },
    computed: {

    },
    methods: {
      close(){
        this.$emit('close')
      }
    }
}
</script>
页面调用:因为该组件和其他组件合在一起,这是一个系列
<template>
  <div class="ces-main">
    <!-- 搜索 -->
    <ces-search
      :that='that'size='mini'labelWidth = '50px':searchData = "searchData":searchForm = "searchForm":searchHandle="searchHandle"></ces-search>

    <!-- 操作表格 -->
    <ces-table
      :that='that'size='mini':isSelection='true':isIndex='true':isPagination='true':isHandle='true':tableData='tableData':tableCols='tableCols':tableHandles='tableHandles':tablePage='tablePage'></ces-table>

    <!-- 弹窗 -->
    <ces-modal width='450px':that='that' :modalCfg='modalCfg'>
        <ces-edit ref='cesEdit' :that='that':editCfg='editForm':editData='editData':editRules='editRules' ></ces-edit>
      </ces-modal>
  </div>
</template>

<script>import cesSearch from '@/components/common/Form/searchForm'import cesTable from '@/components/common/Table/Table'import cesModal from '@/components/common/Modal/Modal'import cesEdit from '@/components/common/Form/editForm'import { createNamespacedHelpers } from 'vuex'const { mapGetters, mapActions } = createNamespacedHelpers('Base')

export default{
  data () {
    return{
      that:this}
  },
  components:{
    cesTable,
    cesSearch,
    cesModal,
    cesEdit
  },
  computed:{
    ...mapGetters([
      'searchData','searchForm','searchHandle',
      'loading','tableData','tableCols','tableHandles','tablePage',
      'modalCfg',
      'editForm','editData','editRules'])
  },
  methods:{
    ...mapActions(['init','showEditModal','hideEditModal','getData','resetData','validateAdd','confirmDel','validateEdit'])
  }
}
</script>

<style>

</style>
最终效果图: