git的代码量大多数都是根据命令行统计,或者根据第三方插件统计。但是都不满足我的需求,因为我们代码都由gitlab管理,于是想到了通过gitlab暴露出来的接口获取数据。
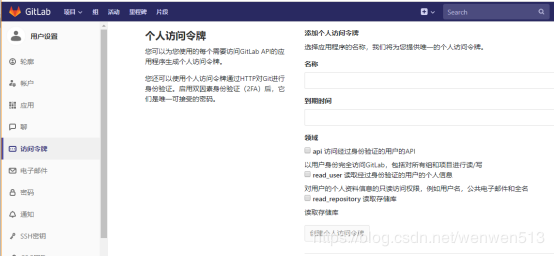
第一步,生成私钥
登录你的gitlab申请私钥private_token
第二步,获取当前用户可见的所有项目(即使用户不是成员)
接口地址:gitlab的地址/api/v4/projects/?private_token=xxx
返回参数:
[{
        "id":219,
        "description":"",
        "name":"share-5.2.3.8",
        "name_with_namespace":"develop / share-5.2.3.8",
        "path":"share-5.2.3.8",
        "path_with_namespace":"develop/share-5.2.3.8",
        "created_at":"2019-07-10T19:59:29.855+08:00",
        "default_branch":"master",
        "tag_list":[

        ],
        "ssh_url_to_repo":"git@127.0.0.1:develop/share-5.2.3.8.git",
        "http_url_to_repo":"http://127.0.0.1/develop/share-5.2.3.8.git",
        "web_url":"http://127.0.0.1/develop/share-5.2.3.8",
        "readme_url":"http://127.0.0.1/develop/share-5.2.3.8/blob/master/README.md",
        "avatar_url":null,
        "star_count":0,
        "forks_count":0,
        "last_activity_at":"2019-07-11T02:53:44.831+08:00",
        "_links":{
            "self":"http://127.0.0.1/api/v4/projects/219",
            "issues":"http://127.0.0.1/api/v4/projects/219/issues",
            "merge_requests":"http://127.0.0.1/api/v4/projects/219/merge_requests",
            "repo_branches":"http://127.0.0.1/api/v4/projects/219/repository/branches",
            "labels":"http://127.0.0.1/api/v4/projects/219/labels",
            "events":"http://127.0.0.1/api/v4/projects/219/events",
            "members":"http://127.0.0.1/api/v4/projects/219/members"
        },
        "archived":false,
        "visibility":"private",
        "resolve_outdated_diff_discussions":false,
        "container_registry_enabled":true,
        "issues_enabled":true,
        "merge_requests_enabled":true,
        "wiki_enabled":true,
        "jobs_enabled":true,
        "snippets_enabled":true,
        "shared_runners_enabled":true,
        "lfs_enabled":true,
        "creator_id":14,
        "namespace":{
            "id":17,
            "name":"develop",
            "path":"develop",
            "kind":"group",
            "full_path":"develop",
            "parent_id":null
        },
        "import_status":"none",
        "open_issues_count":0,
        "public_jobs":true,
        "ci_config_path":null,
        "shared_with_groups":[

        ],
        "only_allow_merge_if_pipeline_succeeds":false,
        "request_access_enabled":false,
        "only_allow_merge_if_all_discussions_are_resolved":false,
        "printing_merge_request_link_enabled":true,
        "merge_method":"merge",
        "permissions":{
            "project_access":null,
            "group_access":{
                "access_level":40,
                "notification_level":3
            }
        }
    },...]
参数这么多我们从中抽取出需要的部分
[{
        "id":219,
        "name":"share-5.2.3.8",
        "name_with_namespace":"develop / share-5.2.3.8",
        "path_with_namespace":"develop/share-5.2.3.8",
        "http_url_to_repo":"http://127.0.0.1/develop/share-5.2.3.8.git",
        "created_at":"2019-07-10T19:59:29.855+08:00",
         "_links":{
            "repo_branches":"http://127.0.0.1/api/v4/projects/219/repository/branches",
        },
    },...]
第三步,遍历项目,根据项目id获取分支列表
接口地址:http://gitlab地址/api/v4/projects/项目id/repository/branches?private_token=xxx
传入参数:无
返回参数:
[{
        "name":"master",
        "commit":{
            "id":"d1b9747ba994f19fb6afb069b3751bd3cf21rrrr",
            "short_id":"d1b974123",
            "title":"添加仓库",
            "created_at":"2019-07-11T02:53:32.000+08:00",
            "message":"添加仓库",
            "author_name":"admin",
            "author_email":"admin@gmail.com",
            "authored_date":"2019-07-11T02:53:32.000+08:00",
            "committer_name":"admin",
            "committer_email":"admin@gmail.com",
            "committed_date":"2019-07-11T02:53:32.000+08:00",
            "parent_ids":[
                "25cf5c94b9ddc762bd2be73e1e542ebd26adadf"
            ]
        },
        "merged":false,
        "protected":true,
        "developers_can_push":false,
        "developers_can_merge":false
    },...]
第四步,遍历分支,根据分支name获取commits
注意,当title和message
接口地址:
http://gitlab地址/api/v4/projects/项目id/repository/commits?ref_name=master&private_token=xxx
[{
"id":"d1b9747ba994f19fb6afb069b3751bd3cf21ag32",
        "author_name":"admin",
        "authored_date":"2019-07-11T02:53:32.000+08:00",
        "committer_email":"admin@gmail.com",
        "committed_date":"2019-07-11T02:53:32.000+08:00",
        "created_at":"2019-07-11T02:53:32.000+08:00",
        "author_email":"admin@gmail.com",
        "short_id":"d1b9747b",
        "title":"添加仓库",
        "parent_ids":[
            "25cf5c94b9ddc762bd2be73e1e542ebd26aafd"
        ],
        "message":"添加仓库 ",
        "committer_name":"admin"
    },...]
第五步,根据commits的id获取代码量
接口地址:
http://gitlab地址/api/v4/projects/项目id/repository/commits/commits的id?private_token=xxx
返回参数:
[{
    "id":"d1b9747ba994f19fb6afb069b3751bd3cf21334d",
    "short_id":"d1b9747b",
    "title":"添加仓库",
    "created_at":"2019-07-11T02:53:32.000+08:00",
    "parent_ids":[
        "25cf5c94b9ddc762bd2be73e1e542ebd26ad7sdf"
    ],
    "message":"添加仓库 ",
    "author_name":"admin",
    "author_email":"admin@gmail.com",
    "authored_date":"2019-07-11T02:53:32.000+08:00",
    "committer_name":"admin",
    "committer_email":"admin@gmail.com",
    "committed_date":"2019-07-11T02:53:32.000+08:00",
    "stats":{
        "additions":21,
        "deletions":8,
        "total":29
    },
    "status":null,
    "last_pipeline":null,
    "project_id":219
},...]
stats里面就是我们想要的代码量了,additions为新增,deletions为删除,total为总量。修改操作实际上是删除之后再新增。
需要注意的是,这里统计出来的代码量是代码行数。
小结
拿到这些数据之后,不管你是存数据库,还是存excel都很方便,完全可以让系统每天定时去跑,不需要手动执行任何命令。
Gitlab文档:https://docs.gitlab.com/ee/api/README.html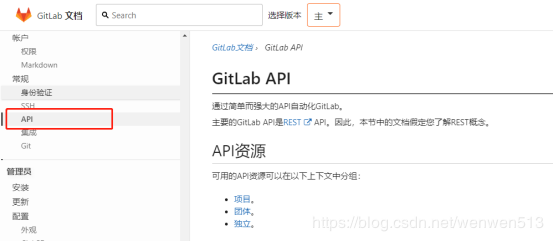
原文链接:https://blog.csdn.net/wenwen513/article/details/95647364