1、
new-->Project-->Spring Initralizr
Group:com.zb
Artifact:zbook
springboot version:2.0.4
2、
将
<dependency>
   <groupId>org.springframework.boot</groupId>
   <artifactId>spring-boot-starter</artifactId>
</dependency>
改成
<dependency>
   <groupId>org.springframework.boot</groupId>
   <artifactId>spring-boot-starter-web</artifactId>
</dependency>
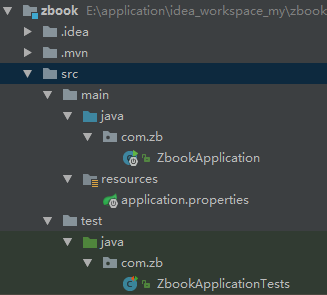
3、此时项目结构
maven clean一下,右键ZbookApplication运行,项目就跑起来了,就是这么简单,真正做到了开箱即用。
二、RestFul Api接口1、在controller包下新建HomeController
package com.zb.controller;
import org.springframework.web.bind.annotation.RequestMapping;
import org.springframework.web.bind.annotation.RestController;
@RestController
public class HomeController {
    @RequestMapping("/")
    public String home(){
        return "Hello, Zbook!";
    }
}
注:RestController和Controller注解的区别是:RestController是返回的内容就是返回的内容,相当于加个@ResponseBody,而controller一般是返回的页面
此时打开网页,输入 http://localhost:8080/
就会看到Hello,Zbook!
1、
上面的可以当作是提供服务的接口,假设我们要开发一个web应用,springboot默认是集成的thymleaf。
springboot是约定大于配置的,我们来看看关于thymleaf的约定
(1)默认静态文件(js,css,jpg等)放在resources下面的static文件夹下面
(2)页面文件放在templates文件夹下面
我们采用bootstrap来渲染页面,如下图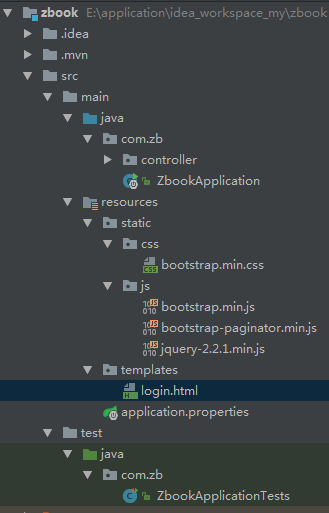
login.html
<!DOCTYPE html>
<html xmlns:th="http://www.thymeleaf.org">
<head>
    <meta charset="UTF-8" />
    <title>登录</title>
    <link href="http://t.zoukankan.com/css/bootstrap.min.css" rel="stylesheet">
</head>
<body>
    <div class="container">
            <form action="login_in" method="post"   role="form" >
                <div class="form-group">
                    <h2 class="col-sm-offset-5 col-sm-4">用户登录</h2>
                </div>
                <div class="form-group">
                    <label for="username" class="col-sm-offset-3 col-sm-2 control-label">用户名:</label>
                    <div class="col-sm-3">
                        <input type="text"     name="username" placeholder="请输入用户名" />
                    </div>
                </div>
                <div class="form-group">
                    <label for="password" class="col-sm-offset-3 col-sm-2 control-label">密码:</label>
                    <div class="col-sm-3">
                        <input type="text"     name="password" placeholder="请输入密码" />
                    </div>
                </div>
                <div class="form-group">
                    <div class="col-sm-offset-5 col-sm-4">
                        <button type="submit" class="btn btn-default">登录</button>
                    </div>
                </div>
            </form>
    </div>
    <script src="http://t.zoukankan.com/js/jquery-2.2.1.min.js"></script>
    <script src="http://t.zoukankan.com/js/bootstrap.min.js"></script>
</body>
</html>
2、写一个LoginController
package com.zb.controller;
import org.springframework.stereotype.Controller;
import org.springframework.web.bind.annotation.RequestMapping;

@Controller
public class LoginController {
    @RequestMapping("/login")
    public String login(){
        return "login";
    }
}
3、加依赖
<dependency>
   <groupId>org.springframework.boot</groupId>
   <artifactId>spring-boot-starter-thymeleaf</artifactId>
</dependency>
4、
重启, http://localhost:8080/login
则会看到登录页面
1、
springboot的配置文件分为两种:application.properties和application.yml
我们把它改成application.yml这种更直观
spring:
  application:
    name: myspringboot
  output:
    ansi:
      enabled: always
  profiles:
    active: dev
  thymeleaf:
    encoding: UTF-8
    prefix: classpath:/templates/

server:
  tomcat:
    uri-encoding: UTF-8
    max-connections: 500
    min-spare-threads: 25
    max-threads: 300
    accept-count: 200
  port: 8080
mybatis:
  type-aliases-package: com.zb.mapper
  mapper-locations: classpath:mapping/*.xml

pagehelper:
  helper-dialect: mysql
  reasonable: true
  support-methods-arguments: true
  params: count=countSql
logging:
  level:
    com.zb.mapper: debug

---

#开发配置
spring:
  profiles: dev
  datasource:
    url: jdbc:mysql://localhost:3306/zb_db?useUnicode=true&characterEncoding=utf8&autoReconnect=true&failOverReadOnly=false&useSSL=false
    username: root
    password: 123456
    driver-class-name: com.mysql.jdbc.Driver
    type: com.alibaba.druid.pool.DruidDataSource
    filters: stat
    maxActive: 20
    initialSize: 1
    maxWait: 60000
    minIdle: 1
    timeBetweenEvictionRunsMillis: 60000
    minEvictableIdleTimeMillis: 300000
    validationQuery: select 'x'
    testWhileIdle: true
    testOnBorrow: false
    testOnReturn: false
    poolPreparedStatements: true
    maxOpenPreparedStatements: 20
2、添加依赖
		<dependency>
			<groupId>org.mybatis.spring.boot</groupId>
			<artifactId>mybatis-spring-boot-starter</artifactId>
			<version>1.3.2</version>
		</dependency>

		<dependency>
			<groupId>mysql</groupId>
			<artifactId>mysql-connector-java</artifactId>
		</dependency>

		<dependency>
			<groupId>com.alibaba</groupId>
			<artifactId>druid</artifactId>
			<version>RELEASE</version>
		</dependency>

<!-- 分页插件 -->
		<dependency>
			<groupId>com.github.pagehelper</groupId>
			<artifactId>pagehelper-spring-boot-starter</artifactId>
			<version>1.2.3</version>
		</dependency>
3、建表
CREATE datebase zb_db;
CREATE TABLE `user` (
  `id` int(11) NOT NULL AUTO_INCREMENT,
  `username` varchar(255) DEFAULT NULL,
  `password` varchar(255) DEFAULT NULL,
  `mobile` varchar(255) DEFAULT NULL,
  `email` varchar(255) DEFAULT NULL,
  `sex` varchar(255) DEFAULT NULL,
  `nickname` varchar(255) DEFAULT NULL,
  PRIMARY KEY (`id`)
) ENGINE=InnoDB AUTO_INCREMENT=1 DEFAULT CHARSET=utf8;
insert into `user`(id, username, password, mobile, email,sex, nickname) VALUES(1, 'admin', '123456', '13918891675','mmc@163.com', '男', '管理员');
insert into `user`(id, username, password, mobile, email,sex, nickname) VALUES(2, 'lisi2', '123456', '13918891675','mmc@163.com', 'm', 'lisi1');
insert into `user`(id, username, password, mobile, email,sex, nickname) VALUES(3, 'lisi3', '123456', '13918891675','mmc@163.com', 'm', 'lisi1');
insert into `user`(id, username, password, mobile, email,sex, nickname) VALUES(4, 'lisi4', '123456', '13918891675','mmc@163.com', 'm', 'lisi1');
insert into `user`(id, username, password, mobile, email,sex, nickname) VALUES(5, 'lisi5', '123456', '13918891675','mmc@163.com', 'm', 'lisi1');
insert into `user`(id, username, password, mobile, email,sex, nickname) VALUES(6, 'lisi6', '123456', '13918891675','mmc@163.com', 'm', 'lisi1');
insert into `user`(id, username, password, mobile, email,sex, nickname) VALUES(7, 'lisi7', '123456', '13918891675','mmc@163.com', 'm', 'lisi1');
insert into `user`(id, username, password, mobile, email,sex, nickname) VALUES(8, 'lisi8', '123456', '13918891675','mmc@163.com', 'm', 'lisi1');
insert into `user`(id, username, password, mobile, email,sex, nickname) VALUES(9, 'lisi9', '123456', '13918891675','mmc@163.com', 'm', 'lisi1');
insert into `user`(id, username, password, mobile, email,sex, nickname) VALUES(10, 'lisi10', '123456', '13918891675','mmc@163.com', 'm', 'lisi1');
insert into `user`(id, username, password, mobile, email,sex, nickname) VALUES(11, 'lisi11', '123456', '13918891675','mmc@163.com', 'm', 'lisi1');
insert into `user`(id, username, password, mobile, email,sex, nickname) VALUES(12, 'lisi12', '123456', '13918891675','mmc@163.com', 'm', 'lisi1');
insert into `user`(id, username, password, mobile, email,sex, nickname) VALUES(13, 'lisi13', '123456', '13918891675','mmc@163.com', 'm', 'lisi1');
insert into `user`(id, username, password, mobile, email,sex, nickname) VALUES(14, 'lisi14', '123456', '13918891675','mmc@163.com', 'm', 'lisi1');
4、用mybatisgenerator自动生成文件
<?xml version="1.0" encoding="UTF-8"?>
<!DOCTYPE generatorConfiguration
        PUBLIC "-//mybatis.org//DTD MyBatis Generator Configuration 1.0//EN"
        "http://mybatis.org/dtd/mybatis-generator-config_1_0.dtd">
<generatorConfiguration>
    <!-- 数据库驱动:选择你的本地硬盘上面的数据库驱动包-->
    <classPathEntry  location="C:UsersDELLDownloadsmysql-connector-java-5.1.22-bin.jar"/>
    <context    targetRuntime="MyBatis3">
        <commentGenerator>
            <property name="suppressDate" value="true"/>
            <!-- 是否去除自动生成的注释 true:是 : false:否 -->
            <property name="suppressAllComments" value="true"/>
        </commentGenerator>
        <!--数据库链接URL,用户名、密码 -->
        <jdbcConnection driverClass="com.mysql.jdbc.Driver" connectionURL="jdbc:mysql://127.0.0.1/zb_db" userId="root" password="123456">
        </jdbcConnection>
        <javaTypeResolver>
            <property name="forceBigDecimals" value="false"/>
        </javaTypeResolver>
        <!-- 生成模型的包名和位置-->
        <javaModelGenerator targetPackage="com.zb.model" targetProject="src/main/java">
            <property name="enableSubPackages" value="true"/>
            <property name="trimStrings" value="true"/>
        </javaModelGenerator>
        <!-- 生成映射文件的包名和位置-->
        <sqlMapGenerator targetPackage="mapping" targetProject="src/main/resources">
            <property name="enableSubPackages" value="true"/>
        </sqlMapGenerator>
        <!-- 生成DAO的包名和位置-->
        <javaClientGenerator type="XMLMAPPER" targetPackage="com.zb.mapper" targetProject="src/main/java">
            <property name="enableSubPackages" value="true"/>
        </javaClientGenerator>

        <!-- 要生成的表 tableName是数据库中的表名或视图名 domainObjectName是实体类名-->
        <table tableName="role_permission" domainObjectName="RolePermission" enableCountByExample="false" enableUpdateByExample="false" enableDeleteByExample="false" enableSelectByExample="false" selectByExampleQueryId="false"></table>
    </context>
</generatorConfiguration>
5、在pom里面添加plugin
<!-- mybatis generator 自动生成代码插件 -->
			<plugin>
				<groupId>org.mybatis.generator</groupId>
				<artifactId>mybatis-generator-maven-plugin</artifactId>
				<version>1.3.2</version>
				<configuration>
					<configurationFile>${basedir}/src/main/resources/generator/generatorConfig.xml</configurationFile>
					<overwrite>true</overwrite>
					<verbose>true</verbose>
				</configuration>
			</plugin>
6、用mvn mybatis-generator:generate -e命令生成文件
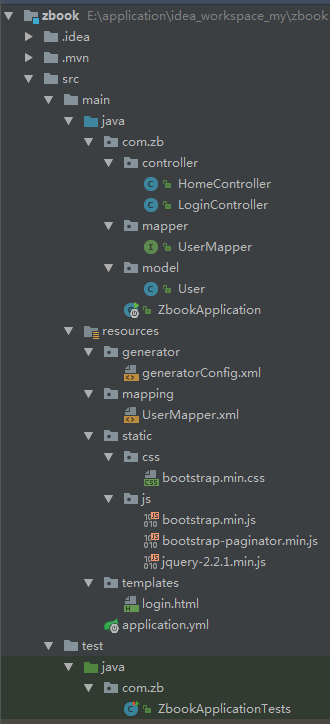
此时目录结构
7、写dao和service,controller,mapper
mapper增加了几个方法
@Select("Select * from user")
List<User> selectAll();

@Select("Select * from user where username = #{username} and password = #{password}")
User selectByUsernamePass(@Param("username") String username, @Param("password") String password);

@Select("Select * from user where username = #{username}")
User selectByUsername(@Param("username") String username);
dao和service都是正常调用,下面是controller
package com.zb.controller;
import com.github.pagehelper.PageInfo;
import com.zb.model.User;
import com.zb.service.UserService;
import org.springframework.beans.factory.annotation.Autowired;
import org.springframework.stereotype.Controller;
import org.springframework.ui.Model;
import org.springframework.web.bind.annotation.RequestMapping;
import org.springframework.web.bind.annotation.RequestMethod;
import org.springframework.web.bind.annotation.ResponseBody;

@Controller
public class UserController {
    @Autowired
    private UserService userService;

    @RequestMapping("/user")
    @ResponseBody
    public User getUserById(int id){
        User user = userService.selectByPrimaryKey(id);
        return user;
    }

    @RequestMapping("/userlist")
    public String getUserList(Model model, PageInfo pageInfo){
        int pageNum  = (pageInfo.getPageNum() == 0)? 1 : pageInfo.getPageNum();
        int pageSize  = (pageInfo.getPageSize() == 0)? 10 : pageInfo.getPageSize();
        PageInfo<User> result = userService.selectAll(pageNum, pageSize);
        model.addAttribute("users", result.getList());
        model.addAttribute("pageInfo", result);
        return "userlist";
    }

    @RequestMapping("/userdelete")
    public String userdelete(int id){
        userService.deleteByPrimaryKey(id);
        return "redirect:/userlist";
    }

    @RequestMapping("/useredit")
    public String useredit(int id, Model model){
        User user = userService.selectByPrimaryKey(id);
        model.addAttribute("user", user);
        return "useredit";
    }

    @RequestMapping(value = "/userupdateoradd", method = RequestMethod.POST)
    public String userUpdateOrAdd(User user){
        if(user.getId() == 0){
            userService.insertSelective(user);
        } else {
            userService.updateByPrimaryKeySelective(user);
        }
        return "redirect:/userlist";
    }
}
页面userlist.html
<!DOCTYPE html>
<html xmlns:th="http://www.thymeleaf.org">
<head>
    <meta charset="UTF-8" />
    <title>用户管理</title>
    <link href="http://t.zoukankan.com/css/bootstrap.min.css" rel="stylesheet">
</head>
<body>
<div class="container">
    <div>
        <nav   role="navigation">
            <div class="container-fluid">
                <div>
                    <ul    >
                        <li><a href="http://t.zoukankan.com/userlist">用户管理</a></li>
                        <li><a href="https://tool.4xseo.com/article/22110.html">书籍管理</a></li>
                    </ul>
                </div>
            </div>
        </nav>
    </div>

    <div>
        <h2>用户管理</h2>
        <table   border="0" cellpadding="0" cellspacing="0" class="table_list">
            <thead>
            <tr>
                <th width="20%">编号</th>
                <th width="20%">用户名</th>
                <th width="20%">电子邮箱</th>
                <th width="20%">手机</th>
                <th width="20%">操作</th>
            </tr>
            </thead>
            <tbody>
            <tr th:each="user:${users}">
                <td height="40px"><a th:text="${user.id}" data-toggle="modal" data-target="#myModal" onclick="values(this)"></a></td>
                <td th:text="${user.username}"></td>
                <td th:text="${user.email}"></td>
                <td th:text="${user.mobile}"></td>
                <td><a href="https://tool.4xseo.com/article/22110.html"   th:value="${user.id}">删除</a></td>
            </tr>
            </tbody>
        </table>
    </div>
</div>
<script src="http://t.zoukankan.com/js/jquery-2.2.1.min.js"></script>
<script src="http://t.zoukankan.com/js/bootstrap.min.js"></script>
</body>
</html>
8,在ZbookApplication上加上注解扫描
@ComponentScan(basePackages = {"com.zb"})
@MapperScan("com.zb.mapper")
9、顺便把分页加上(依赖包之前已经加了)
service层
    @Override
    public PageInfo<User> selectAll(int pageNum, int pageSize) {
        PageHelper.startPage(pageNum, pageSize);
        List<User> users = userDao.selectAll();
        PageInfo<User> pageInfo = new PageInfo<>(users);
        return pageInfo;
    }
controller层
public String getUserList(Model model, PageInfo pageInfo){
        int pageNum  = (pageInfo.getPageNum() == 0)? 1 : pageInfo.getPageNum();
        int pageSize  = (pageInfo.getPageSize() == 0)? 10 : pageInfo.getPageSize();
        PageInfo<User> result = userService.selectAll(pageNum, pageSize);
        model.addAttribute("users", result.getList());
        model.addAttribute("pageInfo", result);
        return "userlist";
    }
页面修改:
<div   style="text-align: center"> <ul id="pageLimit"></ul> </div>
<input type="hidden"   name="pageNum" th:value="${pageInfo.pageNum}" />
<input type="hidden"   name="pages" th:value="${pageInfo.pages}" />
<script src="http://t.zoukankan.com/js/bootstrap-paginator.min.js"></script>
<script>
    $('#pageLimit').bootstrapPaginator({
        currentPage: $("#pageNum").val(),
        totalPages: $("#pages").val(),
        size: "normal",
        bootstrapMajorVersion: 3,
        alignment: "right",
        numberOfPages: 5,
        itemTexts: function (type, page, current) {
            switch (type) {
                case "first": return "首页";
                case "prev": return "上一页";
                case "next": return "下一页";
                case "last": return "末页";
                case "page": return page;
            }
        },
        onPageClicked: function (event, originalEvent, type, page){//给每个页眉绑定一个事件,其实就是ajax请求,其中page变量为当前点击的页上的数字。
            window.location.href = "http://t.zoukankan.com/userlist?pageNum=" + page;
        }
    });
    $(function(){
        $(".delete_a").click(function(){
            var userId=$(this).attr("value");
            if(confirm("确认删除吗?")){
                window.location.href="http://t.zoukankan.com/userdelete?id=" + userId;
                return ;
            }
        });
    });
</script>
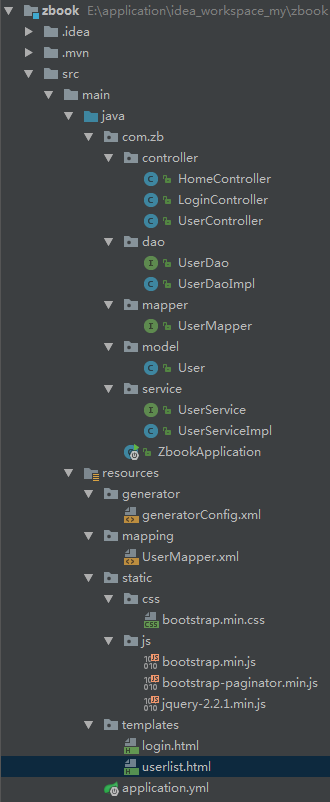
此时目录
此时重启,输入 http://localhost:8080/userlist
就会看到user列表,也可以分页。
1、
package com.zb.filter;

import com.zb.model.User;

import javax.servlet.*;
import javax.servlet.annotation.WebFilter;
import javax.servlet.http.HttpServletRequest;
import javax.servlet.http.HttpServletResponse;
import javax.servlet.http.HttpSession;
import java.io.IOException;

@WebFilter(filterName = "sessionFilter",urlPatterns = {"/*"})
public class SessionFilter implements Filter {

    String NO_LOGIN = "您还未登录";

    String[] includeUrls = new String[]{"/login","/login_in"};

    @Override
    public void init(FilterConfig filterConfig) throws ServletException {
    }

    @Override
    public void doFilter(ServletRequest servletRequest, ServletResponse servletResponse, FilterChain filterChain) throws IOException, ServletException {
        HttpServletRequest request = (HttpServletRequest)servletRequest;
        HttpServletResponse response = (HttpServletResponse)servletResponse;
        HttpSession session = request.getSession();
        String url = request.getRequestURI();
        boolean needFilter = isNeedFilter(url);

        //静态资源放行
        if(url.endsWith(".css")||url.endsWith(".js")||url.endsWith(".jpg")
                ||url.endsWith(".gif")||url.endsWith(".png")){
            filterChain.doFilter(servletRequest, servletResponse);
            return;
        }

        if(!needFilter){
            filterChain.doFilter(servletRequest, servletResponse);
        } else {
            User user = (User)session.getAttribute(session.getId());
            if(user != null){
                filterChain.doFilter(servletRequest, servletResponse);
            } else {
                String requestType = request.getHeader("X-Requested-With");
                //判断是否是ajax请求
                if(requestType!=null && "XMLHttpRequest".equals(requestType)){
                    response.getWriter().write(this.NO_LOGIN);
                }else{
                    //重定向到登录页(需要在static文件夹下建立此html文件)
                    response.sendRedirect(request.getContextPath()+"/login");
                }
                return;
            }
        }
    }

    public boolean isNeedFilter(String uri) {
        for (String includeUrl : includeUrls) {
            if(includeUrl.equals(uri)) {
                return false;
            }
        }
        return true;
    }

    @Override
    public void destroy() {

    }
}
2、在ZbookApplication上加注解
@ServletComponentScan
3、在LoginController下写登录逻辑
package com.zb.controller;

import com.zb.model.User;
import com.zb.service.UserService;
import org.springframework.beans.factory.annotation.Autowired;
import org.springframework.stereotype.Controller;
import org.springframework.ui.Model;
import org.springframework.web.bind.annotation.RequestMapping;
import org.springframework.web.bind.annotation.RequestMethod;

import javax.servlet.http.HttpServletRequest;
import javax.servlet.http.HttpSession;

@Controller
public class LoginController {
    @Autowired
    private UserService userService;

    @RequestMapping("/login")
    public String login(){
        return "login";
    }

    @RequestMapping(value = "/login_in", method = RequestMethod.POST)
    public String login_in(User user, HttpServletRequest request, Model model){
        User user1 = userService.validateUser(user.getUsername(), user.getPassword());
        if(user1 == null){
            return "login";
        }

        HttpSession session = request.getSession();
        session.setAttribute(session.getId(), user1);
        return "redirect:/userlist";

    }

    @RequestMapping("/logout")
    public String logout(HttpServletRequest request){
        request.getSession().removeAttribute(request.getSession().getId());
        return "login";
    }
}
现在就可以简单的登录了
4、修改页面让页面显示用户名和退出
<div>
    <a href="http://t.zoukankan.com/logout" style="display: inline-block; float: right">退出</a>
    <p th:text="${#httpSession.getAttribute(#httpSession.getId()).username}" style="display: inline-block; float: right"></p>
    <p style="display: inline-block; float: right">您好,</p>
</div>
权限管理我们使用现在比较流行的shiro,原理就不说了,直接说怎么使用
1、加依赖包
<!--shiro权限-->
		<dependency>
			<groupId>org.apache.shiro</groupId>
			<artifactId>shiro-core</artifactId>
			<version>1.2.4</version>
		</dependency>
		<dependency>
			<groupId>org.apache.shiro</groupId>
			<artifactId>shiro-web</artifactId>
			<version>1.2.4</version>
		</dependency>
		<dependency>
			<groupId>org.apache.shiro</groupId>
			<artifactId>shiro-spring</artifactId>
			<version>1.2.4</version>
		</dependency>
		<dependency>
			<groupId>com.github.theborakompanioni</groupId>
			<artifactId>thymeleaf-extras-shiro</artifactId>
			<version>2.0.0</version>
		</dependency>
2、建表
shiro需要5张表:用户、角色、权限、用户角色关联表,角色权限关联表
用户表已建立,现在续建4张表
CREATE TABLE `role` (
  `id` int(11) NOT NULL AUTO_INCREMENT,
  `rolename` varchar(255) DEFAULT NULL,
  `description` varchar(255) DEFAULT NULL,
  `status` varchar(255) DEFAULT NULL,
  `create_time` DATE DEFAULT NULL,
  `update_time` DATE DEFAULT NULL,
  PRIMARY KEY (`id`)
) ENGINE=InnoDB AUTO_INCREMENT=1 DEFAULT CHARSET=utf8;

CREATE TABLE `permission` (
  `id` int(11) NOT NULL AUTO_INCREMENT,
  `permissionname` varchar(255) DEFAULT NULL,
  `resourceType` varchar(255) DEFAULT NULL,
  `url` varchar(255) DEFAULT NULL,
  `permission` varchar(255) DEFAULT NULL,
  `status` varchar(255) DEFAULT NULL,
  `create_time` DATE DEFAULT NULL,
  `update_time` DATE DEFAULT NULL,
  PRIMARY KEY (`id`)
) ENGINE=InnoDB AUTO_INCREMENT=1 DEFAULT CHARSET=utf8;

CREATE TABLE `user_role` (
  `id` int(11) NOT NULL AUTO_INCREMENT,
  `user_id` varchar(255) DEFAULT NULL,
  `role_id` varchar(255) DEFAULT NULL,
  PRIMARY KEY (`id`)
) ENGINE=InnoDB AUTO_INCREMENT=1 DEFAULT CHARSET=utf8;

CREATE TABLE `role_permission` (
  `id` int(11) NOT NULL AUTO_INCREMENT,
  `role_id` varchar(255) DEFAULT NULL,
  `permission_id` varchar(255) DEFAULT NULL,
  PRIMARY KEY (`id`)
) ENGINE=InnoDB AUTO_INCREMENT=1 DEFAULT CHARSET=utf8;
insert into `role`(id, rolename, description, status, create_time, update_time) VALUES (1, 'admin', '管理员', 'use', '2018-08-10', '2018-08-10');
insert into `role`(id, rolename, description, status, create_time, update_time) VALUES (2, 'manage', '经理', 'use', '2018-08-10', '2018-08-10');
insert into `role`(id, rolename, description, status, create_time, update_time) VALUES (3, 'user', '普通用户', 'use', '2018-08-10', '2018-08-10');

INSERT INTO `permission` (id, permissionname, resourceType, url, permission, status, create_time, update_time) VALUES (1,'用户管理','menu', 'userlist','user:list','use','2018-08-10', '2018-08-10');
INSERT INTO `permission` (id, permissionname, resourceType, url, permission, status, create_time, update_time) VALUES (2,'用户修改','menu', 'useredit','user:edit','use','2018-08-10', '2018-08-10');
INSERT INTO `permission` (id, permissionname, resourceType, url, permission, status, create_time, update_time) VALUES (3,'用户删除','menu', 'userdelete','user:delete','use','2018-08-10', '2018-08-10');

INSERT INTO `user_role` (id, user_id, role_id) VALUES (1, 1 ,1);
INSERT INTO `user_role` (id, user_id, role_id) VALUES (2, 1 ,2);
INSERT INTO `user_role` (id, user_id, role_id) VALUES (3, 1 ,3);
INSERT INTO `user_role` (id, user_id, role_id) VALUES (4, 2 ,2);
INSERT INTO `user_role` (id, user_id, role_id) VALUES (5, 3 ,3);
INSERT INTO `user_role` (id, user_id, role_id) VALUES (6, 4 ,3);

INSERT INTO `role_permission` (id, role_id, permission_id) VALUES (1, 1, 1);
INSERT INTO `role_permission` (id, role_id, permission_id) VALUES (2, 1, 2);
INSERT INTO `role_permission` (id, role_id, permission_id) VALUES (3, 1, 3);
INSERT INTO `role_permission` (id, role_id, permission_id) VALUES (4, 2, 1);
INSERT INTO `role_permission` (id, role_id, permission_id) VALUES (5, 2, 2);
INSERT INTO `role_permission` (id, role_id, permission_id) VALUES (6, 3, 1);
3、加载bean
package com.zb.shiro;

import java.util.LinkedHashMap;
import java.util.Map;

import at.pollux.thymeleaf.shiro.dialect.ShiroDialect;
import org.apache.shiro.mgt.SecurityManager;
import org.apache.shiro.spring.security.interceptor.AuthorizationAttributeSourceAdvisor;
import org.apache.shiro.spring.web.ShiroFilterFactoryBean;
import org.apache.shiro.web.mgt.DefaultWebSecurityManager;
import org.slf4j.Logger;
import org.slf4j.LoggerFactory;
import org.springframework.aop.framework.autoproxy.DefaultAdvisorAutoProxyCreator;
import org.springframework.boot.web.servlet.FilterRegistrationBean;
import org.springframework.context.annotation.Bean;
import org.springframework.context.annotation.Configuration;
import org.springframework.web.filter.DelegatingFilterProxy;

/**
 * Shiro 配置
 *
 Apache Shiro 核心通过 Filter 来实现,就好像SpringMvc 通过DispachServlet 来主控制一样。
 既然是使用 Filter 一般也就能猜到,是通过URL规则来进行过滤和权限校验,所以我们需要定义一系列关于URL的规则和访问权限。
 */
@Configuration
public class ShiroConfiguration {

    private static final Logger logger = LoggerFactory.getLogger(ShiroConfiguration.class);


    @Bean
    public FilterRegistrationBean delegatingFilterProxy(){
        FilterRegistrationBean filterRegistrationBean = new FilterRegistrationBean();
        DelegatingFilterProxy proxy = new DelegatingFilterProxy();
        proxy.setTargetFilterLifecycle(true);
        proxy.setTargetBeanName("shiroFilter");
        filterRegistrationBean.setFilter(proxy);
        return filterRegistrationBean;
    }

    /**
     * ShiroFilterFactoryBean 处理拦截资源文件问题。
     * 注意:单独一个ShiroFilterFactoryBean配置是或报错的,以为在
     * 初始化ShiroFilterFactoryBean的时候需要注入:SecurityManager
     *
     Filter Chain定义说明
     1、一个URL可以配置多个Filter,使用逗号分隔
     2、当设置多个过滤器时,全部验证通过,才视为通过
     3、部分过滤器可指定参数,如perms,roles
     *
     */
    @Bean("shiroFilter")
    public ShiroFilterFactoryBean shirFilter(SecurityManager securityManager){
        logger.info("ShiroConfiguration.shirFilter()");
        ShiroFilterFactoryBean shiroFilterFactoryBean  = new ShiroFilterFactoryBean();

        // 必须设置 SecurityManager
        shiroFilterFactoryBean.setSecurityManager(securityManager);

        //拦截器.
        Map<String,String> filterChainDefinitionMap = new LinkedHashMap<String,String>();

        //配置退出过滤器,其中的具体的退出代码Shiro已经替我们实现了
        filterChainDefinitionMap.put("/logout", "logout");

        filterChainDefinitionMap.put("/*/*.js", "anon");
        filterChainDefinitionMap.put("/*/*.css", "anon");
        filterChainDefinitionMap.put("/login_in", "anon");
        filterChainDefinitionMap.put("/login", "anon");

        //<!-- 过滤链定义,从上向下顺序执行,一般将 /**放在最为下边 -->:这是一个坑呢,一不小心代码就不好使了;
        //<!-- authc:所有url都必须认证通过才可以访问; anon:所有url都都可以匿名访问-->
        filterChainDefinitionMap.put("/**", "authc");

        // 如果不设置默认会自动寻找Web工程根目录下的"/login.jsp"页面
        shiroFilterFactoryBean.setLoginUrl("/login");
        // 登录成功后要跳转的链接
        shiroFilterFactoryBean.setSuccessUrl("/userlist");
        //未授权界面;
        shiroFilterFactoryBean.setUnauthorizedUrl("/login");

        shiroFilterFactoryBean.setFilterChainDefinitionMap(filterChainDefinitionMap);
        return shiroFilterFactoryBean;
    }

    @Bean
    public SecurityManager securityManager(){
        DefaultWebSecurityManager securityManager =  new DefaultWebSecurityManager();
        securityManager.setRealm(myShiroRealm());
        return securityManager;
    }

    @Bean
    public MyShiroRealm myShiroRealm(){
        MyShiroRealm myShiroRealm = new MyShiroRealm();
        return myShiroRealm;
    }

    /**
     *  开启Shiro的注解(如@RequiresRoles,@RequiresPermissions),需借助SpringAOP扫描使用Shiro注解的类,并在必要时进行安全逻辑验证
     * 配置以下两个bean(DefaultAdvisorAutoProxyCreator和AuthorizationAttributeSourceAdvisor)即可实现此功能
     * @return
     */
    @Bean
    public DefaultAdvisorAutoProxyCreator advisorAutoProxyCreator(){
        DefaultAdvisorAutoProxyCreator advisorAutoProxyCreator = new DefaultAdvisorAutoProxyCreator();
        advisorAutoProxyCreator.setProxyTargetClass(true);
        return advisorAutoProxyCreator;
    }

    /**
     * 开启aop注解支持
     * @param securityManager
     * @return
     */
    @Bean
    public AuthorizationAttributeSourceAdvisor authorizationAttributeSourceAdvisor(SecurityManager securityManager) {
        AuthorizationAttributeSourceAdvisor authorizationAttributeSourceAdvisor = new AuthorizationAttributeSourceAdvisor();
        authorizationAttributeSourceAdvisor.setSecurityManager(securityManager);
        return authorizationAttributeSourceAdvisor;
    }

    @Bean
    public ShiroDialect shiroDialect() {
        return new ShiroDialect();
    }

}
4、写Realm
package com.zb.shiro;

import com.zb.model.Permission;
import com.zb.model.Role;
import com.zb.model.User;
import com.zb.service.UserService;
import org.apache.shiro.authc.AuthenticationException;
import org.apache.shiro.authc.AuthenticationInfo;
import org.apache.shiro.authc.AuthenticationToken;
import org.apache.shiro.authc.SimpleAuthenticationInfo;
import org.apache.shiro.authz.AuthorizationInfo;
import org.apache.shiro.authz.SimpleAuthorizationInfo;
import org.apache.shiro.realm.AuthorizingRealm;
import org.apache.shiro.subject.PrincipalCollection;
import org.apache.shiro.util.ByteSource;
import org.slf4j.Logger;
import org.slf4j.LoggerFactory;

import javax.annotation.Resource;

/**
 *  身份校验核心类;
 *
 * @version v.0.1
 */
public class MyShiroRealm extends AuthorizingRealm{

    private static final Logger logger = LoggerFactory.getLogger(MyShiroRealm.class);

    private static String SALT = "mySlalt";

    @Resource
    private UserService userService;

    /**
     * 认证信息.(身份验证)
     * :
     * Authentication 是用来验证用户身份
     * @param token
     * @return
     * @throws AuthenticationException
     */
    @Override
    protected AuthenticationInfo doGetAuthenticationInfo(AuthenticationToken token) throws AuthenticationException {
        logger.info("MyShiroRealm.doGetAuthenticationInfo()");

        //获取用户的输入的账号.
        String username = (String)token.getPrincipal();

        //通过username从数据库中查找 User对象,如果找到,没找到.
        //实际项目中,这里可以根据实际情况做缓存,如果不做,Shiro自己也是有时间间隔机制,2分钟内不会重复执行该方法
        User user = userService.selectByUsername(username);
        logger.info("----->>userInfo=" + user.toString());
        if(user == null){
            return null;
        }

       /*
        * 获取权限信息:这里没有进行实现,
        * 请自行根据UserInfo,Role,Permission进行实现;
        * 获取之后可以在前端for循环显示所有链接;
        */
        //userInfo.setPermissions(userService.findPermissions(user));
        userService.findRoleAndPermissions(user);


        //账号判断;

        //加密方式;
        //交给AuthenticatingRealm使用CredentialsMatcher进行密码匹配,如果觉得人家的不好可以自定义实现
        SimpleAuthenticationInfo authenticationInfo = new SimpleAuthenticationInfo(
                user, //用户名
                user.getPassword(), //密码
                ByteSource.Util.bytes(user.getUsername() + SALT),//salt=username+salt
                getName()  //realm name
        );

        //明文: 若存在,将此用户存放到登录认证info中,无需自己做密码对比,Shiro会为我们进行密码对比校验
//      SimpleAuthenticationInfo authenticationInfo = new SimpleAuthenticationInfo(
//           userInfo, //用户名
//           userInfo.getPassword(), //密码
//             getName()  //realm name
//      );

        return authenticationInfo;
    }

    /**
     * 此方法调用  hasRole,hasPermission的时候才会进行回调.
     *
     * 权限信息.(授权):
     * 1、如果用户正常退出,缓存自动清空;
     * 2、如果用户非正常退出,缓存自动清空;
     * 3、如果我们修改了用户的权限,而用户不退出系统,修改的权限无法立即生效。
     * (需要手动编程进行实现;放在service进行调用)
     * 在权限修改后调用realm中的方法,realm已经由spring管理,所以从spring中获取realm实例,
     * 调用clearCached方法;
     * :Authorization 是授权访问控制,用于对用户进行的操作授权,证明该用户是否允许进行当前操作,如访问某个链接,某个资源文件等。
     * @param principals
     * @return
     */
    @Override
    protected AuthorizationInfo doGetAuthorizationInfo(PrincipalCollection principals) {

        logger.info("权限配置-->MyShiroRealm.doGetAuthorizationInfo()");

        SimpleAuthorizationInfo authorizationInfo = new SimpleAuthorizationInfo();
        User userInfo  = (User)principals.getPrimaryPrincipal();

        ///在认证成功之后返回.
        //设置角色信息.
        //支持 Set集合,
        //用户的角色对应的所有权限
        for(Role role:userInfo.getRoleList()){
            authorizationInfo.addRole(role.getRolename());
            for(Permission p:role.getPermissionList()){
                authorizationInfo.addStringPermission(p.getPermission());
            }
        }
        return authorizationInfo;
    }
}
5、自动生成那四个表的代码,加相关的
@Select("select * from Role where id in (select role_id from user_role where user_id = #{userId})")
List<Role> selectRoleByUserId(@Param("userId") int userId);
@Select("select * from permission where id in (select permission_id from role_permission where role_id = #{roleId})")
List<Permission> selectPermissionIdByRoleId(@Param("roleId") int roleId);
6、修改LoginController
修改登录方法
    @RequestMapping(value = "/login_in", method = RequestMethod.POST)
    public String login_in(User user, HttpServletRequest request, Model model){
        User user1 = userService.validateUser(user.getUsername(), user.getPassword());
        if(user1 == null){
            return "login";
        }

        // (1) session
//        HttpSession session = request.getSession();
//        session.setAttribute(session.getId(), user1);
//        return "redirect:/userlist";

        // (3) shiro
        String msg ;
        UsernamePasswordToken token = new UsernamePasswordToken(user.getUsername(), user.getPassword());
        token.setRememberMe(true);
        Subject subject = SecurityUtils.getSubject();
        try {
            subject.login(token);
            if (subject.isAuthenticated()) {
                //shiro 的session和request的session封装的是一个,就是说两个都可以
//                request.getSession().setAttribute(request.getSession().getId(),user);
                subject.getSession().setAttribute(subject.getSession().getId(),user);
                return "redirect:/userlist";
            } else {
                return "login";
            }
        } catch (IncorrectCredentialsException e) {
            msg = "登录密码错误. Password for account " + token.getPrincipal() + " was incorrect.";
            model.addAttribute("message", msg);
            System.out.println(msg);
        } catch (ExcessiveAttemptsException e) {
            msg = "登录失败次数过多";
            model.addAttribute("message", msg);
            System.out.println(msg);
        } catch (LockedAccountException e) {
            msg = "帐号已被锁定. The account for username " + token.getPrincipal() + " was locked.";
            model.addAttribute("message", msg);
            System.out.println(msg);
        } catch (DisabledAccountException e) {
            msg = "帐号已被禁用. The account for username " + token.getPrincipal() + " was disabled.";
            model.addAttribute("message", msg);
            System.out.println(msg);
        } catch (ExpiredCredentialsException e) {
            msg = "帐号已过期. the account for username " + token.getPrincipal() + "  was expired.";
            model.addAttribute("message", msg);
            System.out.println(msg);
        } catch (UnknownAccountException e) {
            msg = "帐号不存在. There is no user with username of " + token.getPrincipal();
            model.addAttribute("message", msg);
            System.out.println(msg);
        } catch (UnauthorizedException e) {
            msg = "您没有得到相应的授权!" + e.getMessage();
            model.addAttribute("message", msg);
            System.out.println(msg);
        }
        return "login";

    }

    @RequestMapping("/logout")
    public String logout(HttpServletRequest request){
//        request.getSession().removeAttribute(request.getSession().getId());
        SecurityUtils.getSubject().getSession().removeAttribute(SecurityUtils.getSubject().getSession().getId());
        return "login";
    }
7、修改contorller方法,或者在页面里面加权限
@RequestMapping("/userlist")
@RequiresPermissions("user:list")
@RequestMapping("/userdelete")
@RequiresPermissions("user:delete")
这种或者
页面上
<shiro:hasPermission name="user:delete"></shiro:hasPermission>
至此,权限就加好了