spring
1.spring简介
Spring框架,可以解决对象创建以及对象之间依赖关系的一种框架。
且可以和其他框架一起使用;Spring与Struts, Spring与hibernate
(起到整合(粘合)作用的一个框架)
Spring提供了一站式解决方案:
1) Spring Core spring的核心功能: IOC容器, 解决对象创建及依赖关系
2) Spring Web Spring对web模块的支持。
-à 可以与struts整合,让struts的action创建交给spring
-à spring mvc模式
3) Spring DAO Spring 对jdbc操作的支持 【JdbcTemplate模板工具类】
4) Spring ORM spring对orm的支持:
à 既可以与hibernate整合,【session】
à 也可以使用spring的对hibernate操作的封装
5)Spring AOP 切面编程
6)SpringEE spring 对javaEE其他模块的支持
2.spring开发步骤
1.下载引用开发包
spring各个版本中:
在3.0以下的版本,源码有spring中相关的所有包【spring功能 + 依赖包】
如2.5版本;
在3.0以上的版本,源码中只有spring的核心功能包【没有依赖包】
(如果要用依赖包,需要单独下载!)
源码, jar文件:spring-framework-3.2.5.RELEASE
commons-logging-1.1.3.jar 日志
spring-beans-3.2.5.RELEASE.jar bean节点
spring-context-3.2.5.RELEASE.jar spring上下文节点
spring-core-3.2.5.RELEASE.jar spring核心功能
spring-expression-3.2.5.RELEASE.jar spring表达式相关表
以上是必须引入的5个jar文件!
2.在src下面的包中创建Student对象:
package com.eggtwo.test;

public class Student {
    private int age;
    private String name;
public Student(){
    super();
    System.out.println("调用了student的构造函数");
}
    public int getAge() {
        return age;
    }

    public void setAge(int age) {
        this.age = age;
    }

    public String getName() {
        return name;
    }

    public void setName(String name) {
        this.name = name;
    }
    public void init_student()
    {
        System.out.println("初始化了对象");
    }
    public void destroy_student()
    {
        System.out.println("销毁了对象");
    }
}
3.在src下面的包中引入核心配置文件: applicationContext.xml
<?xml version="1.0" encoding="UTF-8"?>
<beans xmlns="http://www.springframework.org/schema/beans"
       xmlns:xsi="http://www.w3.org/2001/XMLSchema-instance"
       xmlns:p="http://www.springframework.org/schema/p"
       xmlns:context="http://www.springframework.org/schema/context"
       xsi:schemaLocation="
        http://www.springframework.org/schema/beans
        http://www.springframework.org/schema/beans/spring-beans.xsd
        http://www.springframework.org/schema/context
        http://www.springframework.org/schema/context/spring-context.xsd">

    <!--
      1) 对象创建: 单例/多例
          scope="singleton", 默认值, 即 默认是单例    【service/dao/工具类】
       scope="prototype", 多例;                 【Action对象】
      2) 什么时候创建?
            scope="prototype"  在用到对象的时候,才创建对象。
         scope="singleton"  在启动(容器初始化之前), 就已经创建了bean,且整个应用只有一个。
      3)是否延迟创建
            lazy-init="false"  默认为false,  不延迟创建,即在启动时候就创建对象
            lazy-init="true"   延迟初始化, 在用到对象的时候才创建对象(只对单例有效)
      4) 创建对象之后,初始化/销毁
            init-method="init_student"       【对应对象的init_student方法,在对象创建爱之后执行 】
         destroy-method="destroy_student"  【在调用容器对象的destriy方法时候执行,(容器用实现类)】

-->
    <bean     scope="prototype" lazy-init="false"  init-method="init_student"  destroy-method="destroy_student"></bean>

</beans>
4.使用pring创建对象:getBean中的参数是xml中设置的id
package com.eggtwo.test;

import org.junit.Test;
import org.springframework.context.support.ClassPathXmlApplicationContext;

public class APPTest {
    @Test
    public  void  test(){
        // 得到IOC容器对象  【用实现类,因为要调用销毁的方法】
        System.out.println("-----容器创建前-----");
        ClassPathXmlApplicationContext ac = new ClassPathXmlApplicationContext("com/eggtwo/test/applicationContext.xml");
        System.out.println("-----容器创建完成-----");

        // 从容器中获取bean
        Student student1 = (Student) ac.getBean("student");
        Student student2 = (Student) ac.getBean("student");

        System.out.println(student1);
        System.out.println(student2);

        // 销毁容器对象
        ac.destroy();
    }
}
2.spring IOC容器的配置
1.对象的创建方式
SpringIOC容器,是spring核心内容。
作用: 创建对象 & 处理对象的依赖关系
IOC容器创建对象:
创建对象, 有几种方式:
1) 调用无参数构造器
2) 带参数构造器
3) 工厂创建对象
工厂类,静态方法创建对象
工厂类,非静态方法创建对象
<!-- ###############对象创建############### -->

    <!-- 1. 默认无参数构造器
    <bean   class="cn.itcast.b_create_obj.User"></bean>
    -->

    <!-- 2. 带参数构造器 -->
    <bean   class="cn.itcast.b_create_obj.User">
        <constructor-arg index="0" type="int" value="100"></constructor-arg>
        <constructor-arg index="1" type="java.lang.String" value="Jack"></constructor-arg>
    </bean>

    <!-- 定义一个字符串,值是"Jack" ;  String s = new String("jack")-->
    <bean   class="java.lang.String">
        <constructor-arg value="Jacks"></constructor-arg>
    </bean>
    <bean   class="cn.itcast.b_create_obj.User">
        <constructor-arg index="0" type="int" value="100"></constructor-arg>
        <constructor-arg index="1" type="java.lang.String" ref="str"></constructor-arg>
    </bean>


    <!-- 3. 工厂类创建对象 -->
    <!-- # 3.1 工厂类,实例方法 -->
    <!-- 先创建工厂 -->
    <bean   class="cn.itcast.b_create_obj.ObjectFactory"></bean>
    <!-- 在创建user对象,用factory方的实例方法 -->
    <bean   factory-bean="factory" factory-method="getInstance"></bean>


    <!-- # 3.2 工厂类: 静态方法 -->
    <!--
        class 指定的就是工厂类型
        factory-method  一定是工厂里面的“静态方法”
     -->
    <bean     factory-method="getStaticInstance"></bean>
2.对象的依赖关系
Spring中,如何给对象的属性赋值? 【DI, 依赖注入】
1) 通过构造函数
2) 通过set方法给属性注入值
3) p名称空间
4)自动装配(了解)
5) 注解
    <bean     ></bean>
    <bean   class="com.eggtwo.service.UserService">
        <property name="userDao" ref="userDao"></property>
    </bean>
    <bean   class="com.eggtwo.action.UserAction">
        <property name="userService" ref="userService"></property>
    </bean>
3.spring和strut结合
步骤:
引入jar文件
1)引入struts .jar相关文件
2)spring-core 相关jar文件
3)spring-web 支持jar包
spring-web-3.2.5.RELEASE.jar 【Spring源码】
struts2-spring-plugin-2.3.4.1.jar 【Struts源码】
配置:
4)配置XML
web.xml
<?xml version="1.0" encoding="UTF-8"?>
<web-app xmlns="http://xmlns.jcp.org/xml/ns/javaee"
xmlns:xsi="http://www.w3.org/2001/XMLSchema-instance"
xsi:schemaLocation="http://xmlns.jcp.org/xml/ns/javaee http://xmlns.jcp.org/xml/ns/javaee/web-app_4_0.xsd"
version="4.0">
<!-- 引入struts核心过滤器 -->
<filter>
<filter-name>struts2</filter-name>
<filter-class>org.apache.struts2.dispatcher.ng.filter.StrutsPrepareAndExecuteFilter</filter-class>
</filter>
<filter-mapping>
<filter-name>struts2</filter-name>
<url-pattern>/*</url-pattern>
</filter-mapping>
<!-- 2. spring 配置 -->
<context-param>
<param-name>contextConfigLocation</param-name>
<param-value>/WEB-INF/classes/bean-*.xml</param-value>
</context-param>
<listener>
<listener-class>org.springframework.web.context.ContextLoaderListener</listener-class>
</listener>
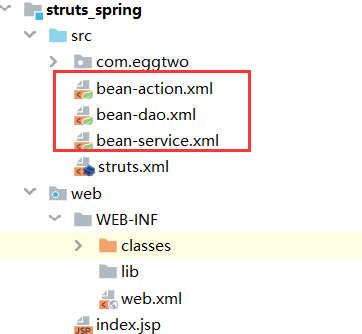
</web-app>bean.xml 【spring ioc容器配置】
每个包配置一个bean
<?xml version="1.0" encoding="UTF-8"?>
<beans xmlns="http://www.springframework.org/schema/beans"
       xmlns:xsi="http://www.w3.org/2001/XMLSchema-instance"
       xmlns:p="http://www.springframework.org/schema/p"
       xmlns:context="http://www.springframework.org/schema/context"
       xsi:schemaLocation="
        http://www.springframework.org/schema/beans
        http://www.springframework.org/schema/beans/spring-beans.xsd
        http://www.springframework.org/schema/context
        http://www.springframework.org/schema/context/spring-context.xsd">


    <bean   class="com.eggtwo.service.UserService">
        <property name="userDao" ref="userDao"></property>
    </bean>

</beans>
struts.xml struts路径与action映射配置】
注意:action交给了spring创建,不再是tomcat创建
<?xml version="1.0" encoding="UTF-8" ?>
<!DOCTYPE struts PUBLIC
          "-//Apache Software Foundation//DTD Struts Configuration 2.0//EN"
          "http://struts.apache.org/dtds/struts-2.0.dtd">
<struts>
    <!-- name任意名称,extends:继承的类 -->
    <package name="com.eggtwo.action" namespace="/" extends="struts-default" abstract="false">


        <action name="execute"   method="execute">
            <!-- name:返回值, 跳转地址 -->
            <result name="success" >/index.jsp</result>
        </action>

    </package>
</struts>
【核心过滤器: 引入struts功能】
【初始化spring的ioc容器】
4.代理模式
静态代理(JDK代理)
动态代理(JDK代理)
CgLib代理
5.Spring 注解实现AOP编程
AOP的实现本质上是代理(动态代理和Cglib代理)
注意:java jdk使用1.8版本,spring的jar包要使用4.2版本以上才可以使用AOP功能
开发步骤:
1.引入aop相关jar包
spring-aop-3.2.5.RELEASE.jar [spring3.2.5源码/libs]
aopalliance.jar [spring-framework-2.5.6/lib/aopalliance]
aspectjrt.jar [aspectj-1.8.2/lib]
aspectjweaver.jar [aspectj-1.8.2/lib]
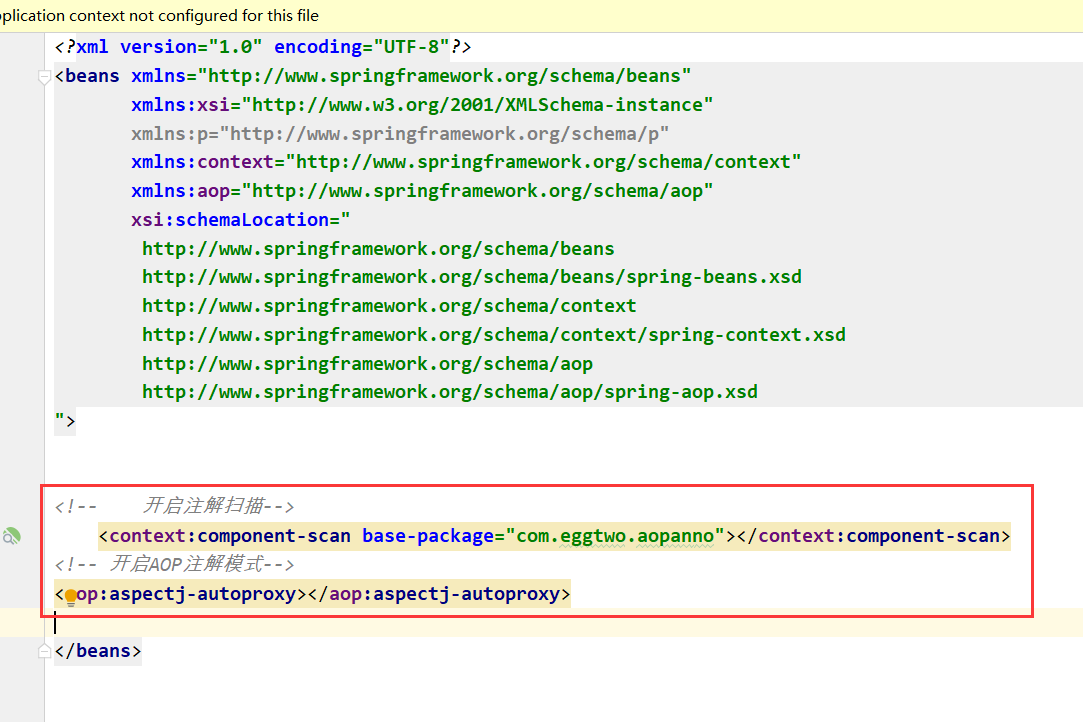
2.bean.xml中引入aop名称空间

3.在bean.xml中开启AOP注解模式
4.新建切面类
package com.eggtwo.aopanno;
import org.aspectj.lang.ProceedingJoinPoint;
import org.aspectj.lang.annotation.*;
import org.springframework.stereotype.Component;
@Component //注解 ioc
@Aspect //指定当前类为切面类
public class MyAspect {
@Pointcut("execution(* com.eggtwo.aopanno.UserDao.*(..))")
public void myPointcut() {
}
//执行方法前执行
@Before("myPointcut()")
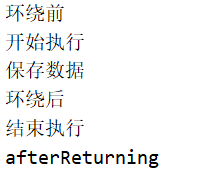
public void begin() {
System.out.println("开始执行");
}
//执行目标方法后执行:(无论目标方法是否出现异常,都会执行)
@After("myPointcut()")
public void end() {
System.out.println("结束执行");
}
//执行目标方法后执行:(发生异常不执行)
@AfterReturning("myPointcut()")
public void afterReturning() {
System.out.println("afterReturning");
}
//执行目标方法后执行:(发生异常执行)
@AfterThrowing("myPointcut()")
public void afterThrowing() {
System.out.println("afterThrowing");
}
//环绕通知:环绕目标方法执行
@Around("myPointcut()")
public void around(ProceedingJoinPoint pjp) throws Throwable {
System.out.println("环绕前");
pjp.proceed();
System.out.println("环绕后");
}
}执行结果顺序:
5.测试
package com.eggtwo.aopanno;

import org.junit.Test;
import org.springframework.context.ApplicationContext;
import org.springframework.context.support.ClassPathXmlApplicationContext;

public class TestApp {
    @Test
    public void test() {
        ApplicationContext ac = new ClassPathXmlApplicationContext("com/eggtwo/aopanno/bean.xml");
        UserDao userDao = (UserDao) ac.getBean("userDao");
        System.out.println(userDao.getClass());
        userDao.save();
    }
}
6.Spring XML实现AOP编程
1.引入jar相关开发包(同步骤5.1)
2.引入命名空间(同5.2)
3.aop配置:添加切面类
package com.eggtwo.aopxml;

import org.aspectj.lang.ProceedingJoinPoint;
import org.aspectj.lang.annotation.*;
import org.springframework.stereotype.Component;

public class MyAspect {


    //执行方法前执行
    public void begin() {
        System.out.println("开始执行");
    }

    //执行目标方法后执行:(无论目标方法是否出现异常,都会执行)
    public void end() {
        System.out.println("结束执行");
    }

    //执行目标方法后执行:(发生异常不执行)
    public void afterReturning() {
        System.out.println("afterReturning");
    }

    //执行目标方法后执行:(发生异常执行)
    public void afterThrowing() {
        System.out.println("afterThrowing");
    }

    //环绕通知:环绕目标方法执行
    public void around(ProceedingJoinPoint pjp) throws Throwable {
        System.out.println("环绕前");
        pjp.proceed();
        System.out.println("环绕后");

    }
}
4.配置bean.xml
<?xml version="1.0" encoding="UTF-8"?>
<beans xmlns="http://www.springframework.org/schema/beans"
       xmlns:xsi="http://www.w3.org/2001/XMLSchema-instance"
       xmlns:context="http://www.springframework.org/schema/context"
       xmlns:aop="http://www.springframework.org/schema/aop"
       xsi:schemaLocation="
        http://www.springframework.org/schema/beans
        http://www.springframework.org/schema/beans/spring-beans.xsd
        http://www.springframework.org/schema/context
        http://www.springframework.org/schema/context/spring-context.xsd
        http://www.springframework.org/schema/aop
        http://www.springframework.org/schema/aop/spring-aop.xsd
">
    <!--spring IOC-->
    <bean   class="com.eggtwo.aopxml.UserDao"></bean>
    <bean   class="com.eggtwo.aopxml.MyAspect"></bean>


    <!--AOP配置-->
    <aop:config>
        <!-- 定义切面点表达式:指定拦截的方法       -->
        <aop:pointcut   expression="execution(* com.eggtwo.aopxml.UserDao.*(..))"/>
        <!-- 切面:引用上面配置的切面类-->
        <aop:aspect ref="myAspect">
            <!--<aop:before method="begin" pointcut="execution(* com.eggtwo.aopxml.UserDao.*(..))"/>-->
            <aop:before method="begin" pointcut-ref="myPointcut"/>
            <aop:before method="end" pointcut-ref="myPointcut"/>
        </aop:aspect>
    </aop:config>
</beans>
7.Spring 切入点表达式
作用:指定拦截的方法
8.Spring 事务管理
事务的实现本身是AOP
XML方式实现spring声明式事务