摘要:
当前目录/类路径下的config包。
springboot在加载配置文件的时候是有先后顺序的,了解加载配置文件的先后顺序,可以减少编写程序出现错误
1 springboot加载配置文件的先后顺序如下:
SpringApplication将从以下位置加载application.properties文件,并把它们添加到Spring Environment中:
- 当前目录下的
/config子目录。 - 当前目录。
- classpath下的
/config包。 - classpath根路径(root)
启动的时候,1中的配置文件优先级最高,会覆盖2,3,4中的配置信息
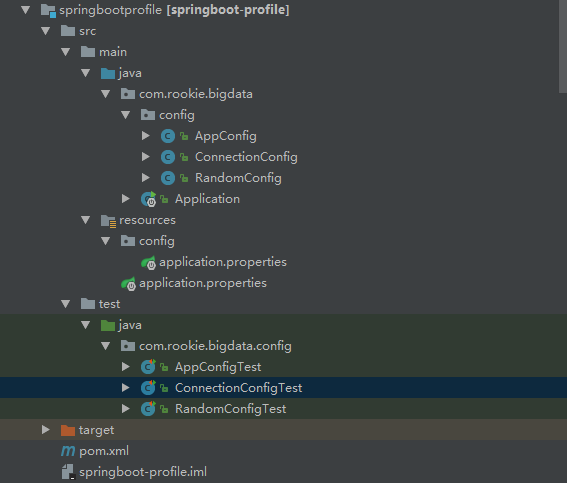
2 工程结构如图:
代码如下:
package com.rookie.bigdata.config;

import org.springframework.beans.factory.annotation.Value;
import org.springframework.boot.context.properties.ConfigurationProperties;
import org.springframework.stereotype.Component;

/**
 * springboot注入随机值
 * my.secret=${random.value}
 * my.number=${random.int}
 * my.bignumber=${random.long}
 * my.number.less.than.ten=${random.int(10)}
 * my.number.in.range=${random.int[1024,65536]}
 * <p>
 * <p>
 * Created by  on 2018/9/29.
 */
@Component
//此注解可以省略
//@ConfigurationProperties
public class RandomConfig {


    @Value("${random.value}")
    private String secret;
    @Value("${random.long}")
    private Long number;

    @Value("${random.int(10)}")
    private String numberLess;

    @Value("${random.int[1024,65536]}")
    private Integer numberRange;

    @Value("${name}")
    private  String name;

    public String getName() {
        return name;
    }

    public void setName(String name) {
        this.name = name;
    }

    public String getSecret() {
        return secret;
    }

    public void setSecret(String secret) {
        this.secret = secret;
    }

    public Long getNumber() {
        return number;
    }

    public void setNumber(Long number) {
        this.number = number;
    }

    public String getNumberLess() {
        return numberLess;
    }

    public void setNumberLess(String numberLess) {
        this.numberLess = numberLess;
    }

    public Integer getNumberRange() {
        return numberRange;
    }

    public void setNumberRange(Integer numberRange) {
        this.numberRange = numberRange;
    }
}
package com.rookie.bigdata.config;

import org.springframework.beans.factory.annotation.Value;
import org.springframework.stereotype.Component;

/**
 *
 * springboot允许使用占位符进行配置
 * Created by on 2018/9/29.
 */
@Component
public class AppConfig {
    @Value("${app.name}")
    private String appName;
    @Value("${app.description}")
    private String appDesc;

    public String getAppName() {
        return appName;
    }

    public void setAppName(String appName) {
        this.appName = appName;
    }

    public String getAppDesc() {
        return appDesc;
    }

    public void setAppDesc(String appDesc) {
        this.appDesc = appDesc;
    }
}
package com.rookie.bigdata;

import org.springframework.boot.SpringApplication;
import org.springframework.boot.autoconfigure.SpringBootApplication;

/**
 * 应用程序启动类
 * Created by on 2018/8/2.
 */
@SpringBootApplication
public class Application {
    public static void main(String[] args) {
        SpringApplication springApplication = new SpringApplication();
        //通过设置该参数禁用命令行属性添加到Environment
//        springApplication.setAddCommandLineProperties(false);

        springApplication.run(Application.class, args);

    }
}
package com.rookie.bigdata.config;

import org.junit.Test;
import org.junit.runner.RunWith;
import org.springframework.beans.factory.annotation.Autowired;
import org.springframework.boot.test.context.SpringBootTest;
import org.springframework.test.context.junit4.SpringRunner;

import static org.junit.Assert.*;

/**
 * Created by liuxili on 2018/9/29.
 */
@RunWith(SpringRunner.class)
@SpringBootTest
public class AppConfigTest {

    @Autowired
    AppConfig appConfig;

    @Test
    public void test1() {
        System.out.println(appConfig.getAppName());
        System.out.println(appConfig.getAppDesc());
    }

}
package com.rookie.bigdata.config;

import org.junit.Test;
import org.junit.runner.RunWith;
import org.springframework.beans.factory.annotation.Autowired;
import org.springframework.boot.test.context.SpringBootTest;
import org.springframework.test.context.junit4.SpringRunner;

import static org.junit.Assert.*;

/**
 * Created by liuxili on 2018/9/29.
 */
@RunWith(SpringRunner.class)
@SpringBootTest
public class RandomConfigTest {

    @Autowired
    RandomConfig randomConfig;

    @Test
    public void test1(){
        System.out.println(randomConfig.getSecret());
        System.out.println(randomConfig.getNumber());
        System.out.println(randomConfig.getNumberLess());
        System.out.println(randomConfig.getNumberRange());
        System.out.println(randomConfig.getName());
    }
}
配置文件如下
my.secret=${random.value}
my.number=${random.int}
my.bignumber=${random.long}
my.number.less.than.ten=${random.int(10)}
#my.number.in.range=${random.int[1024,65536]}
name=lisi
#属性占位符
#当使用application.properties定义的属性时,Spring会先通过已经存在的Environment查找该属性,所以你可以引用事先定义的值
app.name=appStore
app.description=${app.name} is a Spring Boot application

connection.username=root
connection.password=roots
3、使用@Value("${property}")注解注入配置属性有时会比较麻烦,特别是需要使用多个properties,或数据本身有层次结构。Spring Boot提供一种使用配置的替代方法,这种方法允许强类型的beans以管理和校验应用的配置,代码如下:
package com.rookie.bigdata.config;

import org.springframework.boot.context.properties.ConfigurationProperties;
import org.springframework.context.annotation.Configuration;
import org.springframework.stereotype.Component;

/**
 * Created by liuxili on 2018/9/29.
 */
//@Component
@Configuration
@ConfigurationProperties(prefix = "connection")
public class ConnectionConfig {

    private String userName;

    private String passWord;

    public String getUserName() {
        return userName;
    }

    public void setUserName(String userName) {
        this.userName = userName;
    }

    public String getPassWord() {
        return passWord;
    }

    public void setPassWord(String passWord) {
        this.passWord = passWord;
    }
}
package com.rookie.bigdata.config;

import org.junit.Test;
import org.junit.runner.RunWith;
import org.springframework.beans.factory.annotation.Autowired;
import org.springframework.boot.test.context.SpringBootTest;
import org.springframework.test.context.junit4.SpringRunner;

import static org.junit.Assert.*;

/**
 * Created by liuxili on 2018/9/29.
 */
@RunWith(SpringRunner.class)
@SpringBootTest
public class ConnectionConfigTest {

    @Autowired
    private ConnectionConfig connectionConfig;

    @Test
    public void test1(){
        System.out.println(connectionConfig.getPassWord());
        System.out.println(connectionConfig.getUserName());
    }
}
属性名配置一般规则如下:
| 属性 | 说明 |
|---|---|
person.firstName | 标准驼峰规则 |
person.first-name | 虚线表示,推荐用于.properties和.yml文件中 |
person.first_name | 下划线表示,用于.properties和.yml文件的可选格式 |
PERSON_FIRST_NAME | 大写形式,使用系统环境变量时推荐 |
对于使用yml文件配置跟这里配置差不多,这里不再赘述,看个人喜好,有人喜好properties进行配置,有人喜好yml文件进行配置