
[root@lizhipenglinux01 ~]# crontab -e 编写任务计划
no crontab for root - using an empty one
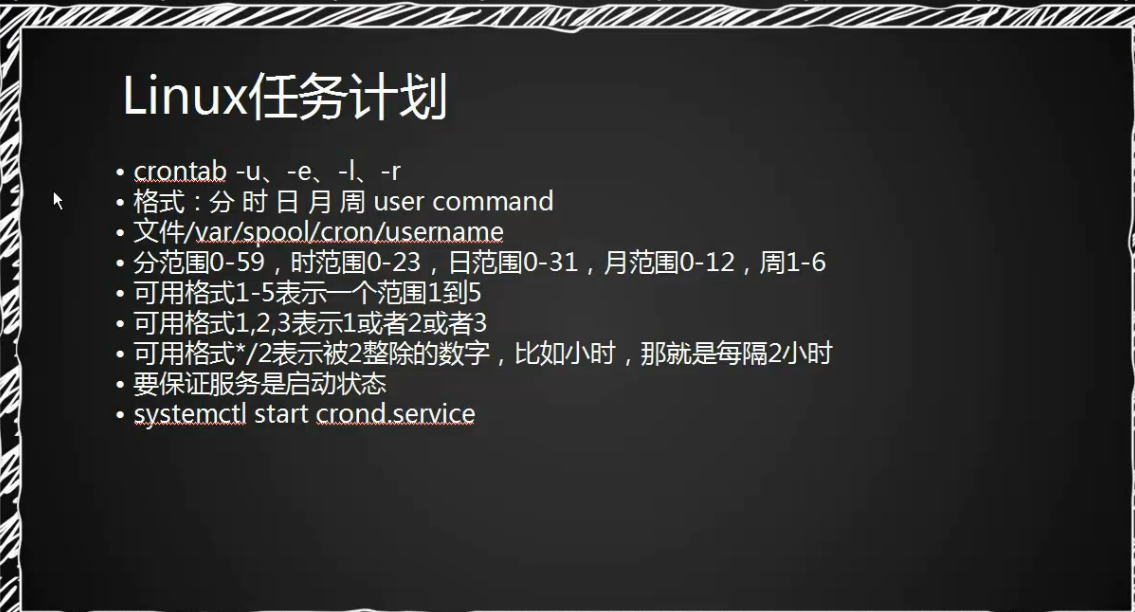
20 11 29 01 1 echo "OK" > /root/cron.log 表示在1月29日(星期一)的11点20分执行:echo "OK" > /root/cron.log
命令crontab -e 实际上打开/var/spool/cron/username文件(如果用户是root,则打开的是/var/spool/cron/root)。打开这个文件使用了vim编辑器,保存时命令模式下输入:wq即可。
[root@lizhipenglinux01 ~]# crontab -l 查看已经设定的任务计划
20 11 29 01 1 echo "OK" > /root/cron.log
[root@lizhipenglinux01 ~]# crontab -r 删除任务计划,慎用。它会一下子把全部计划都删除。如果只想删除一条计划,可以使用-e选项进入crontab进行编辑。
[root@lizhipenglinux01 ~]# crontab -l
no crontab for root
(1)每天凌晨1点20分清除/var/log/slow.log这个文件
20 1 * * * echo "" > /var/log/slow.log
(2)每周日3点执行/bin/sh /usr/local/sbin/backup.sh。
0 3 * * 0 /bin/sh /usr/local/sbin/backup.sh
(3)每月14日4点10分执行/bin/sh /usr/local/sbin/backup_month.sh。
10 4 14 * * 、bin/sh /usr/local/sbin/backup_month.sh
(4)每隔8小时执行ntpdate time.windows.com
* */8 * * * ntpdate time.windows.com
(5)每天1点、12点、18点执行/bin/sh /usr/local/sbin/test.sh。
0 1,12,18 * * * /bin/sh /usr/local/sbin/test.sh
(6)每天的9点到18点执行/bin/sh /usr/local/sbin/test2.sh。
0 9-18 * * * /bin/sh /usr/local/sbin/test2.sh
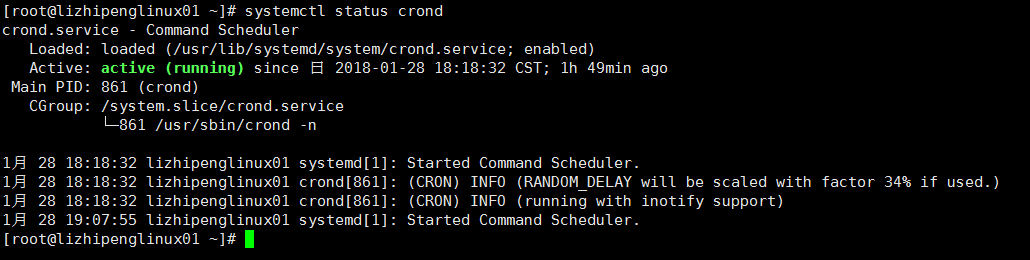
查看一下crond服务是否已经启动,看Active,如果是启动状态显示为active(runing),未启动则显示inacvtive(dead)。

[root@lizhipenglinux01 ~]# ls /etc/init.d/
functions netconsole network README
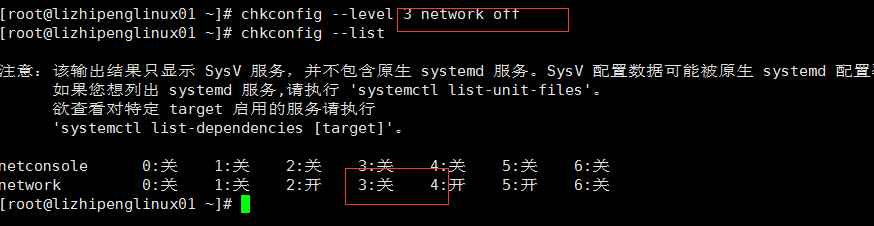
[root@lizhipenglinux01 ~]# chkconfig network off 关闭network
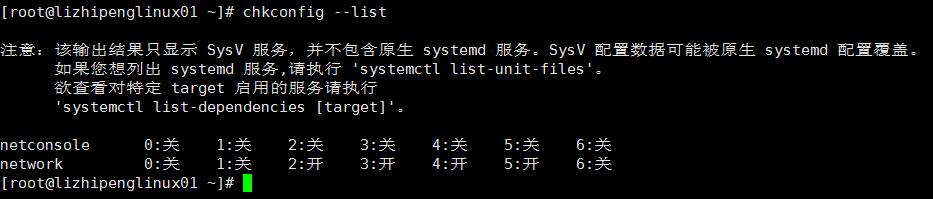
[root@lizhipenglinux01 ~]# chkconfig --list
注意:该输出结果只显示 SysV 服务,并不包含原生 systemd 服务。SysV 配置数据可能被原生 systemd 配置覆盖。
如果您想列出 systemd 服务,请执行 'systemctl list-unit-files'。
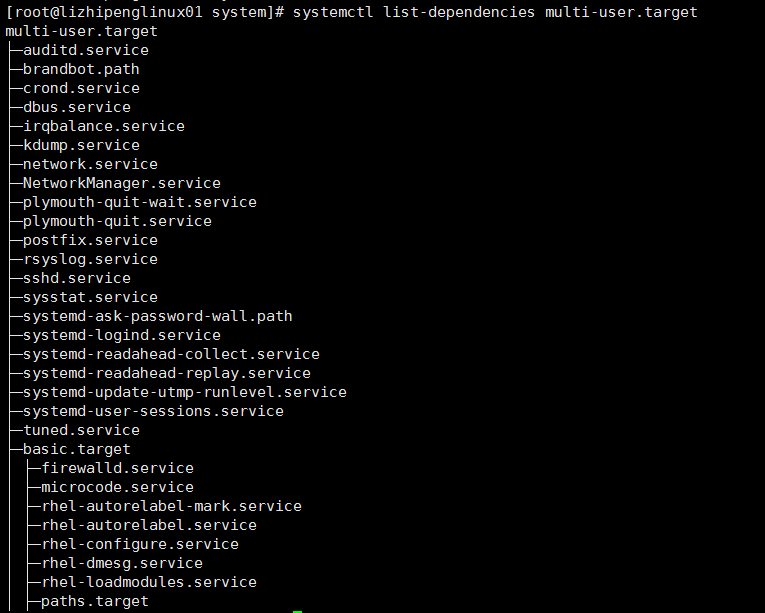
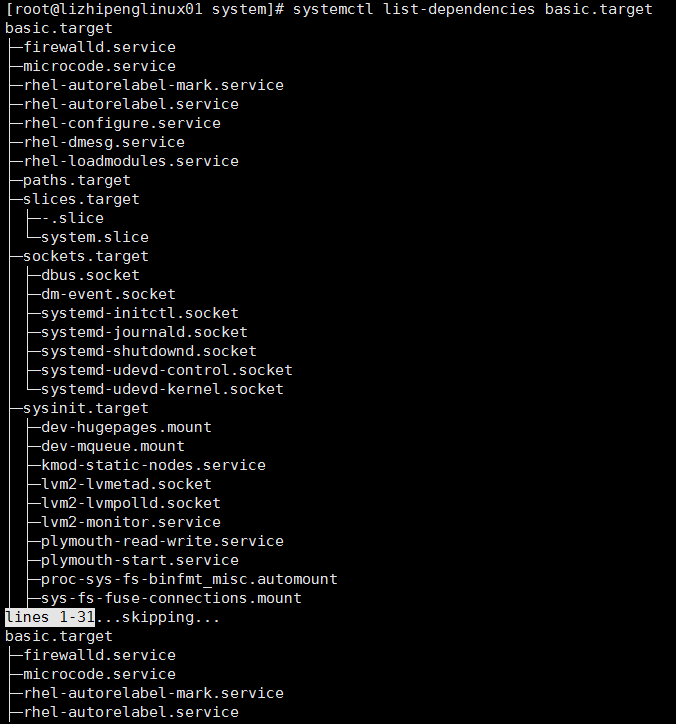
欲查看对特定 target 启用的服务请执行
'systemctl list-dependencies [target]'。
netconsole 0:关 1:关 2:关 3:关 4:关 5:关 6:关
network 0:关 1:关 2:关 3:关 4:关 5:关 6:关
[root@lizhipenglinux01 ~]# chkconfig network on
[root@lizhipenglinux01 ~]# chkconfig --list
注意:该输出结果只显示 SysV 服务,并不包含原生 systemd 服务。SysV 配置数据可能被原生 systemd 配置覆盖。
如果您想列出 systemd 服务,请执行 'systemctl list-unit-files'。
欲查看对特定 target 启用的服务请执行
'systemctl list-dependencies [target]'。
netconsole 0:关 1:关 2:关 3:关 4:关 5:关 6:关
network 0:关 1:关 2:开 3:开 4:开 5:开 6:关
[root@lizhipenglinux01 ~]# chkconfig --level 345 network on
[root@lizhipenglinux01 ~]# chkconfig --list
注意:该输出结果只显示 SysV 服务,并不包含原生 systemd 服务。SysV 配置数据可能被原生 systemd 配置覆盖。
如果您想列出 systemd 服务,请执行 'systemctl list-unit-files'。
欲查看对特定 target 启用的服务请执行
'systemctl list-dependencies [target]'。
netconsole 0:关 1:关 2:关 3:关 4:关 5:关 6:关
network 0:关 1:关 2:开 3:开 4:开 5:开 6:关
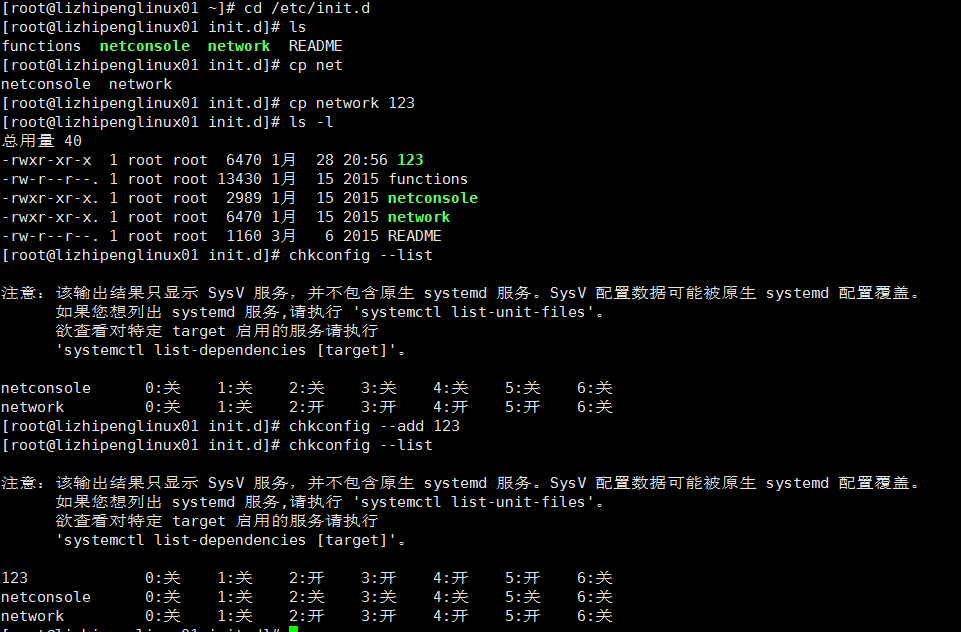
[root@lizhipenglinux01 init.d]# chkconfig --del 123
[root@lizhipenglinux01 init.d]# chkconfig --list
注意:该输出结果只显示 SysV 服务,并不包含原生 systemd 服务。SysV 配置数据可能被原生 systemd 配置覆盖。
如果您想列出 systemd 服务,请执行 'systemctl list-unit-files'。
欲查看对特定 target 启用的服务请执行
'systemctl list-dependencies [target]'。
netconsole 0:关 1:关 2:关 3:关 4:关 5:关 6:关
network 0:关 1:关 2:开 3:开 4:开 5:开 6:关
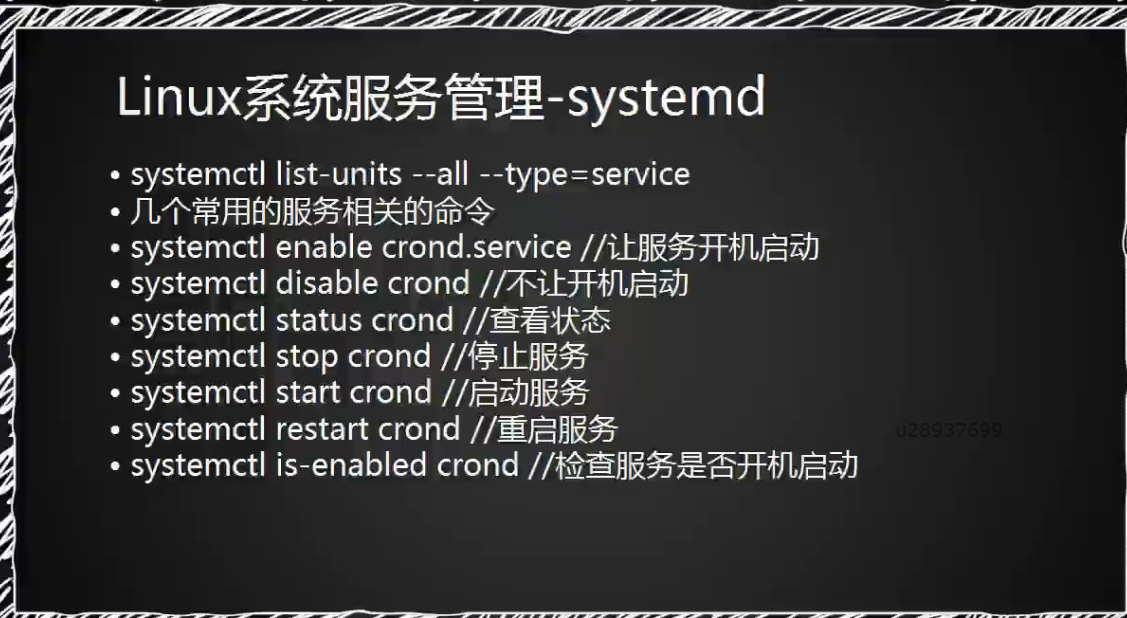
[root@lizhipenglinux01 init.d]# systemctl enable crond.service
[root@lizhipenglinux01 init.d]# systemctl disable crond
rm '/etc/systemd/system/multi-user.target.wants/crond.service'
[root@lizhipenglinux01 init.d]# systemctl enable crond.service
ln -s '/usr/lib/systemd/system/crond.service' '/etc/systemd/system/multi-user.target.wants/crond.service'
[root@lizhipenglinux01 init.d]# systemctl status crond.service
crond.service - Command Scheduler
Loaded: loaded (/usr/lib/systemd/system/crond.service; enabled)
Active: active (running) since 日 2018-01-28 18:18:32 CST; 2h 48min ago
Main PID: 861 (crond)
CGroup: /system.slice/crond.service
└─861 /usr/sbin/crond -n
1月 28 18:18:32 lizhipenglinux01 systemd[1]: Started Command Scheduler.
1月 28 18:18:32 lizhipenglinux01 crond[861]: (CRON) INFO (RANDOM_DELAY will be scaled with factor 34% if used.)
1月 28 18:18:32 lizhipenglinux01 crond[861]: (CRON) INFO (running with inotify support)
1月 28 19:07:55 lizhipenglinux01 systemd[1]: Started Command Scheduler.
[root@lizhipenglinux01 init.d]# systemctl disable crond
rm '/etc/systemd/system/multi-user.target.wants/crond.service'
[root@lizhipenglinux01 init.d]# systemctl is-enabled crond
disabled
[root@lizhipenglinux01 init.d]# systemctl enable crond
ln -s '/usr/lib/systemd/system/crond.service' '/etc/systemd/system/multi-user.target.wants/crond.service'
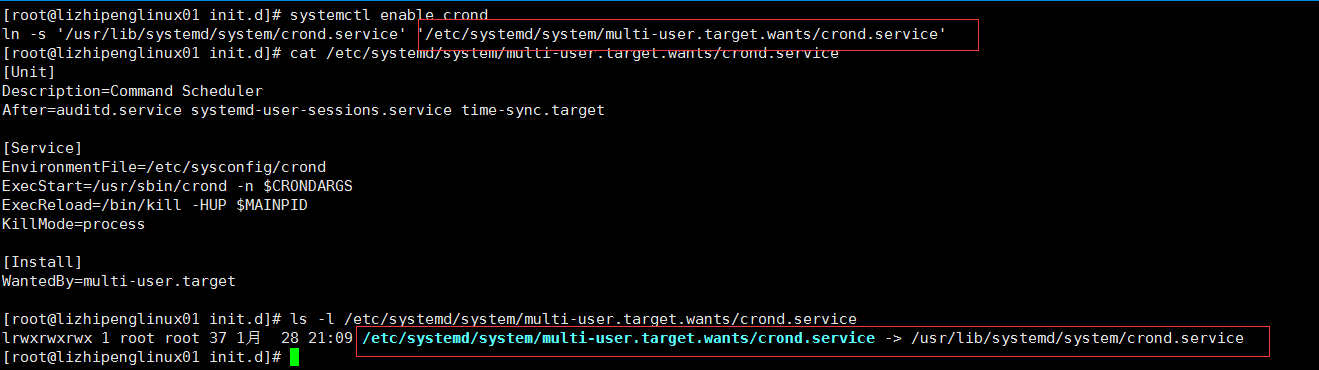
软链接
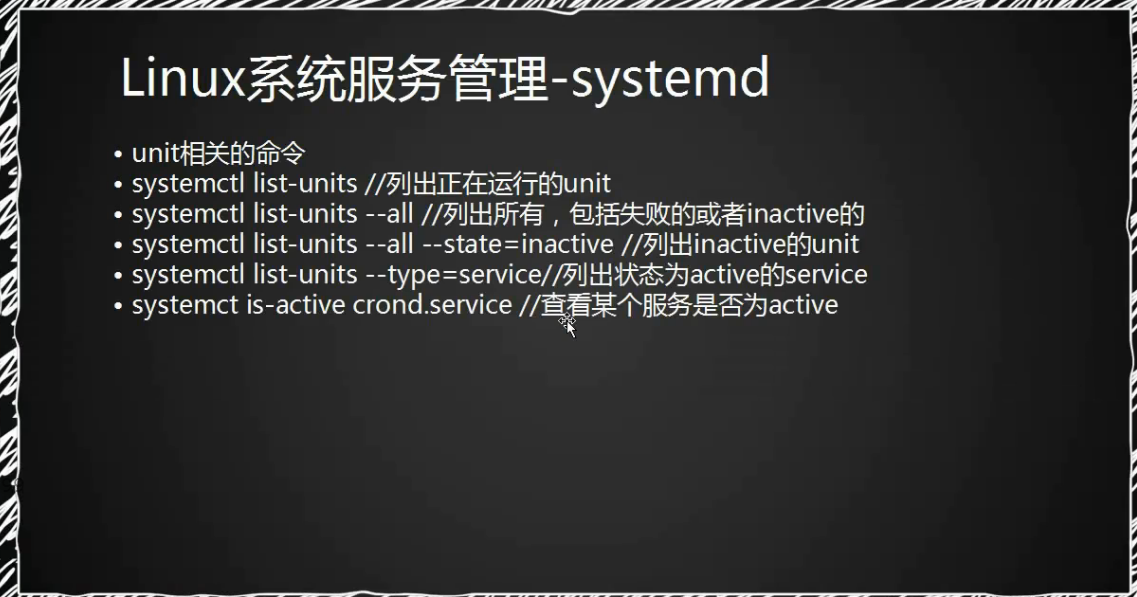
[root@lizhipenglinux01 system]# systemctl list-units -all --state=inactive 列出所有状态inactive的units
[root@lizhipenglinux01 system]# systemctl list-units -all --type=service
[root@lizhipenglinux01 system]# systemctl is-active crond.service
active
[root@lizhipenglinux01 system]# systemctl is-enabled crond.service
enabled
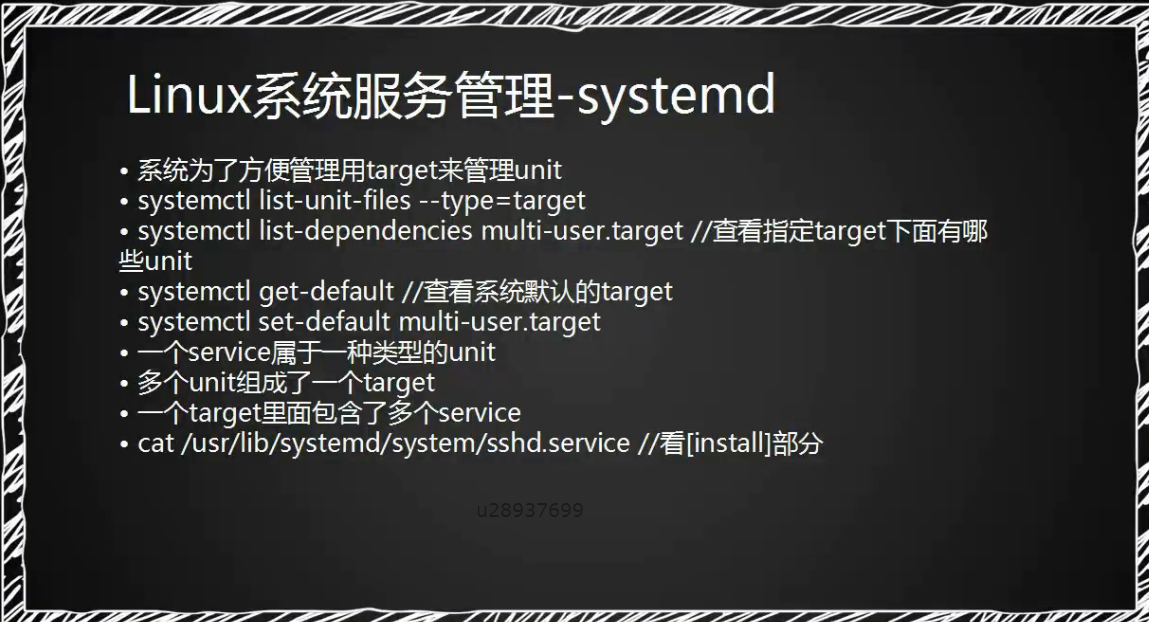
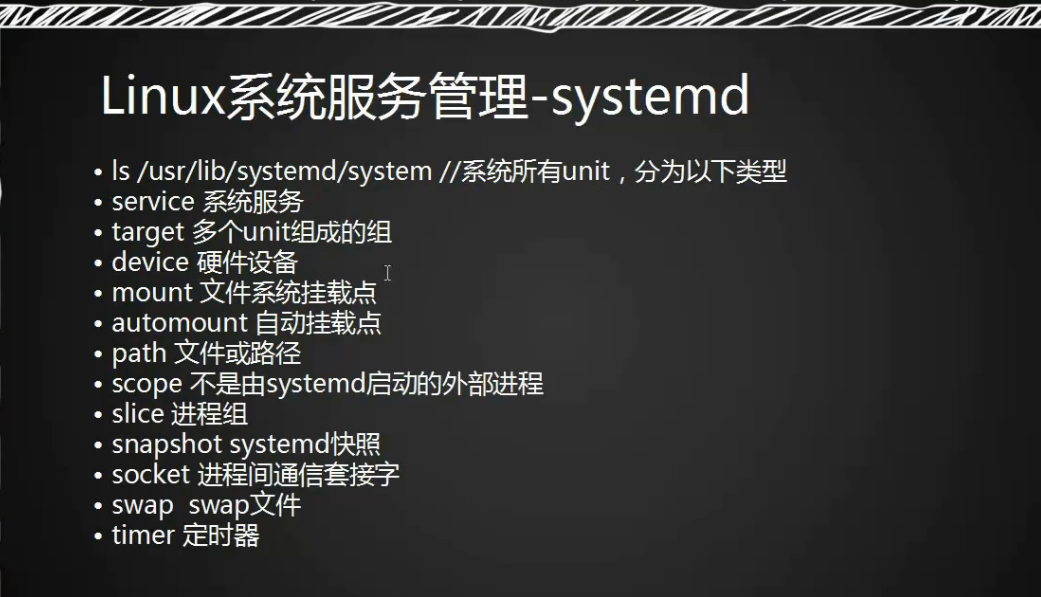
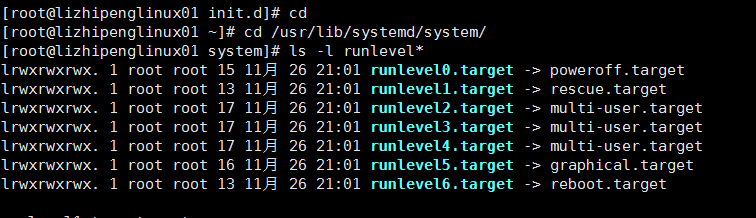
[root@lizhipenglinux01 system]# systemctl list-unit-files --type=target 列出系统里所有的target
[root@lizhipenglinux01 system]# systemctl get-default
multi-user.target
[root@lizhipenglinux01 system]# cat /usr/lib/systemd/system/sshd.service
[Unit]
Description=OpenSSH server daemon
After=network.target sshd-keygen.service
Wants=sshd-keygen.service
[Service]
EnvironmentFile=/etc/sysconfig/sshd
ExecStart=/usr/sbin/sshd -D $OPTIONS
ExecReload=/bin/kill -HUP $MAINPID
KillMode=process
Restart=on-failure
RestartSec=42s
[Install]
WantedBy=multi-user.target
[root@lizhipenglinux01 system]# cat /usr/lib/systemd/system/crond.service
[Unit]
Description=Command Scheduler
After=auditd.service systemd-user-sessions.service time-sync.target
[Service]
EnvironmentFile=/etc/sysconfig/crond
ExecStart=/usr/sbin/crond -n $CRONDARGS
ExecReload=/bin/kill -HUP $MAINPID
KillMode=process
[Install]
WantedBy=multi-user.target