摘要:
学习地址:https://www.bilibili.com/video/BV1mf4y1S72o?p=11示例练习I使用系统;使用System.Collections。通用的使用系统。Linq;使用系统。文本使用Autodesk.Revit。UI;使用Autodesk.Revit。数据库;使用Autodesk.Revi
学习地址:https://www.bilibili.com/video/BV1mf4y1S72o?p=11
实例练习一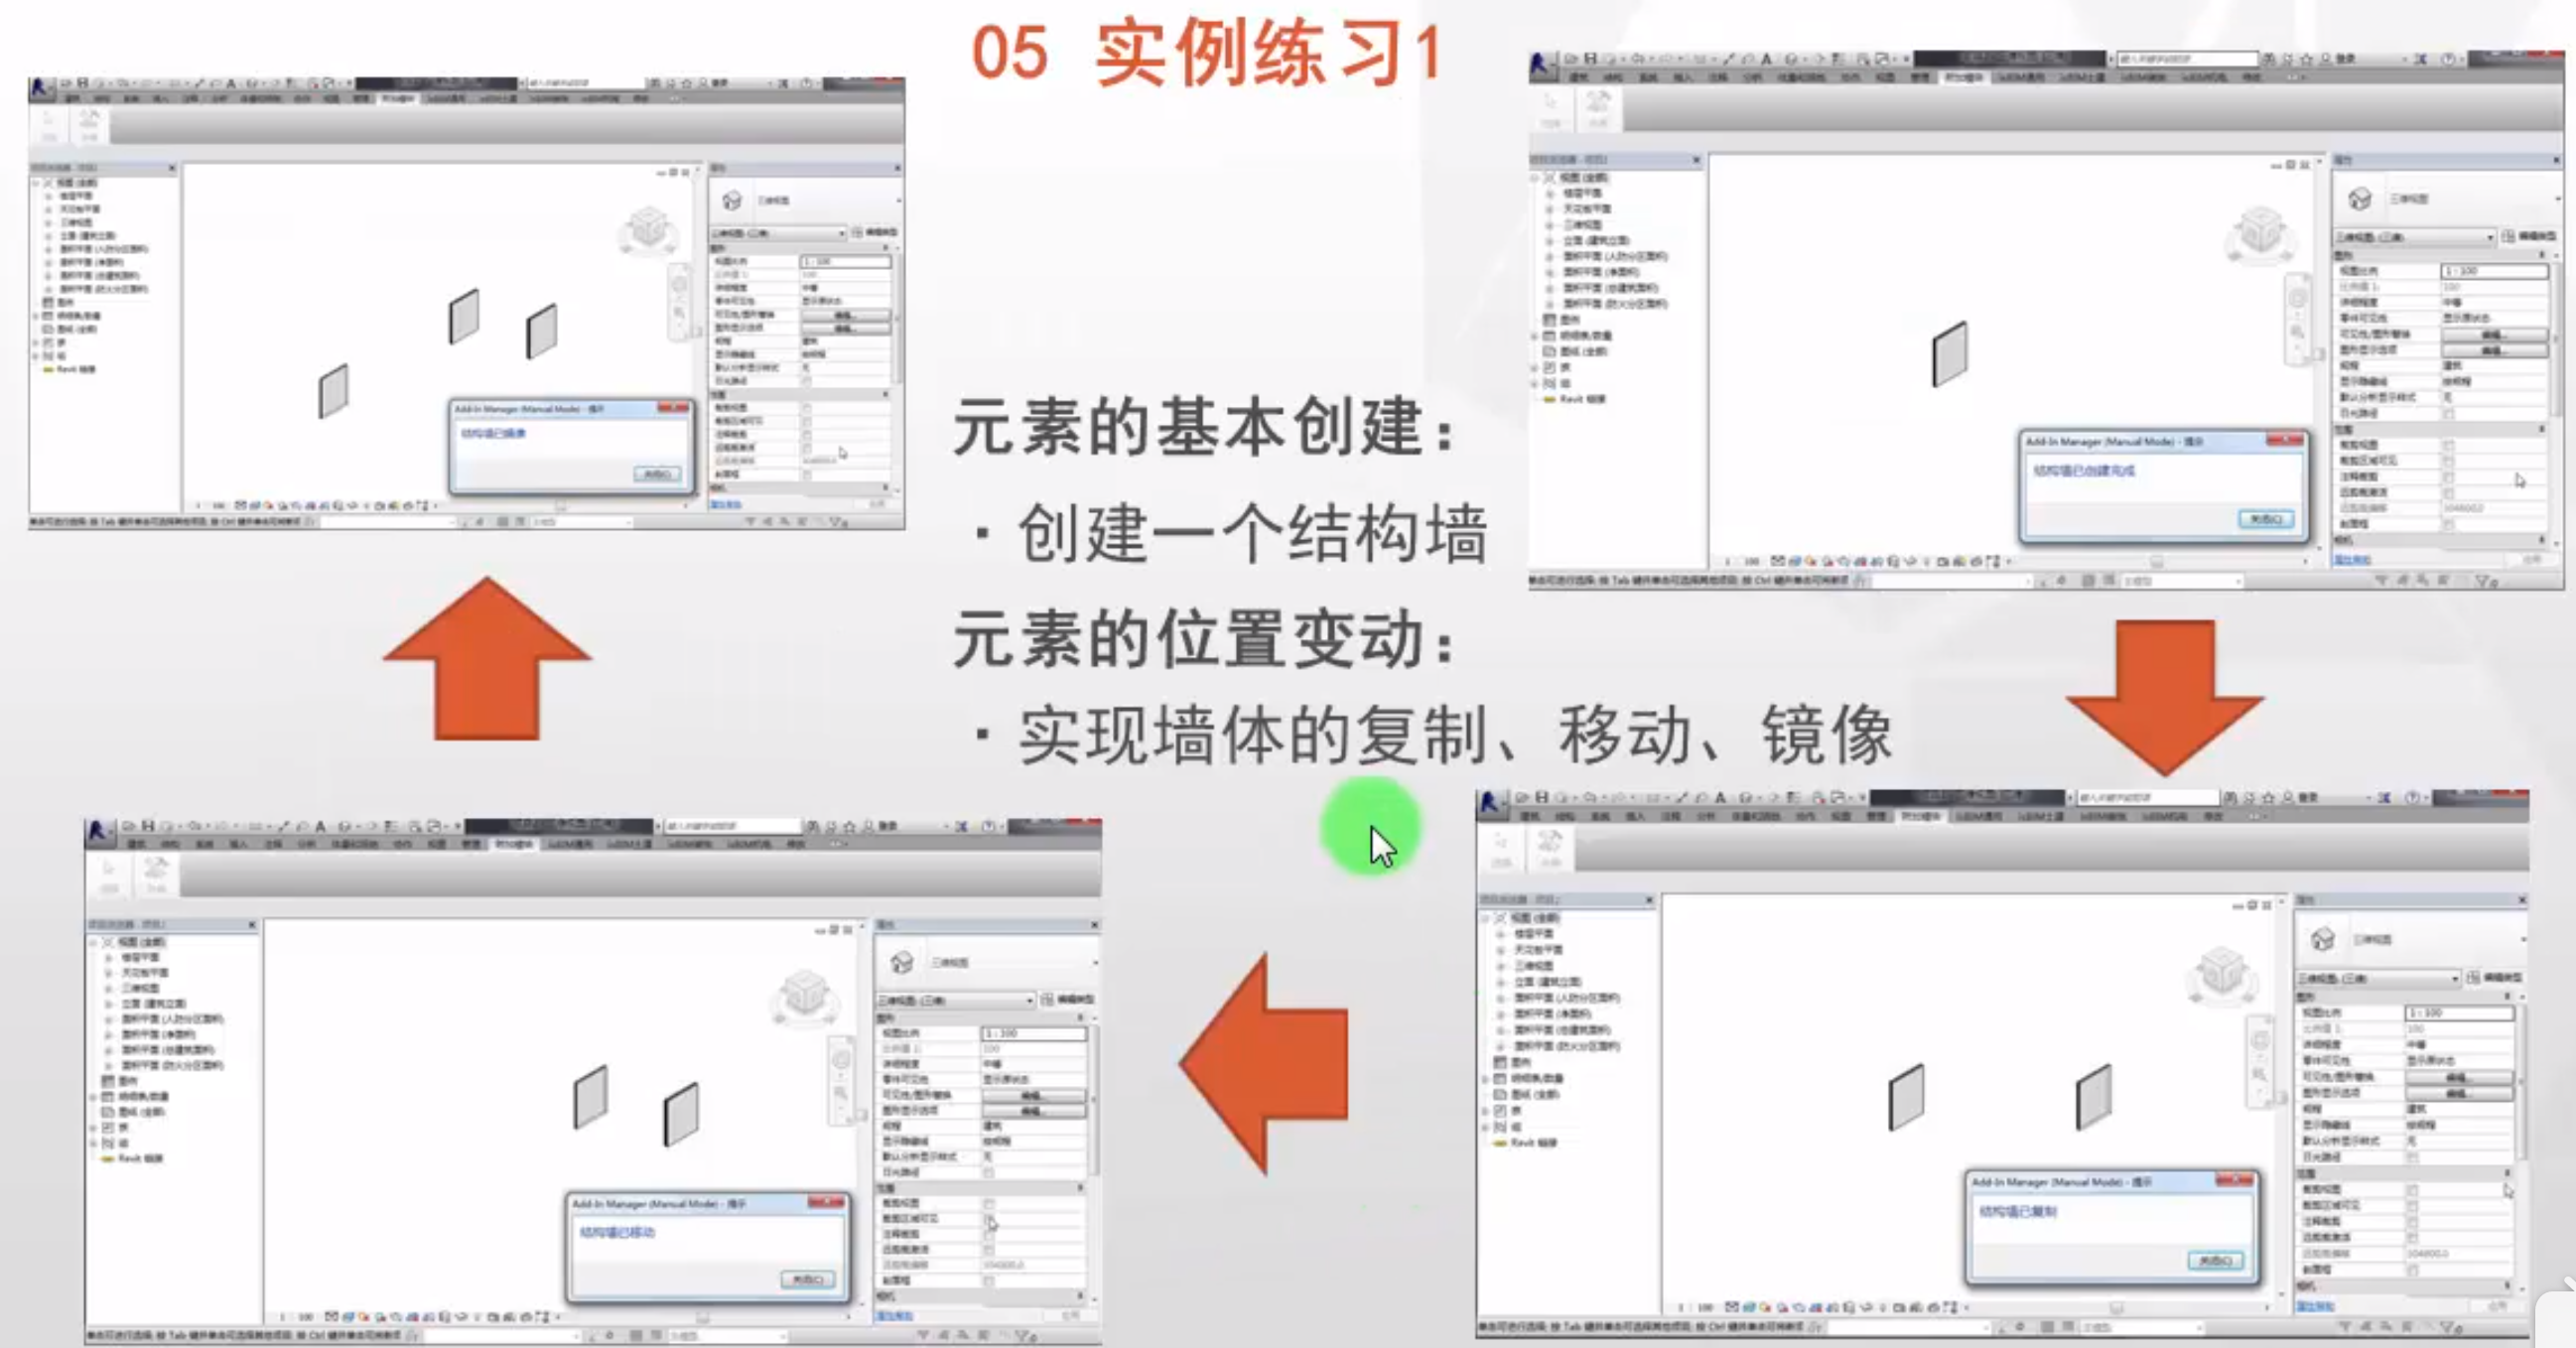
using System;
using System.Collections.Generic;
using System.Linq;
using System.Text;
using Autodesk.Revit.UI;
using Autodesk.Revit.DB;
using Autodesk.Revit.ApplicationServices;
using Autodesk.Revit.Attributes;
using System.Windows.Forms;
using Autodesk.Revit.UI.Selection;

namespace RevitDevTV
{
    /// <summary>
    /// 实现文件中的修改与创建
    /// </summary>
    [TransactionAttribute(TransactionMode.Manual)]
    [RegenerationAttribute(RegenerationOption.Manual)]
    public class BasicCreation : IExternalCommand
    {
        public Result Execute(ExternalCommandData commandData, ref string message, ElementSet elements)
        {
            UIDocument uidoc = commandData.Application.ActiveUIDocument;
            Document doc = uidoc.Document;
            //=====创建墙
            //开启事务
            Transaction t1 = new Transaction(doc, "创建");
            t1.Start();
            //创建墙
            Wall wall = Wall.Create(doc, Line.CreateBound(new XYZ(), new XYZ(0, 10, 0)), Level.Create(doc, 0).Id, false);
            t1.Commit(); //提交事务
            TaskDialog.Show("t1", "结构墙已创建完成");

            //====复制墙到指定位置
            Transaction t2 = new Transaction(doc, "复制");
            t2.Start();
            //复制
            ElementTransformUtils.CopyElement(doc, wall.Id, new XYZ(30, 30, 30));
            t2.Commit(); //提交复制墙
            TaskDialog.Show("t2", "结构墙已复制");

            //====移动墙
            Transaction t3 = new Transaction(doc, "移动");
            t3.Start();
            ElementTransformUtils.MoveElement(doc, wall.Id, new XYZ(10, 20, 10));
            t3.Commit(); //提交移动墙
            TaskDialog.Show("t3", "结构墙已移动");

            //====镜像
            Transaction t4 = new Transaction(doc,"镜像");
            t4.Start(); //开启事务
            if (ElementTransformUtils.CanMirrorElement(doc, wall.Id)) //判断是否可以镜像,true为可镜像
            {
                Plane p1 = Plane.CreateByNormalAndOrigin(new XYZ(0, -1, 0), XYZ.Zero);
                ElementTransformUtils.MirrorElement(doc,wall.Id, p1);
            }
            t4.Commit();
            TaskDialog.Show("t4", "结构墙已镜像");
            return Result.Succeeded;
        }
    }
}
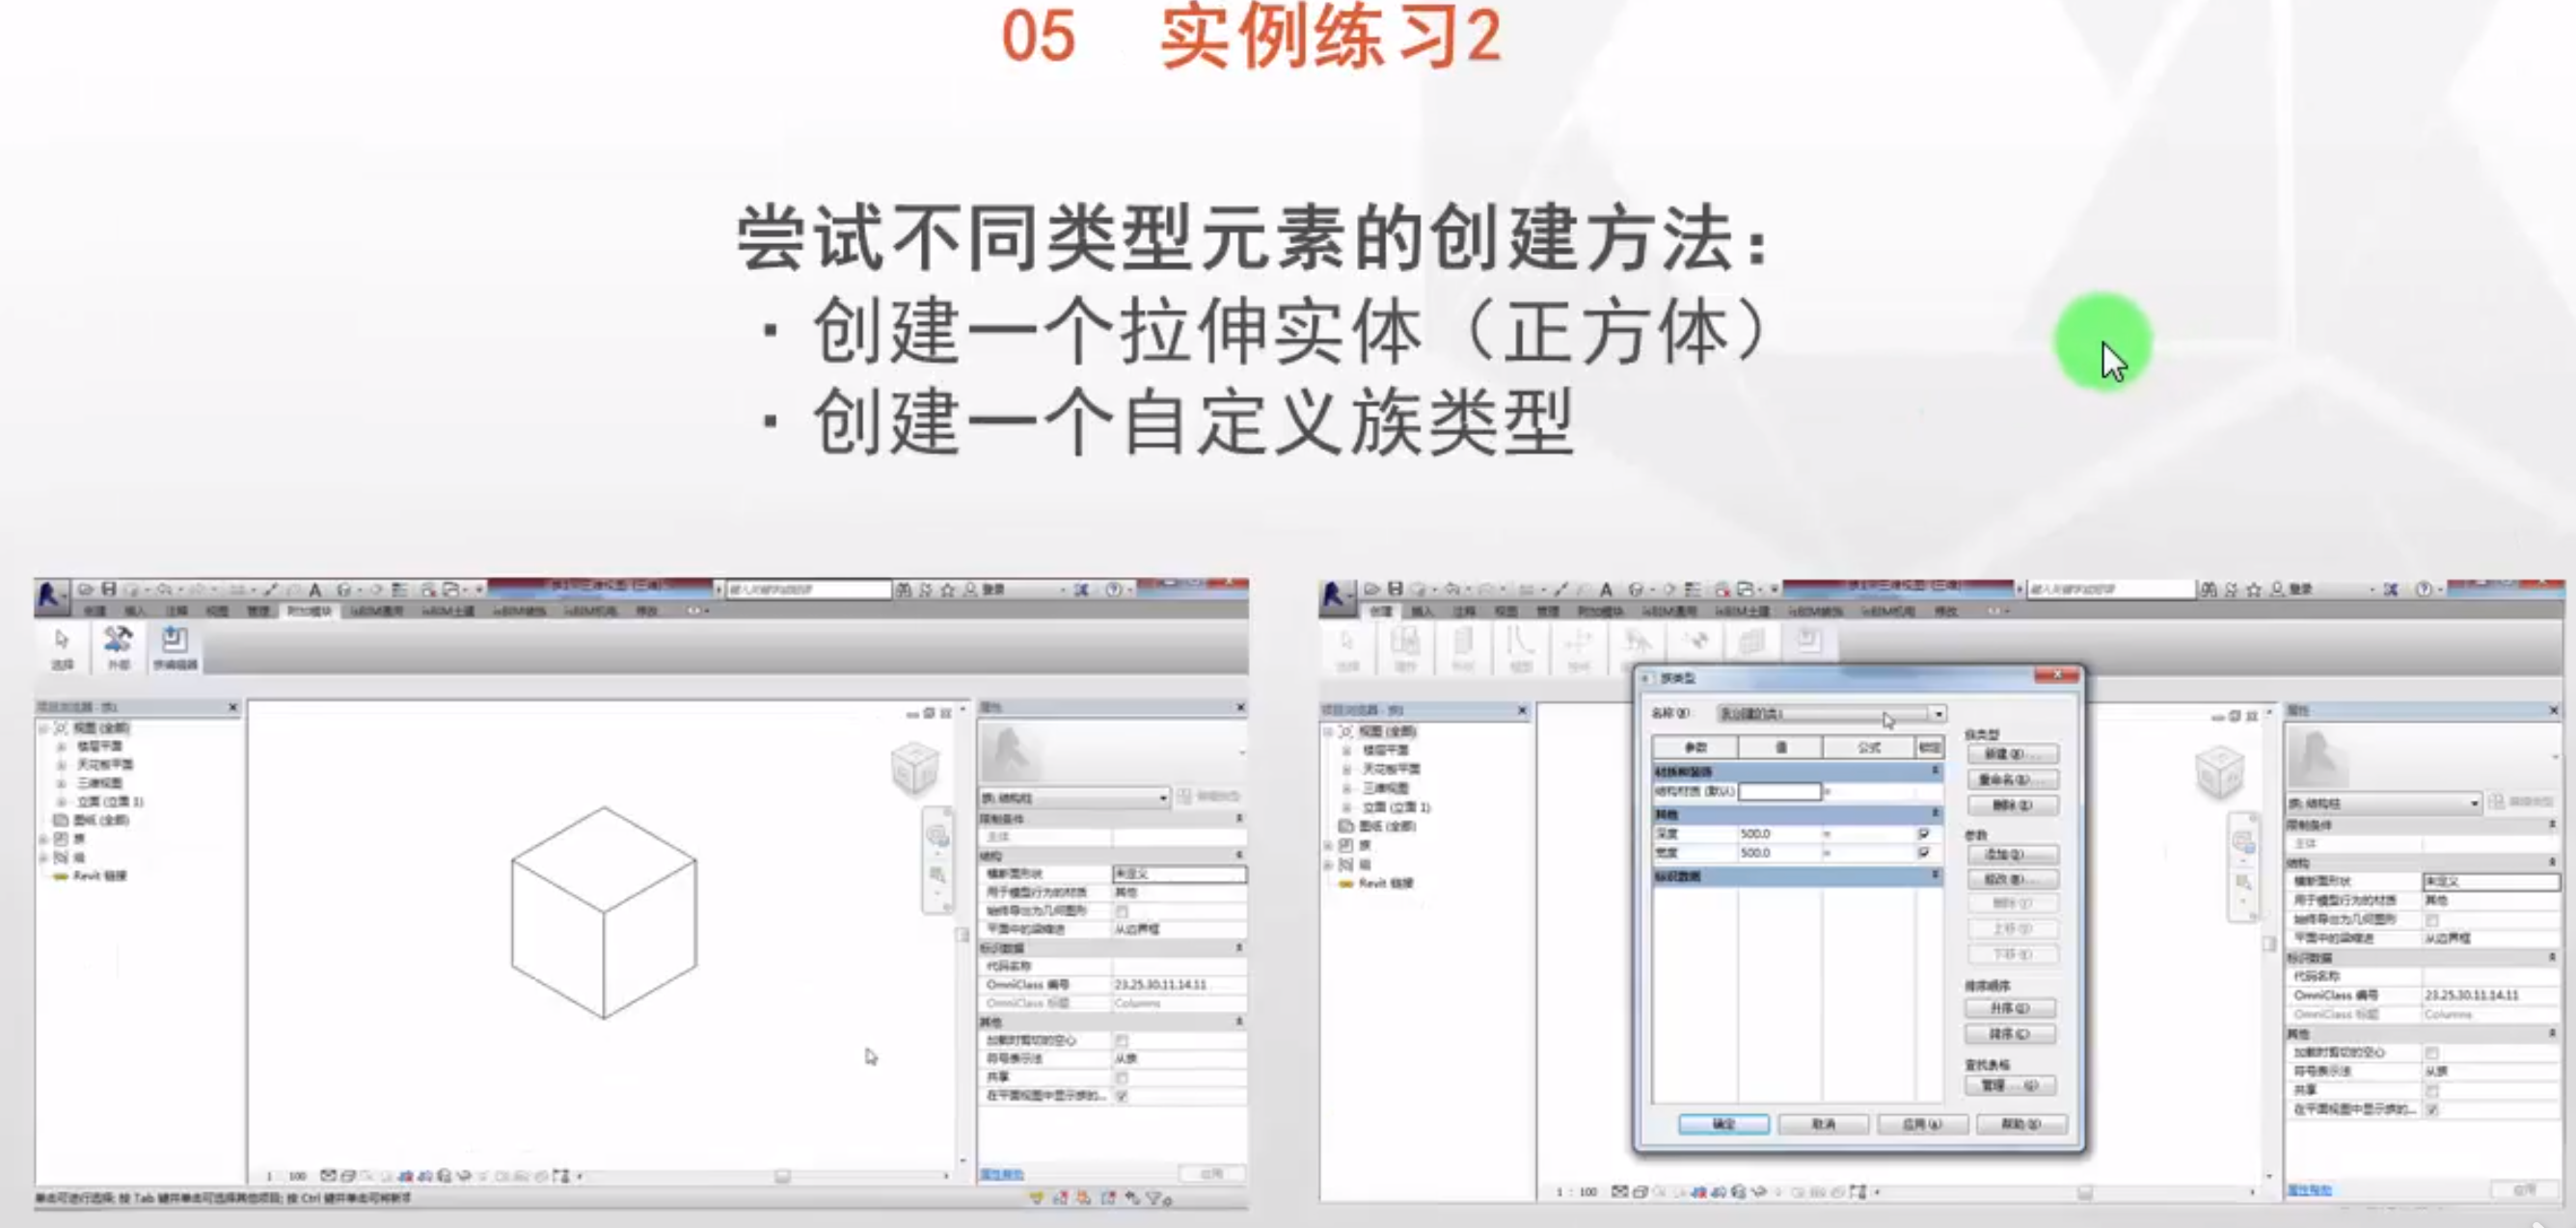
using System;
using System.Collections.Generic;
using System.Linq;
using System.Text;
using Autodesk.Revit.UI;
using Autodesk.Revit.DB;
using Autodesk.Revit.ApplicationServices;
using Autodesk.Revit.Attributes;
using System.Windows.Forms;
using Autodesk.Revit.UI.Selection;

namespace RevitDevTV
{
    /// <summary>
    /// 尝试不同类型元素的创建方法
    /// </summary>
    [TransactionAttribute(TransactionMode.Manual)]
    [RegenerationAttribute(RegenerationOption.Manual)]
    public class MoreCreation : IExternalCommand
    {
        public Result Execute(ExternalCommandData commandData, ref string message, ElementSet elements)
        {
            UIDocument uidoc = commandData.Application.ActiveUIDocument;
            Document doc = uidoc.Document;
            Transaction trans = new Transaction(doc, "LS");
            trans.Start();
            Curve c1 = Line.CreateBound(new XYZ(0, 0, 0), new XYZ(0, 10, 0));
            Curve c2 = Line.CreateBound(new XYZ(0, 10, 0), new XYZ(10, 10, 0));
            Curve c3 = Line.CreateBound(new XYZ(10, 10, 0), new XYZ(10, 0, 0));
            Curve c4 = Line.CreateBound(new XYZ(10, 0, 0), new XYZ(0, 0, 0));
            CurveArray curveArray = new CurveArray();
            curveArray.Append(c1);
            curveArray.Append(c2);
            curveArray.Append(c3);
            curveArray.Append(c4);
            CurveArrArray curveArr = new CurveArrArray();
            curveArr.Append(curveArray);
            //图形的拉伸创建
            doc.FamilyCreate.NewExtrusion(true, curveArr, SketchPlane.Create(doc, Plane.CreateByOriginAndBasis(new XYZ(20, 20, 20), new XYZ(20, 20, 20),new XYZ(20, 20, 20))), 10);
            doc.FamilyManager.NewType("我创建的类");
            trans.Commit();
            return Result.Succeeded;
        }
    }
}
这块Plane.CreateByOriginAndBasis(new XYZ(20, 20, 20), new XYZ(20, 20, 20),new XYZ(20, 20, 20))有问题,功能没实现