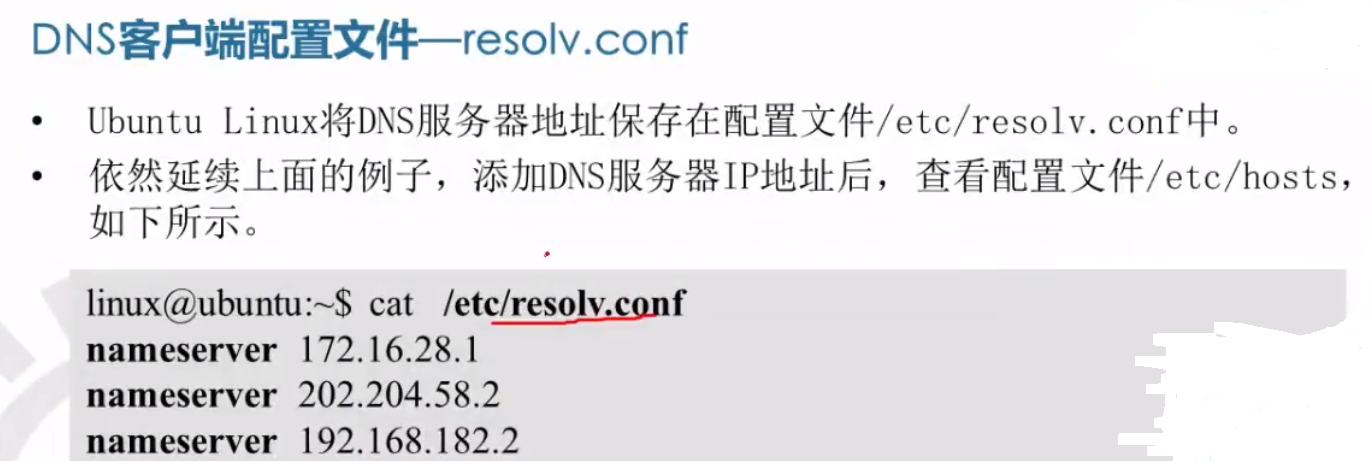
“ubuntu从17.10开始,已放弃在/etc/network/interfaces里固定IP的配置,即使配置也不会生效,而是改成netplan方式 ,配置写在/etc/netplan/01-netcfg.yaml或者类似名称的yaml文件里”
但DNS配置最好检查一下17.10以前的传统配置方法
翻译自https://linuxhint.com/ubuntu_20-04_network_configuration/
Whether you are a Linux administrator or regular user, you must know the basics of network configuration in your Linux system. it might be helpful when troubleshooting the issues with internal and external connectivity. The basic knowledge involves knowing the interface name, the current IP configuration, and the hostname. Also, you should know how to change the default configurations to the customized settings.
In this article, we will be covering how to:
- View current IP address
- Set static IP address 设置静态IP
- Set the dynamic IP address 设置动态IP
- View current hostname 查看主机名称
- Change hostname 修改主机名称
Note: We have run the commands and procedure mentioned in this article on the Ubuntu 20.04 system.
View Current IP Address
To view the current IP address of your machine, you can use either of the following commands:
Or
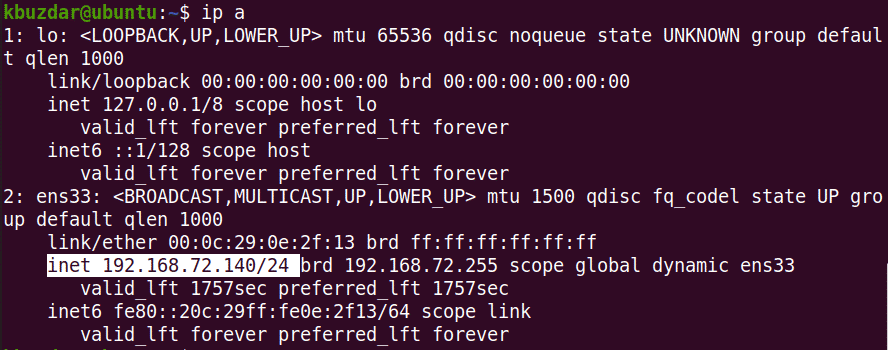
Running either of the above commands will display the IP address information. Note down the name of the interface from the output of the above command.
Set Static IP Address
In the following procedure, we will see how to set up the static IP in a Ubuntu system.
Ubuntu 20.04 uses netplan as a default network manager. The configuration file for the netplan is stored in the /etc/netplan directory. You can find this configuration file listed in the /etc/netplan directory the following command:
The above command will return the name of the configuration file with the .yaml extension, which in my case was 01-network-manager-all.yaml.
Before making any changes to this file, make sure to create a backup copy of it. Use the cp command to do so:
Note: You might have a configuration file with the name other than the 01-network-manager-all.yaml. So make sure you use the right configuration file name in the commands.
You can edit the netplan configuration using any text editor. Here we are using the Nano text editor for this purpose.
Then add the following lines by replacing the interface name, IP address, gateway, and DNS information that fit your networking needs.
version: 2
renderer: NetworkManager
ethernets:
ens33:
dhcp4: no
addresses:
- 192.168.72.140/24
gateway4: 192.168.72.2
nameservers:
addresses: [8.8.8.8, 8.8.4.4]
Once done, save and close the file.
Now test the new configuration using the following command:
If it validates the configuration, you will receive the configuration accepted message; otherwise, it rolls back to the previous configuration.
Next, run the following command to apply the new configurations.
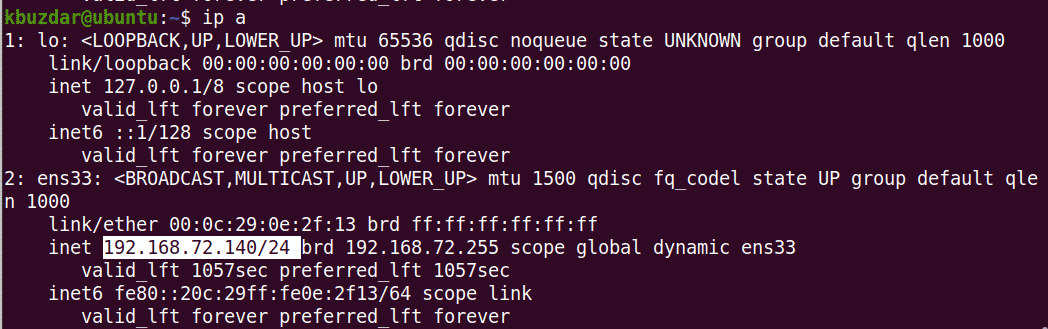
After this, confirm the IP address of your machine using the following command:
It should reflect the changes you have made.
Set the Dynamic IP Address
In the following procedure, we will see how to configure the interface to receive a dynamic IP address from DHCP. Edit the netplan configuration file using any text editor. Here we are using the Nano text editor for this purpose.
Then add the following lines by replacing the interface name with your system’s network interface.
version: 2
renderer: NetworkManager
ethernets:
ens33:
dhcp4: yes
addresses: []
Once done, save and close the file.
Now test the new configuration using the following command:
If it validates the configuration, you will receive the configuration accepted message, otherwise, it rolls back to the previous configuration.
Next, run the following command to apply the new configurations.
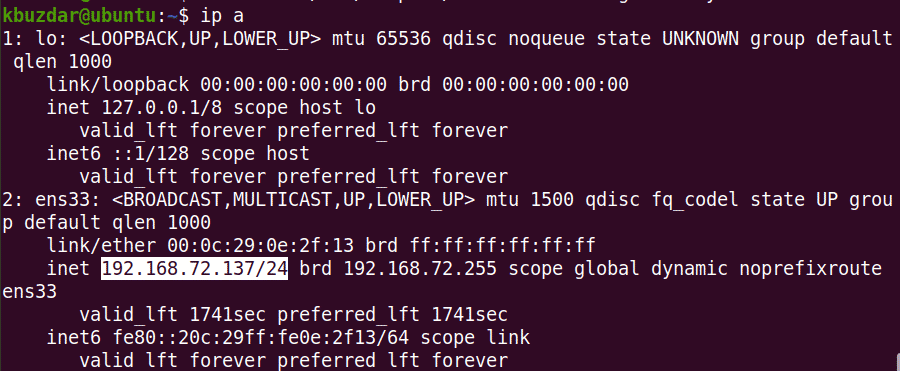
After this, check the IP address of your machine using the following command:
View Current Hostname
To view the current hostname, you can use either of the following commands:
or

Change Hostname
There are two different ways to change the hostname of the system. To change the hostname of the system, you must be a root user or a standard user with sudo privileges.
Using the Hostnamectl Command
To change the hostname of the system to a new name, use the following command:
Example:
This command will change the hostname of the system to “desktop”.
After that, reboot the system and you will see the new hostname assigned to your system.
Using Hostname Command
Hostname command can also be used to change the hostname of the system. Use the following command to change the hostname of the system:
This command changes the hostname of the system temporarily. To permanently change the hostname, you will need to edit the /etc/hostname and /etc/hosts file.
Use the following command to edit the /etc/hostname file:
Replace the old hostname with the new name, then save and exit the file.
Next, use the following command to edit the /etc/hosts file:
Replace the old hostname with the new name, then save and exit the file.
After that, reboot the system and you will see the new hostname assigned to your system.
Once you are done with basic network configurations, use the ping command to verify the connectivity of your system with other systems on the network and the external network.
That is all the basics you need to know about network configuration in Ubuntu 20.04 system. Note that if you have multiple network interfaces, you will have to perform IP configurations for each interface. I hope you liked the article!
How to Check Route Table?
ip route show
davidyin@u20:~$ ip route show
default via 192.168.1.1 dev ens18 proto dhcp src 192.168.1.158 metric 100
192.168.1.0/24 dev ens18 proto kernel scope link src 192.168.1.158
192.168.1.1 dev ens18 proto dhcp scope link src 192.168.1.158 metric 100
davidyin@u20:~$
Other commands I am not using.
Add Static Route
# ip route add 10.10.20.0/24 via 192.168.1.100 dev eth0
Remove Static Route
# ip route del 10.10.20.0/24
Add default gateway
# ip route add default via 192.168.1.100
Add an IP address to a specific interface
# ip addr add 192.168.1.5 dev eth1
Remove an IP address
# ip addr del 192.168.1.5/24 dev eth1
I always like to use a Router to assign a static IP to the network device. I just need to know the MAC address then I can do it at DD-WRT router.
Ubuntu20配置值静态ip时需要修改/etc/netplan下面
转自https://blog.csdn.net/chaofanjun/article/details/106663662?utm_medium=distribute.pc_relevant.none-task-blog-BlogCommendFromBaidu-1.control&depth_1-utm_source=distribute.pc_relevant.none-task-blog-BlogCommendFromBaidu-1.control
1-network-manager-all.yaml这个文件,该文件的原始内容为: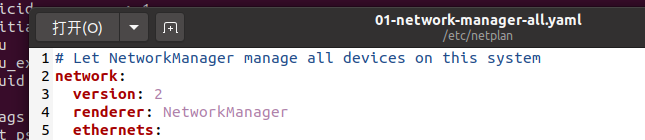
在修改该文件时,先试用ifconfig查看下网卡相关信息,然后再对应修改,修改后的文件内容为:
修改时相应的配置为:
ens33:   #配置的网卡名称
      dhcp4: no    #dhcp4关闭
      dhcp6: no    #dhcp6关闭
      addresses: [192.168.147.130/24]   #设置本机IP及掩码
      gateway4: 192.168.147.1   #设置网关
      nameservers:
          addresses: [192.168.147.1, 114.114.114.114]   #设置DNS
有时候在修改该文件时,会碰到无权限修改的情况,这时候使用chmod修改下文件权限即可。
修改完成后,在终端再输入
sudo netplan apply此时,在终端中使用ifconfig查看ip时可以发现ip地址已经发生了变化。
转自https://blog.csdn.net/fansnn/article/details/105930009
Ubuntu 20.04修改ip地址今天在继续上次的办公协作平台实验的时候发现虚拟机因为之前是DHCP的方式获取的ip地址,而这次虚拟机开机后DHCP获取的地址变更了,因为网站上已经配置了固定ip地址访问,导致不能访问网页,所以需要修改ip地址为上次获取的ip地址才能访问,查了一下ubuntu怎么修改ip地址才发现“ubuntu从17.10开始,已放弃在/etc/network/interfaces里固定IP的配置,即使配置也不会生效,而是改成netplan方式 ,配置写在/etc/netplan/01-netcfg.yaml或者类似名称的yaml文件里”
话不多说,直接说netplan怎么修改ip地址
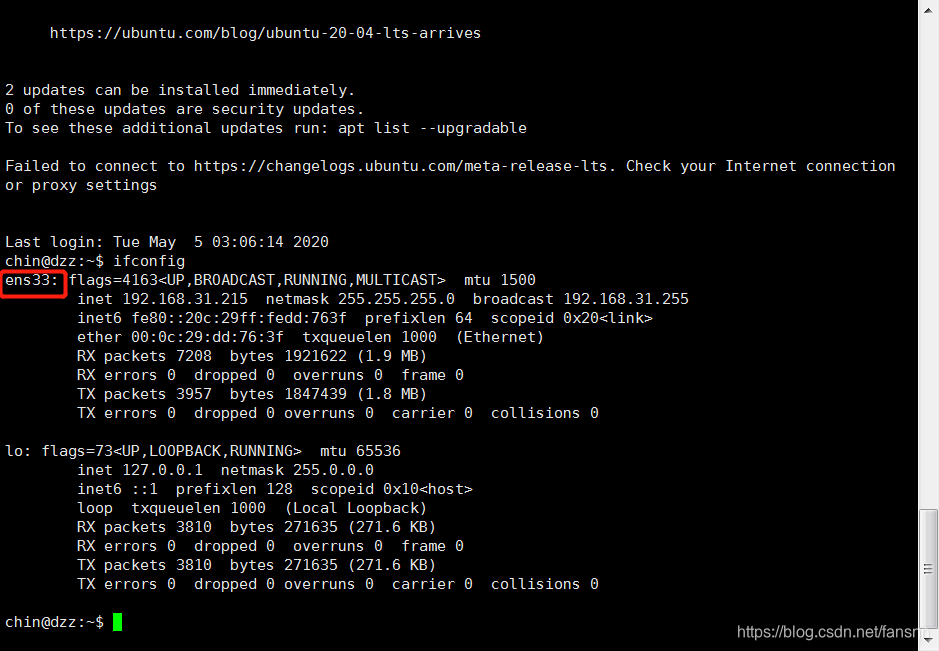
使用ifconfig命令查看网卡
ifconfig
修改yaml配置文件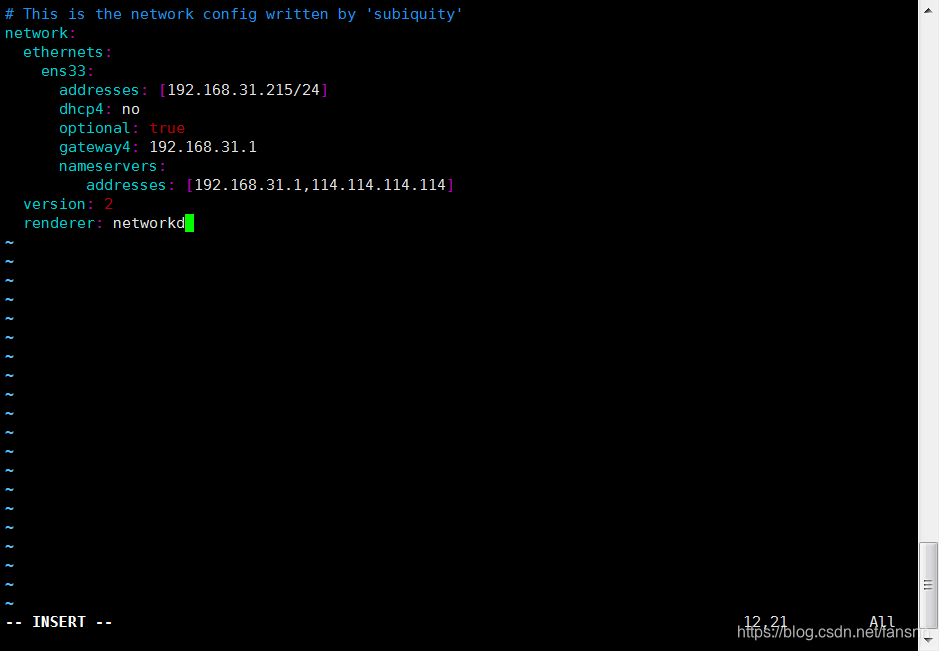
sudo vi /etc/netplan/00-installer-config.yaml

network:
  ethernets:
    ens33:     #配置的网卡的名称
      addresses: [192.168.31.215/24]    #配置的静态ip地址和掩码
      dhcp4: no    #关闭DHCP,如果需要打开DHCP则写yes
      optional: true
      gateway4: 192.168.31.1    #网关地址
      nameservers:
         addresses: [192.168.31.1,114.114.114.114]    #DNS服务器地址,多个DNS服务器地址需要用英文逗号分隔开
  version: 2
  renderer: networkd    #指定后端采用systemd-networkd或者Network Manager,可不填写则默认使用systemd-workd
根据自己的需要配置好之后保存文件
使配置的ip地址生效
sudo netplan apply好了,使用ifconfig命令查看配置的新ip地址是否生效了吧
注意事项:
1、ip地址和DNS服务器地址需要用[]括起来,但是网关地址不需要
2、注意每个冒号后边都要先加一个空格
3、注意每一层前边的缩进,至少比上一层多两个空格